4
1. INSTALLING COVER SIDE RAILS (Continued)
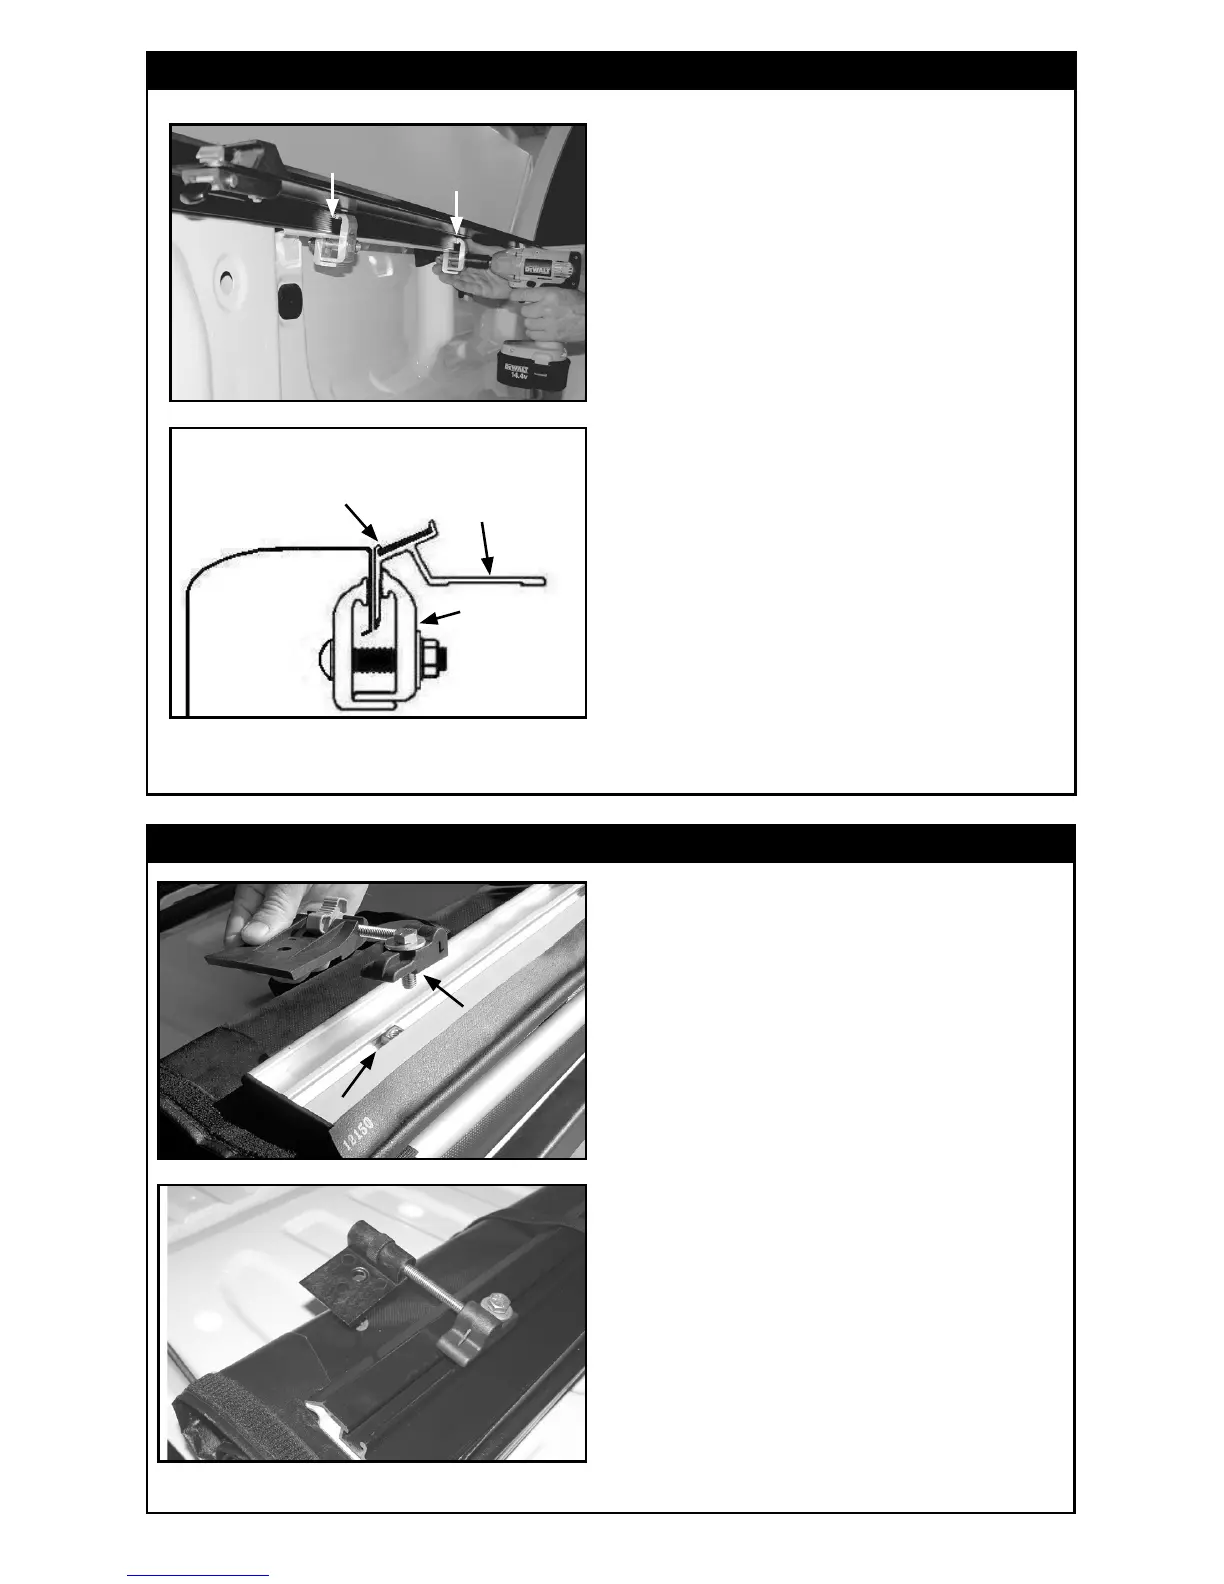
E. Install second clamp on rail at
midway point of box. Adjust rail ush
at top of box and repeat clamping
procedure, always making sure teeth
are engaged on rail grooves.
F. At tailgate, adjust rail height ush
with top of tailgate. Repeat clamp-
ing procedure placing third clamp as
close to tailgate as possible. NOTE:
For trucks with an electric tail-
gate, rails will have to be installed
slightly higher (approximately
3/16”) to eliminate interference.
Repeat STEP 1 to install rail on
opposite side. When done, make
sure all clamps are torqued to 20
ft-lbs on both rails.
A. The cover comes pre-rolled in
its normal open position for ease
of installation. Set pre-rolled cover
on tailgate with front bar facing up.
Align tension adjuster (marked “L”)
on driver side of cover - positioned
as shown in photo at left.
2. ASSEMBLING TENSION ADJUSTERS TO COVER
B. Turn 1-1/4” bolt with at washer
onto nut in bar. Leave loose for now.
Repeat for tension adjuster (marked
“R”) on passenger side of cover,
and leave that bolt loose as well.
Nut
“L” left
tension
adjuster
Working from front to tailgate,
match this point of cover rail
with top of pickup box as
clamps are installed
This surface of
rail should be
level
Adjust clamps
up or down
until they hold
rail level when
tightened
Second
Clamp
Third clamp
last