4 Standalone NVR Quick Installation Guide
RACKMOUNT THE UNIT
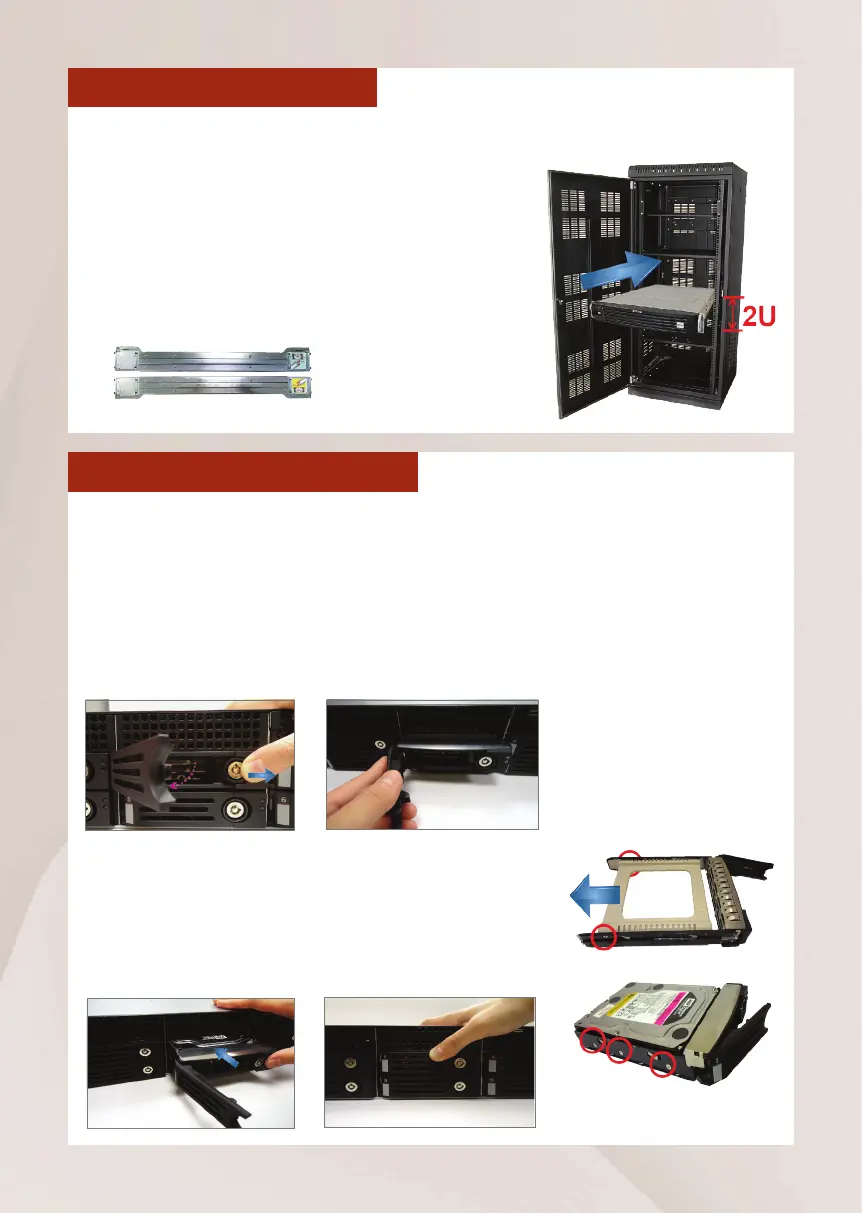
This unit is designed to be mounted on a standard server rack, which occupies 2U
(3.5″)ofverticalspace.
GNR Sliding Rail Kit
HARD DISK INSTALLATION
REMOVE THE TRAY
Step 1
Slide the lock tab aside,
and the hinge tab will
pop out by itself.
Step 2
Hold the tab lever and
pull out the tray.
INSTALL THE TRAY
Step 4
Place your thumb on the
lock to push the tray into
position in the chassis.
Step 5
Press the hinge tab until
it clicks into place.
MOUNT THE DISK
Step 3
Loosen the two screws
on the tray to remove the
dummy disk. Secure the
hard disk on the tray with
the provided disk screws.
Make sure the disk
connector faces towards
the SATA contacts inside
the unit.
Make sure this unit is turned off, and insert the hard disks into the disk bays
following the sequence of tray numbers.
1. Allowaminimumof5cmclearanceatthefront
andtherearforfront-to-backairowoftheunit.
2. Prepare a rack shelf rated for the unit’s weight
or purchase the rail kit from ACTi, and install
that to support the entire unit.
3. Secure the unit onto the rack.



 To Next Page