This document is a Quick Installation Guide for the ACTi INR-340, a 64-Channel 6-Bay RAID Tower Standalone NVR (Network Video Recorder). It provides essential information for quickly setting up the INR server system via its local interface. For more detailed instructions on installation, operation, and web client login, users are directed to the product manuals available on ACTi's corporate website.
Function Description:
The ACTi INR-340 is a standalone network video recorder designed for surveillance applications. It supports hardware RAID configuration, allowing users to create disk arrays for robust data storage. The NVR can connect to and record video from up to 64 network cameras. It provides a local interface for initial setup, including hard disk installation, RAID configuration, disk volume creation, user management, camera addition, and recording schedule setup. The device also supports live viewing and playback of recorded video.
Important Technical Specifications:
- Model: INR-340
- Channels: 64-Channel
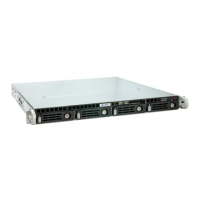
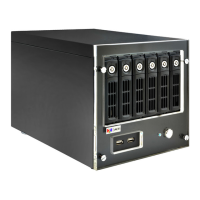
- Drive Bays: 6-Bay RAID Tower Standalone NVR (supports 5 storage disk bays and 1 system disk bay)
- Hard Disk Compatibility: Requires ACTi-certified 3.5-inch SATA hard disks. A link to certified disk models is provided:
http://www.acti.com/hddselector.
- RAID Support: Supports hardware RAID configuration (RAID 0, RAID 1, LARGE, RAID 3, CLONE, RAID 5, RAID 10).
- Video Output: VGA Port, HDMI Port / Display Port.
- Connectivity: LAN1 Port, LAN2 Port, USB Ports (2 on front, 4 on rear), eSATA Port.
- Audio: Line-in, Line-out, Mic-in.
- Power: AC Power Connector.
- Default Administrator Password: "123456" (users are advised to change this for security).
Usage Features:
- Quick Setup: The guide focuses on a streamlined setup process via the local interface.
- Hardware Installation:
- Unpacking: Includes the INR unit, HDD Tray Keys Pack, Disk Screws Pack, Quick Installation Guide, Power Cord, Universal Converter, and Warranty Card.
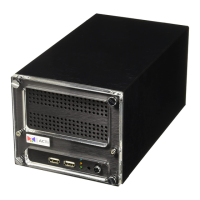
- Front Panel: Features 5 Storage Disk Bays, a System Disk bay, 2 USB Ports, a Power Button, and a Power Status LED Indicator.
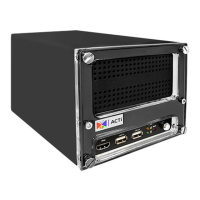
- Rear Panel: Provides VGA, eSATA, HDMI/Display Ports, LAN1/LAN2 Ports, 4 USB Ports, AC Power Connector, Line-in, Line-out, and Mic-in.
- Hard Disk Installation: Detailed steps are provided for removing trays, mounting disks with supplied screws, and re-installing trays. Crucially, users are instructed to turn off the unit before handling trays.
- Device Connection: An example diagram illustrates connecting the NVR to network cameras, a monitor, USB devices (mouse, keyboard), and a power source. DHCP service on the router is recommended for automatic IP address assignment.
- Software Configuration:
- Initial Login: After powering on, users log into Windows as "administrator" with the password "123456".
- Hardware RAID Creation:
- Utilizes a bundled software utility (JMicron HW RAID Manager).
- Users double-click a desktop shortcut, select a RAID type (e.g., RAID 0, 1, 3, 5, 10), and click "Apply".
- An "Information Message" indicates the progress of RAID configuration.
- Warning: Moving disk trays while the unit is operating can cause damage.
- Disk Volume Creation:
- Uses Windows Disk Management.
- Users search for "computer management", select "Disk Management", right-click a disk, and choose "Initialize Disk" with "GPT" partition style.
- After initialization, users right-click the disk to create a new volume, assigning a drive letter and label, and formatting it (NTFS recommended).
- Note: For Striped, Mirrored, or RAID-5 volumes, it's recommended to use disks of the same model and capacity.
- NVR Interface Login: Double-click the "NVR 3 Enterprise Workstation" shortcut on the desktop. Default account: "admin", password: "123456".
- User Management:
- From the NVR Setup page, navigate to the "Users" tab.
- User Groups: Add new user groups by inputting an ID and clicking "Apply".
- New Users: Add new users by inputting Account, Password, Email, selecting a User Group, and clicking "Apply".
- Storage Drive Selection:
- In the NVR Setup page, go to the "Storage" tab.
- De-select the C: Drive and select other storage drives for recording. Click "Apply".
- Camera Addition:
- In the NVR Setup page, go to the "Devices" tab and click "Add".
- Search Cameras: Auto-search for ACTi cameras or ONVIF-compliant cameras on the local network. Input correct account/password for ONVIF search.
- Add Camera Manually: For cameras in other networks, manually input Media Type, Protocol, IP Address, HTTP Port, Account, and Password, then click "Get Device Settings" and "Apply".
- Camera Settings Configuration:
- From the NVR Setup page, "Devices" tab, select a camera.
- Configure settings under "Basic", "Video", "PTZ", or "Preset Tour" tabs.
- Recording Schedule Setup:
- From the NVR Setup page, "Schedule" tab, select a camera.
- Choose "Schedule Recording" (continuous) or "Event Recording" (trigger-based, e.g., motion detection).
- Drag on the time table to define recording sessions and click "Apply".
- Customize Views:
- In "Live View" page, click the "add new layout" icon and then "edit mode" icon.
- Select a layout style.
- Drag cameras from "Camera List" to channels.
- Upload maps and adjust channel size.
- Save the view and optionally set it as default.
- Validation:
- Live Streaming: Double-click "All Cameras" on the "Camera List" in "Live View" page.
- Recording Playback: In "Playback" page, double-click a view or camera from "View List" or "Camera List", then drag on the time bar.
Maintenance Features:
- Hard Disk Handling: Instructions emphasize turning off the unit before removing or inserting hard disk trays to prevent damage.
- Software Updates: Users are informed that documentation may change due to continuous product improvements and are directed to the ACTi Download Center (
http://www.acti.com/downloadcenter) for the latest user documentation.
- Technical Support: For system installation questions, users can contact ACTi engineers via the ACTi Customer Help Desk platform (
http://www.acti.com/CHD).