AssemblyInstructions(cont)
Step 3
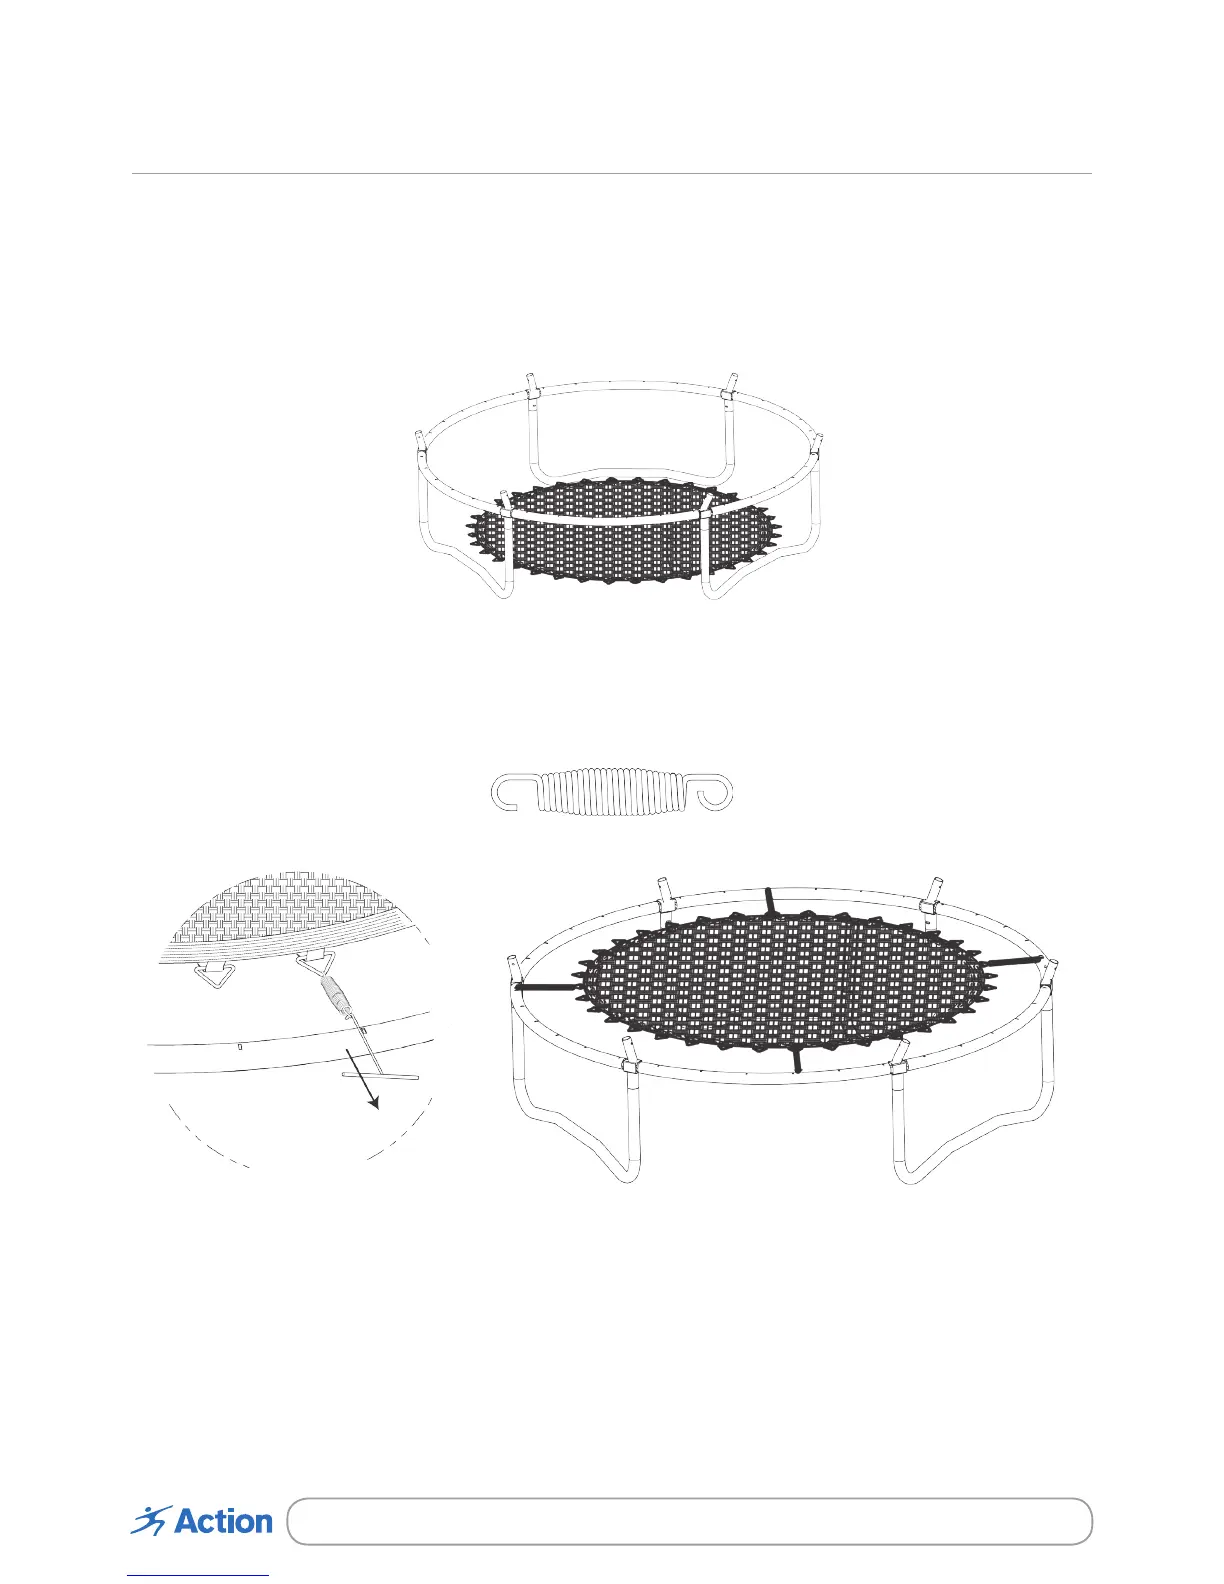
LaytheMat(1)outatontheoorinsideofthecompletedtrampolineframe.Ensurethatthesideof
the Mat (1) with double stitching is facing downward, the warning label stitched into the mat should be
located on the top side of the mat.
TobeginattachingtheMat(1)totheframetake2xSprings(6)andplacetheseatoppositeendsof
theMat(1).PlacetheendoftheSpring(6)withthenarrowopeningoverthemetalv-ringsattheedge
ofthematandinserttheoppositeendoftheSpring(6)withthewideopeningintothegrooveonthe
TopRail(3)usingtheSpringHook(8).RepeatthisfortheotherSpring(6)toevenoutthetensioninthe
mat.
Takeanother2xSprings(6)andrepeattheaboveinstructionssotherearenow4xSprings(6)
connectingtheMat(1)totheTopRails(3)atpoints¼thewayaroundtheframe.Usetheremaining
Springs(6)toconnecttheMat(1)totheTopRails(3)securingitintoposition.
Note: It is recommended that you connect a handful of Springs (6) on one side of the frame and
then connect the same number of Springs (6) to the opposite side of the frame, this will even out
the tension on the Springs (6) from the Mat (1) and make it easier to connect the last couple of
springs.
1
6
8
Wide opening Narrow opening