AssemblyInstructions(cont)
Step 4
Attach1xSafetyInstructionPlacard(7)tothetrampolineframeinapositionthatiseasilyvisible.
ThreadtheincludedcabletiethroughtheholeintheSafetyInstructionPlacard(7)andwrapitaround
theframe.Securethisintoplacebyplacingtheatendofthecabletiethroughthegapattheother
endandpullingtheatendthroughuntilitisttedtightlyaroundtheframe.
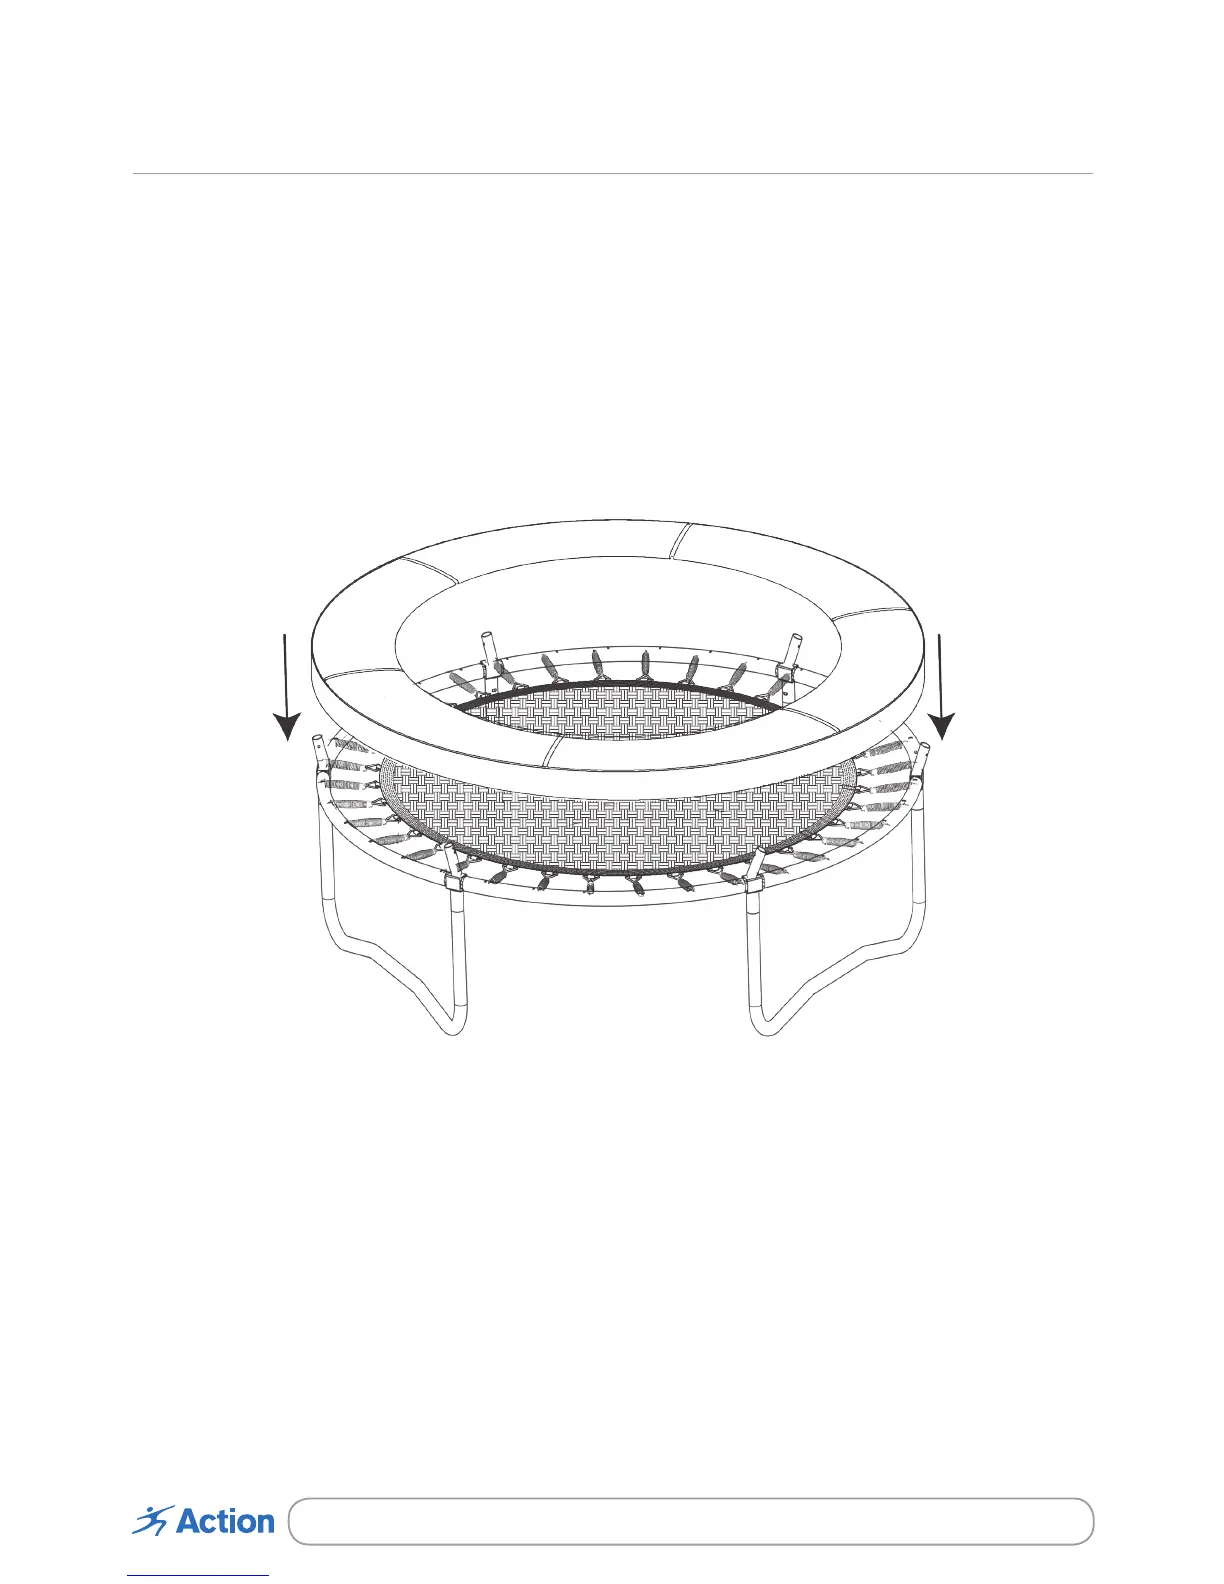
LaytheFramePad(2)overthetrampolinesothatthespringsandframearecompletelycovered.
PleaseensurethatthesmallgapsintheFramePad(2)arealignedwiththeT-Joints(9)sothetopofthe
T-Joints(9)tthroughthegap.
To secure the Frame Pad (2) to the trampoline, take the hook attached to the base of the Frame Pad (2)
andclipthistoav-ringthatistwoorthreespringstotheleftofthestrap.
Warning: Do not position your face close to the strap as if you let go it can rebound at high speed
causing injury.
Repeat this for all hooks on the Frame Pad (2). There should be a few remaining pairs of straps on the
Frame Pad (2), take each pair and wrap each side around the outside of the stitched material holding
thev-ringstotheMat(1).Tieaknotusingapairofthestrapsunderthev-ringtonishsecuringthe
Frame Pad (2) in place.
2