2
ActronAir
®
is constantly seeking ways to improve the design of it’s products, therefore specifi cations are subject to change without notice. Please check prior to purchase.
Copyright © 2013 Actron Engineering Pty. Ltd.
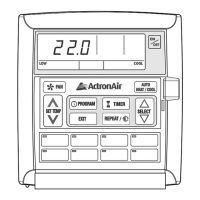
LM7-LM24 WALL CONTROLLER INSERT
Rev. 4 130320
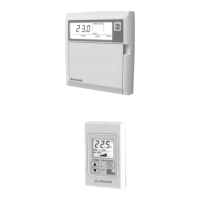
1.0 INSTALLATION OF WALL CONTROLLER
WALL CONTROLLER INSTALLATION
1.1 Remove front cover, as shown
Insert and gently twist screwdriver into the slot at the bottom •
of the Wall Controller. Do this procedure alternately between
the two slots until back cover opens.
Use large enough fl at blade screwdriver to fi t into the slot in •
order to avoid damaging the Wall Controller.
1.2 Mount back cover to the wall
Use plasterboard mounting bracket to mount back cover •
to the wall.
Ensure that the Wall Controller back cover is aligned and •
levelled on the wall before tightening the screws.
1.3 Connect wiring at the back of Wall Controller
Ensure that all wiring is tightly connected. All wiring must be •
in accordance with the provided wiring diagram.
1.4 Attach the Wall Controller to the back cover
On completion of the mounting installation, check that the •
Wall Controller is aligned and levelled on the wall.
COMMON
KEY
SENSOR
POWER
PLASTERBOARD
MOUNTING
BRACKET
WALL CONTROLLER
BACK COVER
BACK COVER
AS MOUNTED
ON THE WALL
WALL CONTROLLER
SCREW DRIVER
SLOTS
INSERT
SCREWDRIVER
AND TWIST
WALL CONTROLLER
REMOVE PROTECTIVE
FILM COVER WHEN
INSTALLATION IS
COMPLETE
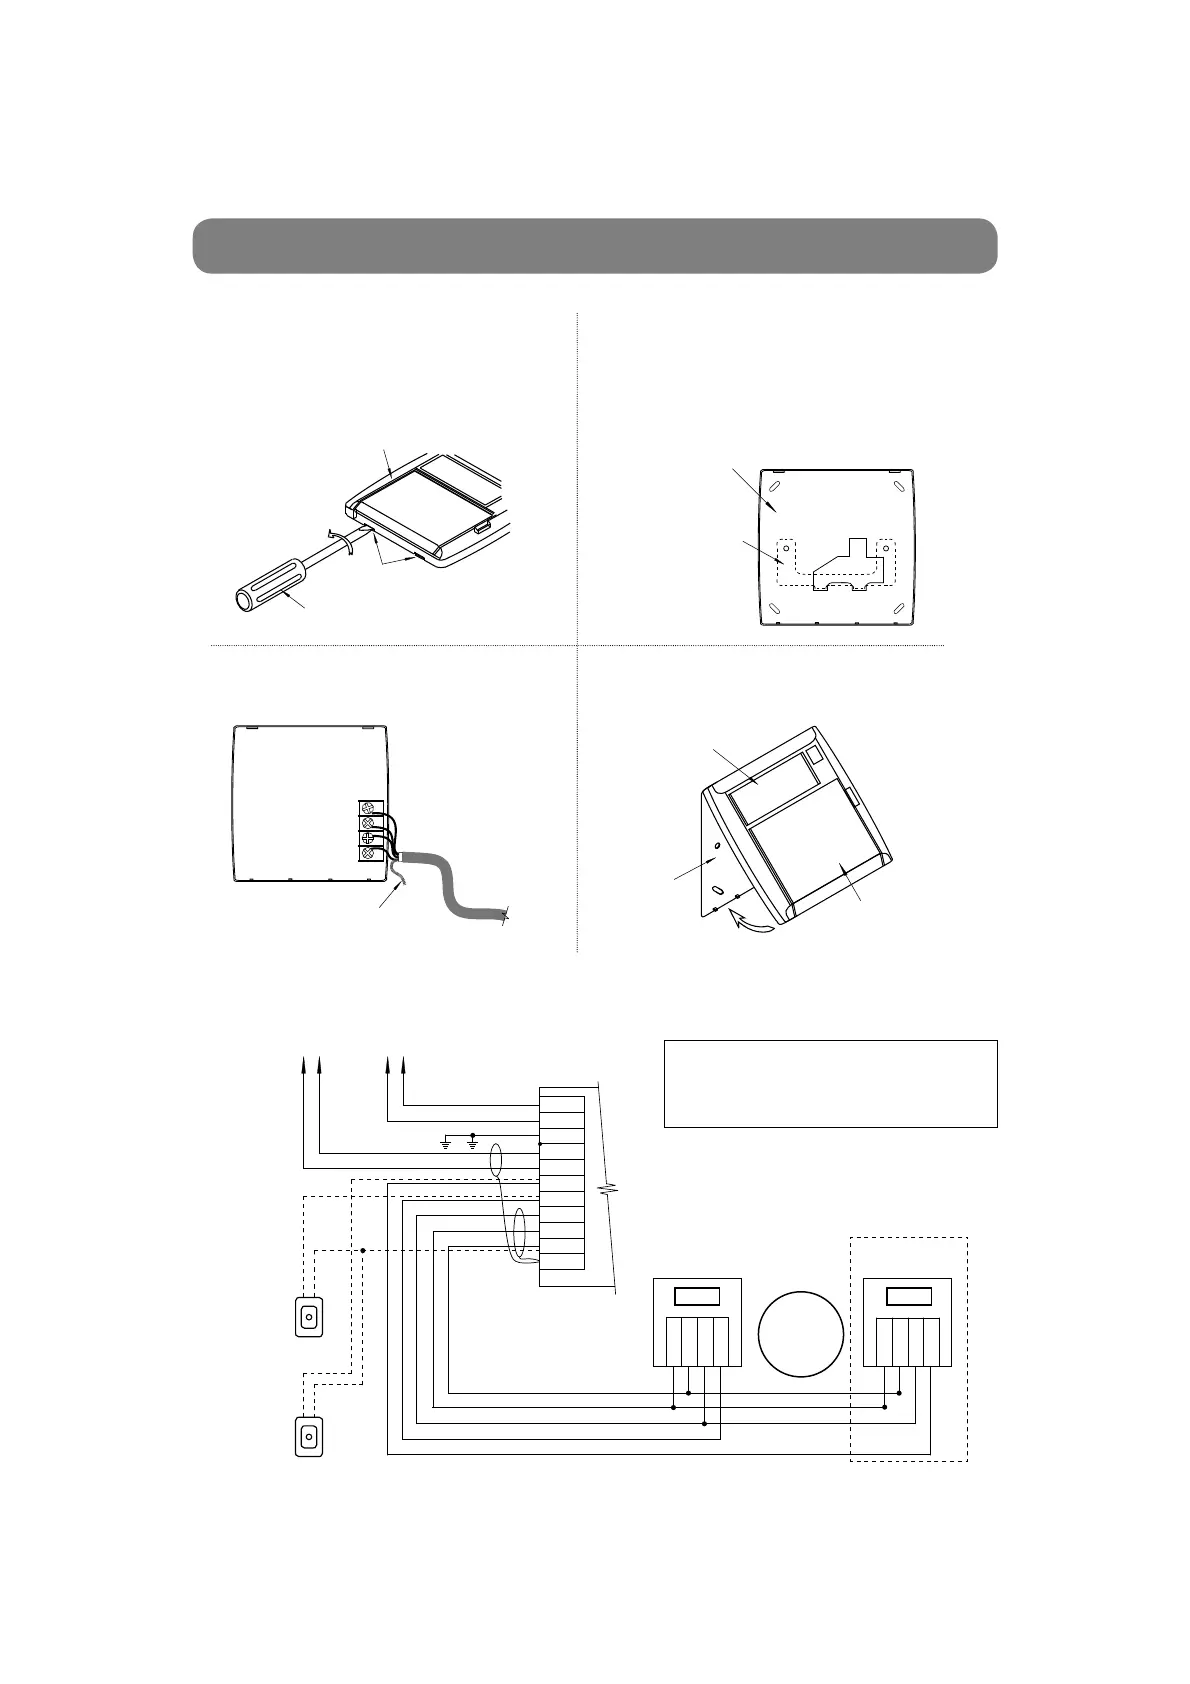
2.1 WIRING DIAGRAM - SRA SRG & SRV MODELS
ACT
NEUT
EARTH
DATA/R
COM/BL
S-2
S-1/G
KEY/Y
PWR/R
COM/BK
SCRN
NOTES:
1. When using 2 wall controls, the second wall control’s
onboard sensor must be wired from the indoor board and
cannot be looped from the other wall control’s sensor terminal.
2. Use only one 7-day controller with dual (MIMIC LOGIC)
controller set up.
INDOOR BOARD
(AMIB)
WALL
CONTROLLER 1
OPTIONAL WALL
CONTROLLER 2
OPTIONAL
SENSOR 1
OPTIONAL
SENSOR 2
TO
OUTDOOR
UNIT
SENSOR
KEY
COM
POWER
SENSOR
KEY
COM
POWER
DO NOT
CONNECT
SCREEN
AT WALL
CONTROL
WC-2WC-1
DO NOT CONNECT TRACE WIRE TO
WALL CONTROLLER.
CUT WIRE TO PREVENT SHORTING OUT.
 Loading...