This document is a user manual for an addlink M.2 PCIe SSD, designed for installation in both desktop and laptop computers. The manual provides comprehensive instructions for installing and setting up the SSD, aiming to make the computer significantly faster.
Function Description:
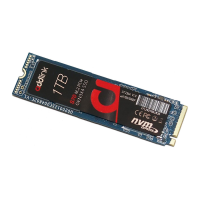
The addlink M.2 PCIe SSD serves as a high-performance storage device for computers. It utilizes the M.2 form factor and connects via the PCI Express (PCIe) bus, specifically supporting NVM Express (NVMe) as its logical device interface. This allows for significantly faster data transfer speeds compared to traditional SATA-based SSDs or hard disk drives (HDDs). The SSD is designed to replace or augment existing storage, providing a quicker boot time for the operating system and faster loading of applications and files. It is compatible with various Windows operating systems (Windows 7, 8.1, 10, Windows Server 2008 R2, 2012, and 2012 R2), as well as Linux distributions like Ubuntu that include PCIe NVMe drivers. The device does not require special drivers for installation on Windows 8.1 or above, as these systems provide native support for PCIe NVMe SSDs. For Windows 7, however, a specific update from Microsoft is needed due to its lack of native NVMe support.
Usage Features:
The manual outlines a clear, step-by-step process for installing the SSD, tailored for both desktop and laptop environments.
For desktop installation, the process begins with essential preparatory steps:
- Data Backup: Users are strongly advised to back up all important data to an external storage device, USB flash drive, or cloud storage before starting the installation. This is a critical precaution to prevent data loss.
- Disconnecting Other Storage Devices: To avoid conflicts or accidental data manipulation, users should disconnect and remove any other existing storage devices from the motherboard or drive bays.
- BIOS Configuration: Before physical installation, users need to power on their PC and access the motherboard's BIOS. Within the BIOS, it's crucial to ensure that a PCIe device is set in the boot sequence or boot priority list to allow the system to recognize and boot from the M.2 SSD. The manual emphasizes consulting the motherboard or system manufacturer's manual for specific BIOS access keys and boot sequence information. After configuring, these BIOS settings must be saved, and the PC powered down.
- Locating the M.2 Slot: Users are guided to locate the M.2 slot on their motherboard, again referencing their motherboard user manual for precise location and orientation.
- Inserting the SSD: The physical insertion involves holding the M.2 device pin-side first and inserting it into the M.2 slot at an angle. The opposite end is then fastened to the motherboard using a screw or other provided hardware. The manual includes an illustration to clarify this step.
- Operating System Installation: After physical installation, users can proceed with installing Microsoft Windows from an approved USB device. The manual reiterates that for Windows 8.1 and above, no special drivers are needed, as native support is available. For Windows 7, a specific Microsoft update (linked in the manual) is required.
For laptop installation, the steps are adapted to the portable nature of the device:
- System Shutdown: The first step is to completely shut down the laptop.
- Power Disconnection and Battery Removal: Users must remove the power cable and, if applicable, the battery. The manual advises consulting the laptop's owner's manual for battery removal instructions.
- Discharging Residual Power: For laptops with removable batteries, holding the power button for five seconds after battery removal helps discharge any remaining electricity in the system, a safety measure.
- Opening the Case: Accessing the internal components of a laptop varies significantly by model, so users are instructed to consult their laptop's owner's manual for exact instructions on opening the case.
- Grounding: Before handling internal components, users should touch an unpainted metal surface to ground themselves. This protects the computer's components from static electricity.
- Locating the M.2 PCIe Slot: Similar to desktops, users need to locate the M.2 PCIe slot, which is typically found under the bottom panel or keyboard in laptops. The owner's manual is again recommended for precise location.
- Inserting the SSD: The insertion process is similar to desktops, involving careful alignment of the SSD's notches with the PCIe slot's ridges and inserting it at a 30-degree angle. Users are warned not to force the connection and to secure the drive with a screw if necessary, without over-tightening. Prior removal of a heatsink or screw might be required depending on the laptop model.
- Reassembly: Once the SSD is securely in place, the laptop should be reassembled, and the battery reconnected if it was removed.
- Power On: Finally, the computer can be turned on. If the old storage drive was not removed, the computer will likely boot from it.
The manual also includes a glossary of terms to help users understand the technology involved:
- Basic Input/Output System (BIOS): Explains BIOS as the built-in software controlling basic computer functions and its role in boot processes. It highlights modern flash BIOSes that can be updated and PnP-aware BIOSes for device recognition.
- M.2: Defines M.2 as a specification for internally mounted computer expansion cards, replacing mSATA. It describes M.2's edge connector, various module widths and lengths, and its suitability for solid-state storage in small devices due to advanced interfacing features.
- NVM Express (NVMe): Details NVMe as a technical standard for host bus adapters accessing SSDs via the PCIe bus. It emphasizes NVMe's design for low latency and parallelism, capitalizing on PCIe SSD capabilities for performance improvements. It clarifies that NVMe is best implemented with a direct PCIe connection and should not be confused with SATA Express. It also notes native support for NVMe in Windows 8.1, Windows Server 2012 R2, and Linux Kernel 3.3, and mentions NVMe SSDs come as PCIe expansion cards or 2.5-inch drives with U.2 or M.2-M connectors.
- Solid State Device (SSD): Provides a basic definition of an SSD as a data storage device using microchips (NAND Flash) instead of spinning magnetic disks found in HDDs.
Maintenance Features:
The manual primarily focuses on installation and initial setup rather than ongoing maintenance. However, several aspects contribute to the longevity and proper functioning of the device:
- Proper Installation: The detailed instructions for physical installation, including careful handling of the SSD (not touching gold connector pins), proper alignment, and securing with appropriate screws without over-tightening, are crucial for preventing physical damage and ensuring reliable operation.
- BIOS Configuration: Correctly configuring the BIOS to recognize and boot from the PCIe device ensures the SSD functions as intended from the start, preventing system errors or boot failures that might otherwise require troubleshooting.
- Data Backup: While presented as a pre-installation step, the emphasis on data backup is a fundamental maintenance practice. It safeguards user data against unforeseen issues during installation or future hardware failures, promoting data integrity and recovery.
- Consulting Manuals: The repeated advice to consult the motherboard or laptop owner's manual for specific details (BIOS access, M.2 slot location, case opening, battery removal) is a key maintenance feature. It ensures users follow manufacturer-specific guidelines, which can prevent damage, maintain warranty validity, and ensure compatibility.
- Online Support: The provision of a link to addlink's online support (FAQ for new M.2) serves as a resource for troubleshooting and obtaining further assistance, which is an important aspect of device maintenance and problem resolution.
- Warranty Awareness: The manual explicitly states the user's responsibility to review warranty policies before installation, as improper procedures might void or limit the motherboard or computer warranty. This encourages users to perform the installation correctly and seek professional help if unsure, indirectly contributing to maintaining the device's support eligibility.
In summary, the addlink M.2 PCIe SSD user manual is a practical guide for integrating a high-speed storage solution into a computer system. It emphasizes careful preparation, precise installation steps, and an understanding of the underlying technology to ensure a smooth upgrade and enhanced computer performance.