A-dec 6300 Ceiling-Mount Dental Light Installation Guide
8 85.0521.00 Rev R
4. Connect the power cable and route the
data line through the transformer
housing. See Figure 11 on page 7. For
lights with a short post, twist the power
cord to slide the cord into the post. Avoid
crimping the wires.
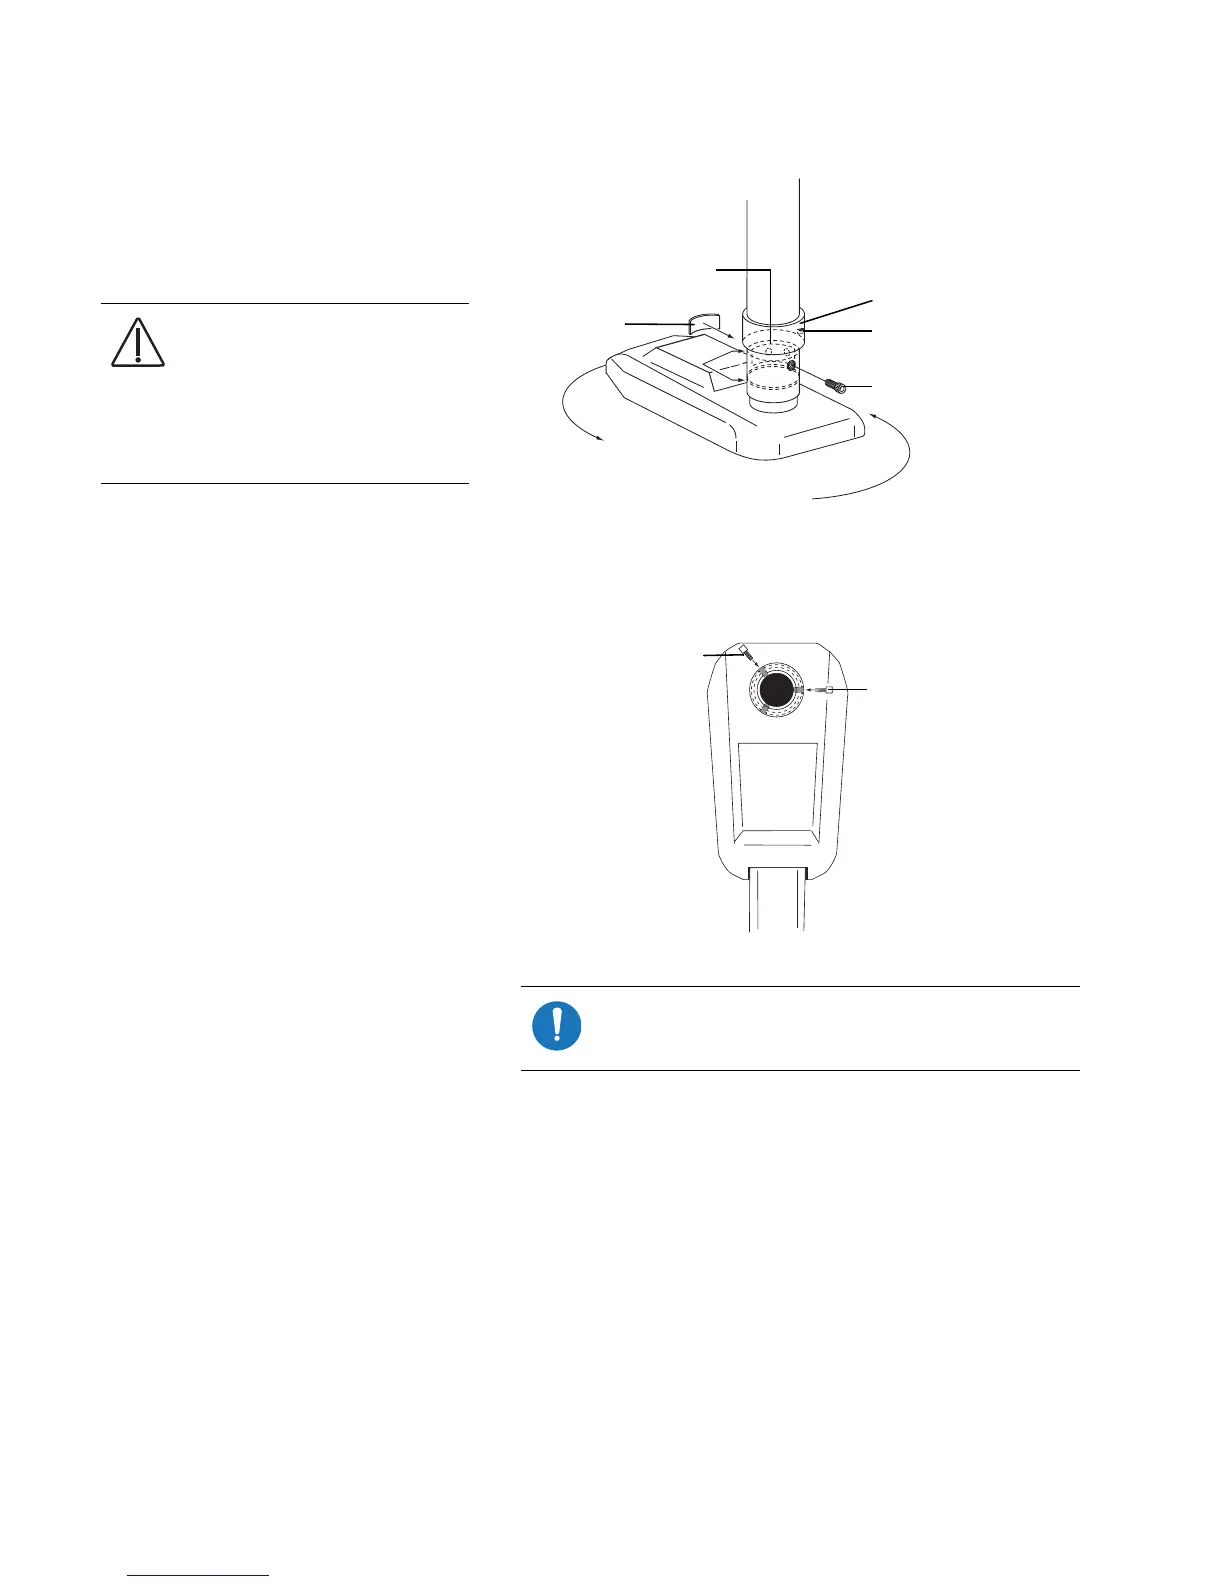
5. Push the data line through the hub, then
slide the hub up into the post with the
recess visible through the slot in the post.
Insert the locking tab. See Figure 12.
6. Rotate the dental light to the desired
position over the head of the chair. Then
rotate the dental light away from the
head of the chair to where it should stop.
One of the three holes in the recessed
area of the hub should be visible through
the hole on the back side of the post.
See Figure 12.
7. Use a 5/32" hex key to install a 10-32 x
3/8" (10 mm) stop screw into the hole.
See Figure 13.
8. Loosen the retaining ring stop screw,
then slide the ring down over the slot in
the post and tighten the stop screw.
See Figure 12.
CAUTION The locking tab holds
the dental light assembly in the
post. While you are installing
the stop screw and locking tab,
keep a firm hold on the dental
light assembly to prevent it from
falling.
Figure 12. Rotate the Light Into Position Over the Chair
Figure 13. Install the Left/Right Stop Screw
NOTE The stop screw prevents the light from rotating
360 degrees and keeps the dental light power cord
from being unplugged or damaged.
Locking Tab
Slot
Retaining Ring
Setscrew
Stop Screw
Left-hand Stop Screw
Right-hand Stop Screw
 Loading...