2 61287412F1-13A
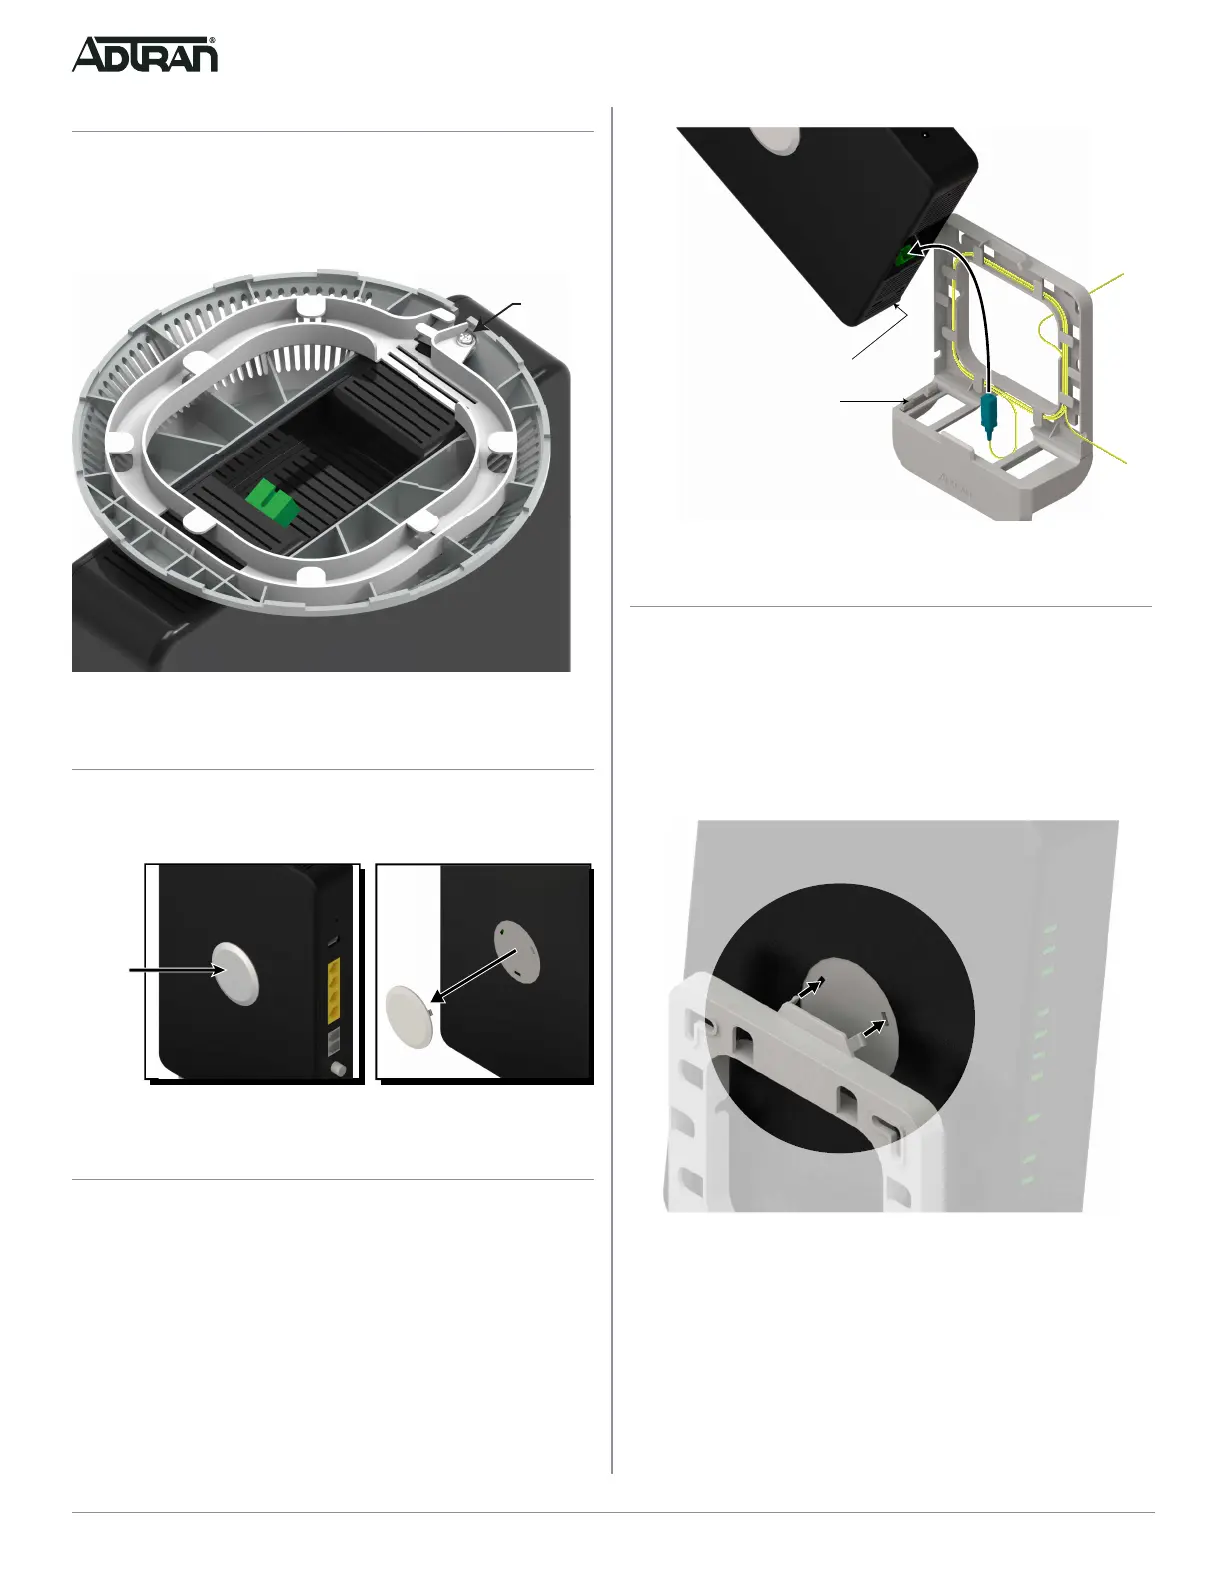
Figure 5. Connect Incoming Fiber Cable to ONT
Step 6: Attach ONT to ONT Fiber Tray and Bracket
1. Refer to Figure 5 and position the ONT Mounting Sots so
that these align with the Mounting Bracket Tabs on the ONT.
2. Refer to Figure 6 and position the ONT so that the two
mounting tabs on the top of the ONT Fiber Tray and Bracket
align with the mounting slots in the back of the ONT.
3. Refer to Figure 6 and gently push the ONT towards the ONT
Fiber Tray and Bracket until the ONT snap onto the bracket.
Figure 6. Attach ONT to ONT Fiber Tray and Bracket
Mounting
Bracket Tabs
ONT
Mounting Slots
Step 3. Remove Base (if required) from ONT
Refer to Figure 3 and remove the screw that holds the base to the
bottom of the ONT.
After the base has been removed, reinsert the screw into the
bottom of the ONT and tighten.
Figure 3. Remove Base from ONT
Step 4. Remove Logo Panel from ONT
Refer to Figure 4 and remove the Logo Panel from the ONT by
pulling it straight out from the ONT housing.
Figure 4. Remove Logo Panel from ONT
Step 5. Connect Incoming Fiber Cable to ONT
Refer to Figure 5 and connect the Incoming Fiber Cable to the
Fiber Connector on the bottom of the ONT.
Screw
Logo
Panel
 Loading...