Do you have a question about the ADTRAN NetVanta Series and is the answer not in the manual?
Learn to access the NetVanta unit's graphical user interface via a web browser for configuration.
Access the Adtran Operating System command line interface for advanced configuration and management.
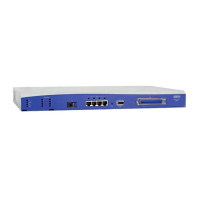
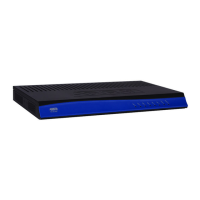
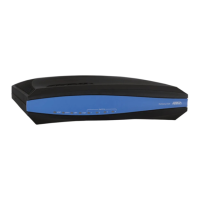
The NetVanta 3430 Router is a versatile networking device designed for both small and medium-sized businesses, offering robust connectivity and advanced configuration options. It functions as a router, facilitating network traffic management and providing secure access to the internet and other networks. The device ships with a default static IP address of 10.10.10.1, making initial setup straightforward. Additionally, it supports Dynamic Host Control Protocol (DHCP), allowing it to automatically obtain an IP address from a DHCP server when connected to a DHCP-enabled network. This flexibility in IP address assignment caters to various network environments, from simple peer-to-peer connections to complex enterprise setups.
A key feature of the NetVanta 3430 is its support for Zero-Touch Provisioning (ZTP). When connected to a DHCP network, the router can automatically download and apply configuration parameters from a configuration management server. This capability significantly simplifies deployment, especially in large-scale rollouts, by reducing the need for manual intervention and ensuring consistent configurations across multiple devices. ZTP streamlines the provisioning process, allowing for quicker and more efficient network setup.
The NetVanta 3430 offers two primary methods for configuration: a web-based graphical user interface (GUI) and the ADTRAN Operating System (AOS) command line interface (CLI). The GUI provides an intuitive and user-friendly way to configure the main unit settings, complete with online guidance and explanations for each parameter. This makes it accessible for users who prefer a visual approach to network management. For more advanced configurations and granular control, the AOS CLI is available. The CLI allows experienced network administrators to execute complex commands, script configurations, and perform detailed diagnostics, offering a powerful toolset for fine-tuning network performance and security.
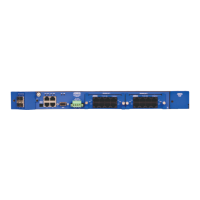
Connecting to the GUI can be done in two ways. First, by connecting the router directly to a PC using an Ethernet cross-over cable via the ETH 0/1 port and setting the PC's IP address to a fixed address (e.g., 10.10.10.2) within the same subnet as the router's default static IP (10.10.10.1). Once the PC's IP is configured, users can access the GUI by entering http://10.10.10.1 in a web browser. Second, if the router is connected to an existing DHCP-enabled network, it will automatically request an IP address. Users can then check the DHCP server for the assigned IP address and access the GUI from any network PC by entering that IP address in a web browser. This dual approach ensures accessibility regardless of the network setup.
Accessing the CLI provides an alternative, more powerful configuration method. This can be achieved via the CONSOLE port or through a Telnet or SSH session. For console access, a PC with VT100 terminal emulation software and a straight-through serial cable are required. The serial cable connects the PC to the CONSOLE port on the back of the unit. Once connected and powered up, a terminal session with specific settings (9600 baud, 8 data bits, no parity, 1 stop bit, no flow control) allows users to access the AOS CLI by pressing ENTER. The default enable mode password is "password". For remote CLI access, a Telnet or SSH client can be used. If the unit's IP address is known (either the default static IP or a DHCP-assigned IP), users can open a Telnet or SSH client and enter the IP address. For SSH, the default login is "admin" with the password "password", while for Telnet, only the password "password" is required. This multi-modal access ensures that administrators can manage the device efficiently from various locations and with different levels of security.
Maintenance features include the ability to easily view interface statistics, current configurations, and all configured IP addresses using specific CLI commands like show interfaces, show running-config, and show ip interfaces brief. These commands are invaluable for troubleshooting, auditing, and understanding the current state of the network. The device also allows for manual configuration of its IP address and subnet mask, providing flexibility for network administrators to tailor the device to specific network requirements, especially when DHCP is not used or a fixed IP is preferred. This involves using CLI commands to set the IP address, activate the interface, and add a default route.
Security is also a key aspect, with provisions for changing default login passwords. Users can modify passwords for user accounts, the Enable mode, and Telnet access through CLI commands, enhancing the security posture of the device. This is a critical maintenance step to prevent unauthorized access and ensure network integrity.
In case of misconfigurations or the need to revert to a known good state, the NetVanta 3430 supports restoring factory defaults. This feature is crucial for troubleshooting and redeployment scenarios, allowing administrators to quickly reset the device to its original settings. Comprehensive documentation, including the "Restoring an AOS Device to Factory Default" guide, is available online to assist with this process.
The device also comes with a range of configuration guides for common applications, such as configuring T1 access, port forwarding, DHCP, VPNs (using Aggressive Mode or Main Mode), Internet access with NAT and Firewall Wizard, and Quality of Service (QoS) for VoIP. These guides, available on ADTRAN's Support Community, empower users to implement various network services and optimize performance for specific applications. The availability of these resources underscores the device's versatility and its suitability for diverse networking needs.
Overall, the NetVanta 3430 Router is designed to be a robust, flexible, and manageable networking solution. Its combination of static and DHCP IP assignment, Zero-Touch Provisioning, dual GUI/CLI configuration methods, and comprehensive maintenance features makes it a powerful tool for building and maintaining reliable and secure networks.
| Product Line | NetVanta |
|---|---|
| Category | Network Hardware |
| Manufacturer | ADTRAN |
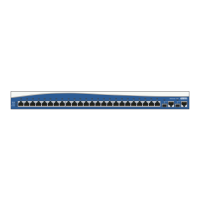
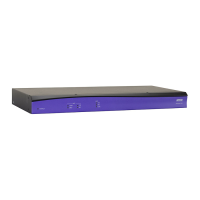
| Form Factor | Desktop, Rack-mountable |
| Network Interfaces | Ethernet, Gigabit Ethernet |
| Management | Web-based, CLI, SNMP |
| Security Features | ACLs |
| Port Options | T1/E1 |
| Voice Support | SIP |
| VPN Support | IPSec |
| Firewall | Stateful Packet Inspection |
| Operating Temperature | 0°C to 40°C (32°F to 104°F) |
| Power Options | AC, DC |