TM
10
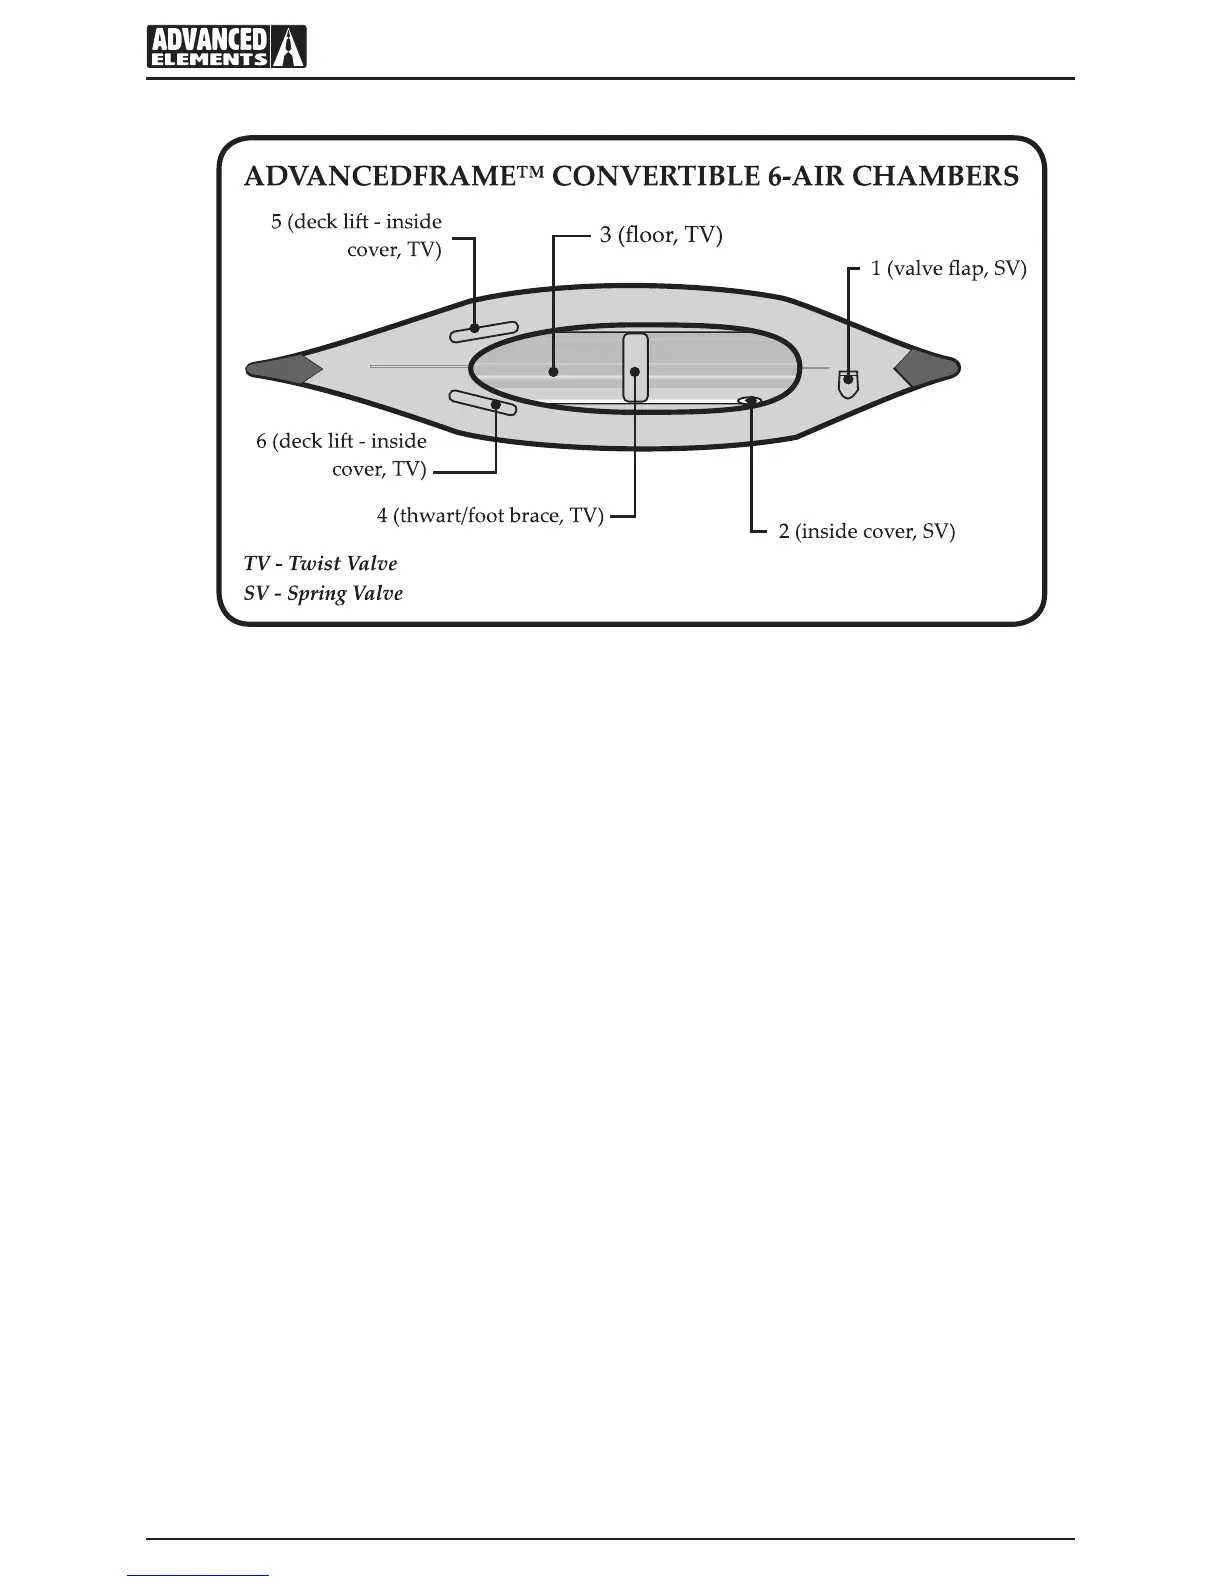
Diagram of Ination Chambers
3.3 Inating
IMPORTANT: Before inating, check to be sure that the kayak is completely assembled. Inate
your kayak in the following order. Failure to follow these instructions may cause damage to
your kayak. Do not over inate.
1. Partially inate chamber 1 until the kayak begins to ll out or appears to be half way inated
then close cap. Check to be sure the valve is in the inate position (See Figure 1).
2. Proceed to chamber 2. Inate chamber 2 until AdvancedFrame™ tube is rm to touch. Close
closed caps on chambers 1 and 2 tightly. Chamber 1 and 2 are separate chambers but
equalize in pressure because they are inside a fabric cover. Ideally you want to put half of the
air in chamber 1 and half in chamber 2. That way if you suddenly lose pressure in one
chamber you should have another chamber as a safety.
3. Inate chamber 3 “oor” (using proper hose ing). Twist valve open to inate and twist
closed when complete (Figure 2). Fill with air until rm (1 psi ONLY). CAUTION: Do not
over inate!
4. Inate thwart/foot brace (chamber 4) until rm (1 psi ONLY). Aach to Velcro on side tubes.
This chamber can be moved forward or backward when paddling solo.
5. Inate chambers 5 and 6 for desired deck li.
6. Make sure all valves are closed tightly and properly.
7. Finally, Insert Plastic Bow and Stern forms into pocket on bow and stern (Figure 3).