This document is a user manual for the Advoin Motorized Treadmill, model T09D7. It provides essential information regarding its assembly, operation, maintenance, and safety.
Function Description:
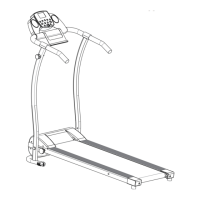
The Advoin Motorized Treadmill is designed for indoor exercise, allowing users to walk or run to improve their fitness. It features a motorized running belt, a control panel for adjusting settings, and handrails for support. The treadmill is equipped with an emergency stop magnet for safety, which, when detached, immediately stops the machine.
Important Technical Specifications:
- Product Name: Motorized Treadmill
- Voltage Rate: 220V
- Rated Frequency: 50/60HZ
- Rated Power: 1000W
- Maximum User Weight: 120KG
- Speed Range: Minimum 0.8 KPH to Maximum 10.0 KPH
Usage Features:
- Always read the manual carefully before assembly or use.
- Position the treadmill on a firm, flat surface indoors, avoiding deep, thick carpets to ensure proper air circulation.
- Wear appropriate clothing (not loose or long) and footwear.
- Do not stand on the belt before operating; step on after the motor starts and the belt reaches 0.8 KPH.
- Ensure the emergency cord is attached to you during use.
- Keep children and pets away from the treadmill when in use. Children and elderly users require adult supervision.
- Unplug the treadmill when not in use.
- Consult a doctor before use if you have any prior medical conditions.
- Do not use the treadmill if the electrical cable or plug is loose or worn; have it inspected by a qualified electrician.
Assembly Instructions:
- Secure the pole to the treadmill frame using a nut.
- Mount the handrail onto the frame leg, tightening the screw with the accompanying Allen key. Insert the crystal head of the handrail into the right side of the column crystal hole and attach the decorative covers.
- Align the control panel with the screw hole and screw it in place tightly by hand.
- Place the Emergency Stop Magnet on the control panel to complete assembly.
Operating the Computer:
- Flip the Master Power Switch to the ON position.
- Ensure the Safety Tether Key is on the Computer Console and the Safety Clip is attached to your clothing.
- Quick Start: Press the START button. The LCD will count down "3-2-1" before the running belt starts moving at an initial speed of 1.0 KPH. Always stand on the side rails and step onto the belt after it reaches 0.8 KPH.
- Speed Adjustment: Use the SPEED + or SPEED - buttons on the console or handlebar to increase/decrease speed (0.8 KPH to 10.0 KPH). Instant speed buttons (2, 4, 6, 8, 10 KPH) are also available.
- Display Functions:
- TIME: Displays elapsed workout time (0:00 to 99:59).
- DISTANCE: Displays accumulative distance traveled.
- CALORIES: Displays total calories burned (rough guide, not for medical treatment).
- PULSE: Displays heart rate in beats per minute (BPM) when gripping hand pulse sensors for 4-5 seconds.
- Stopping: Press the STOP button or pull out the safety tether key.
- START: Initiates training in various modes.
- STOP: Halts training.
- PROG (PROGRAM): Selects pre-set training programs (P01-P12) before training.
- MODE: Selects functions (time, distance, calories) for setting exercise goals in manual program mode.
- SPEED + (SPEED UP): Adjusts target training time, distance, or calories upwards; increases running speed during exercise.
- SPEED - (SPEED DOWN): Adjusts target training time, distance, or calories downwards; decreases running speed during exercise.
- INSTANT SPEED (2 / 4 / 6 / 8 / 10): Quickly sets desired speed.
Training in Manual Program Mode:
- Allows pre-setting target TIME, DISTANCE, or CALORIES in STOP mode. Only one function can be pre-set.
- Setting Time: Press MODE until TIME blinks. Use SPEED + or - to adjust (5:00 to 99:00 minutes, 1-minute increments). Press START to begin. Time counts down, and the treadmill stops automatically at 0:00.
- Setting Distance: Press MODE until DISTANCE blinks. Use SPEED + or - to adjust (0.50 to 99.5 kilometers, default 1 km). Press START to begin. Distance counts down, and the treadmill stops automatically at 0.00.
- Setting Calories: Press MODE until CALORIES blinks. Use SPEED + or - to adjust (10 to 995 calories). Press START to begin. Calories count down, and the treadmill stops automatically at 0.
Pre-set Training Programs (P01-P12):
- Select a program using the PROG button in STOP mode.
- The split window of TIME will blink. Adjust target time (5:00 to 99:00 minutes, 1-minute increments) using SPEED + or -.
- Press START to begin. Running speed changes automatically through 20 intervals.
- Speed can be adjusted during the workout using SPEED + or -.
- The treadmill stops automatically when the pre-set time counts down to 0:00.
Unfolding/Folding the Machine:
The manual includes diagrams illustrating how to unfold and fold the treadmill for storage.
Warm-up and Cool-down Routine:
- Warm-up: 2-5 minutes of aerobic exercise to prepare the body and minimize injuries.
- Cool-down: Repeat exercises at the end of the workout to reduce soreness and return the body to a resting state.
- Specific stretches are illustrated: Head Rolls, Shoulder Lifts, Side Stretches, Quadriceps Stretch, Inner Thigh Stretch, Toe Touches, Hamstring Stretches, and Calf/Achilles Stretch.
Maintenance Features:
General Maintenance:
- Unplug the treadmill before moving or cleaning.
- Clean with a damp cloth, avoiding the control panel. DO NOT use rough cleaning agents.
- Clean the power switch and control panel with a soft, dry cloth. Avoid wet cloths in these areas.
- Do not use the treadmill in wet, damp, or high-dust conditions.
- Store in a clean, dry indoor environment, with the master power switch off and unplugged.
Adjusting the Running Belt:
- Running belt shifting is normal.
- To straighten/adjust, turn the adjusting bolt on either side of the base (refer to figures C and D in the manual).
- Ensure the belt does not catch the sides to prevent tearing.
Lubrication:
- Lubrication ensures superior performance and extends life expectancy.
- Apply lubricant after the first 25 hours of use (2-3 months), then every 50 hours (5-8 months).
- Checking Lubrication: Lift one side of the running belt and feel the top surface of the running deck. If slick, no lubrication is needed. If dry, apply lubricant.
- Applying Lubricant: Lift one side of the running belt, pour lubricant under the center of the belt on the top surface of the running deck. Run the treadmill at a slow speed for 3-5 minutes to distribute.
- NOTE: Do not over-lubricate. Wipe off any excess.
Troubleshooting Guide:
The manual provides a table outlining common problems, potential causes, and corrections:
- Treadmill will not start:
- Potential Causes: Not plugged in, Safety Tether Key not installed, house circuit breaker tripped, treadmill circuit breaker tripped.
- Corrections: Plug in, reinstall Safety Tether Key, reset/replace circuit breaker, wait 5 minutes then restart.
- Belt slips:
- Potential Cause: Belt not tight enough.
- Correction: Adjust belt tension.
- Belt hesitates when stepped on:
- Potential Causes: Insufficient lubrication, belt too tight.
- Corrections: Apply lubricant, adjust belt tension.
- Belt is not centered:
- Potential Cause: Running belt tension not even across the rear roller.
- Correction: Centre the belt.