The oven
16
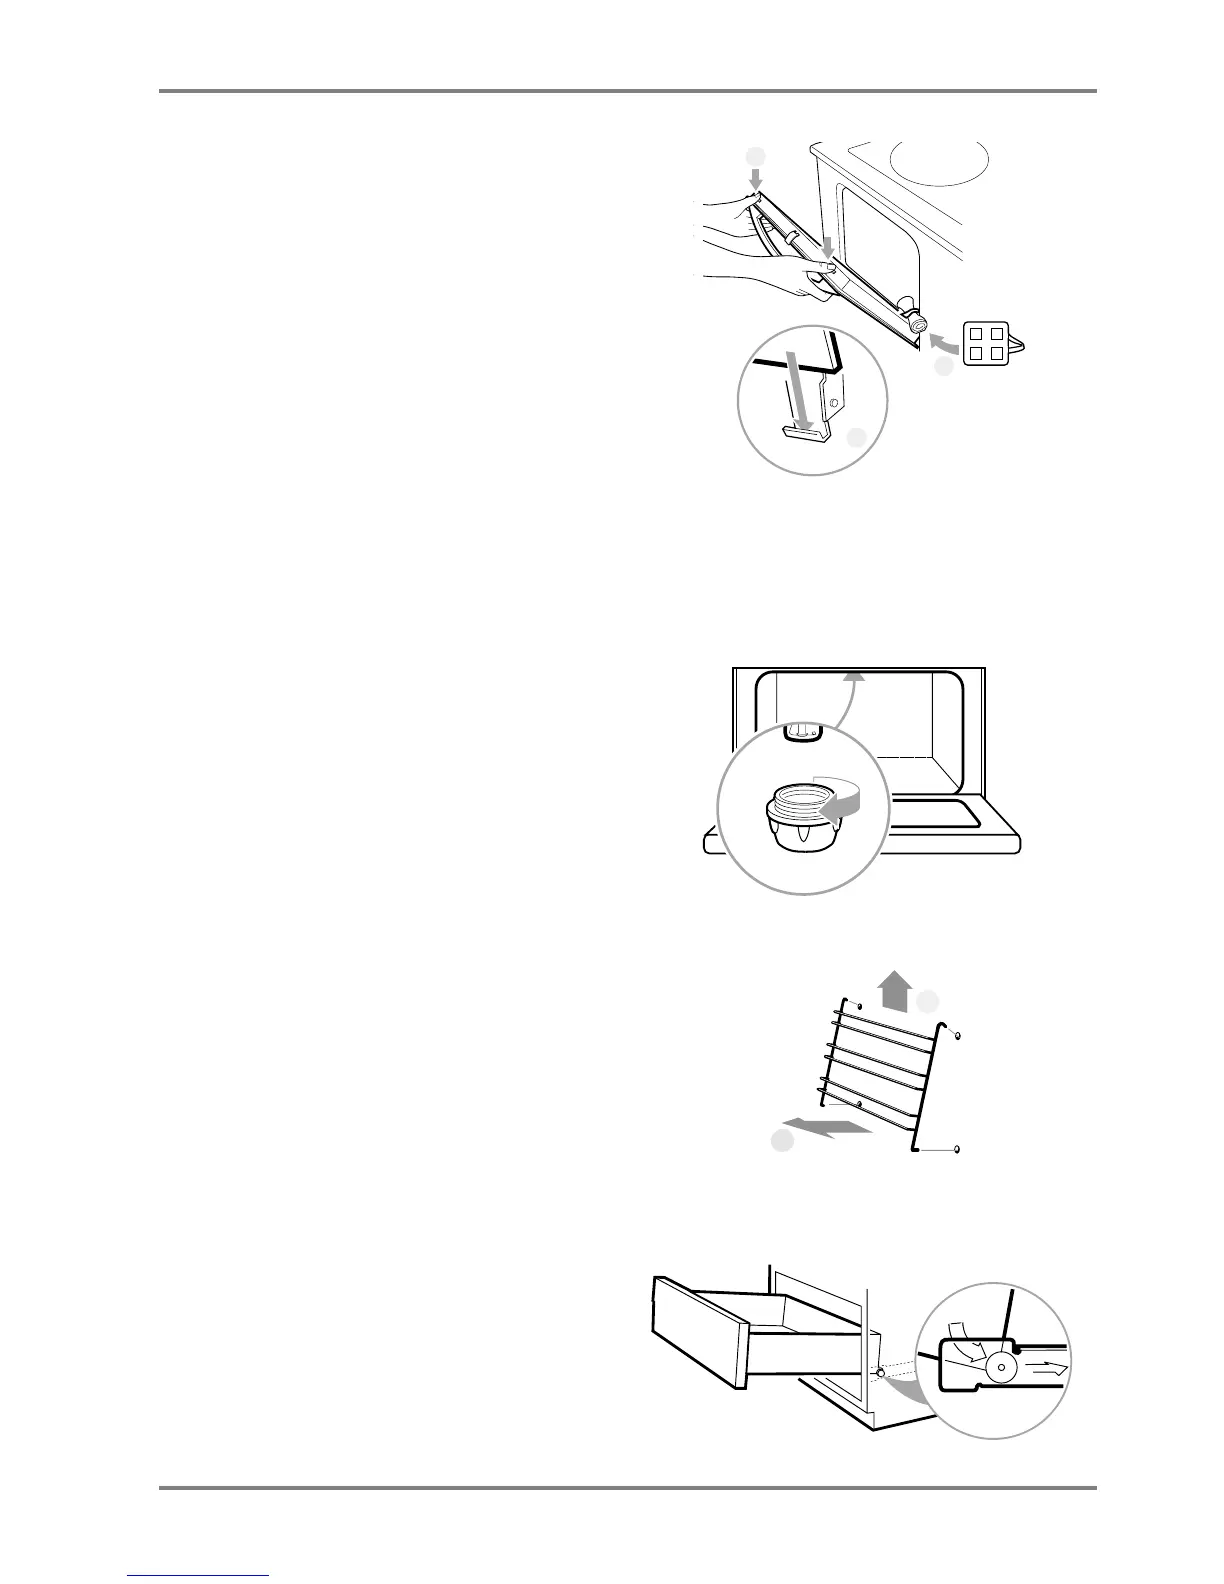
TO CLEAN BETWEEN THE TWO PANES:
1 Check that the oven is not hot and that the door
catch is activated before you remove the outer
section, the door front.
2 Open the door and insert rolled-up oven cloths
between the hinges
(SEE PICTURE). These to pre-
vent the door from closing. Raise the door up
again.
3 Grasp the door handle and press in the two
springs on the top edge of the door downwards,
then lift off the door front.
4 After cleaning (use a window-cleaning product),
slot the the door front back into the bracket
(SEE
PICTURE). If the glass is very soiled, use the
scraper supplied with the cooker. Make sure the
door is properly secured on both sides.
5 Press the two springs on the top edge of the door
and press the door front into place.
6 Remove the oven cloths.
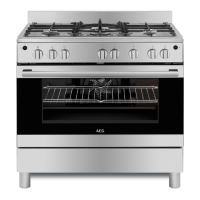
To change the oven light bulb
1 Turn all controls to off and check that the oven
is not hot.
2 Unscrew the glass cover (see illustration).
3 Unscrew the old bulb.
4 Fit a new bulb, marked 230–240 V, 15 W and
300°C, with an E14 screw fitting.
5 Refit the glass cover.
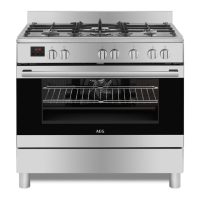
The oven accessories
Release each side rack for the oven shelves at the bot-
tom corners (1), lift it sideways and upwards and
remove from the oven (2). Wash the racks and shelves
by hand or in a dishwasher. If very soiled, soak them
first, before cleaning with a steelwool pad.
The baking trays and oven dish should be wiped
clean with paper towels, or washed by hand when
necessary. Any burnt-on food can be removed using a
suitable spatula.
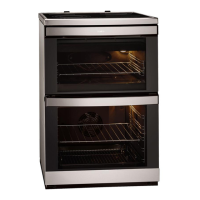
Storage drawer
1 Empty the drawer and pull it out as far as possible.
2 Hold the handle and lift upwards gently. This
frees the drawer from the catch at the back.
3 Pull the drawer out completely and lift it out.
After cleaning, place the drawer wheels on the brack-
ets
(SEE PICTURE). Lift the drawer slightly as you first
push it in so as to prevent the wheels from fastening in
the front catch.
2
4
3
2
1



 To Next Page