30
Installing the reversing camera
Verify the battery of the reversing
camera is fully charged.
Ensure the slide switch (7) at the
back of the camera is in the „ON“
position before installing.
If the device will not be used for
device with the slide switch (7) to
prevent battery damage due to deep
discharging.
The monitor shows the battery
charge when on.
The mounting bracket (1) may need to
be turned depending on if the reversing
camera is installed above or below the
number plate.
1. Loosen the screws at the back to
turn the mounting bracket.
2. Turn the mounting bracket (1) 180°.
3. Fix the mounting bracket (1) with
the screws.
Attention!
design-related vehicle types, these
instructions for use do not apply to all
vehicle models.
1. Remove the number plate from its
bracket.
2. Unscrew and remove the number
plate holder.
3. Centre the mounting plate behind
the number plate holder.
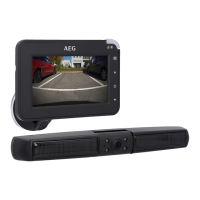
7. „ON/OFF“ slide switch (back)
8. LCD monitor
9. „Wake/Standby“ button
10. „Menu“ button
11. „Up“ button
12. „Power/Enter“ button
13. „Down“ button
14. Pairing pin
15. Monitor arm with suction cup
16. 1 Monitor cable with 12 V plug
17. USB cable
INSTALLATION
Charging the battery pack
The reversing camera is powered by
the integrated battery pack, which is
charged via the built-in solar cells or
the USB port.
The storage battery should be fully
If the battery is drained due to lack
of sun exposure, also charge via the
USB port.
1. Open the rubber cover at the side.
2. Plug the USB cable into the USB
port.
3. Connect the other end of the USB
cable to a USB power supply.
4. The charging process will start
automatically. The charging time is
approx. 6-7 hours.
 Loading...