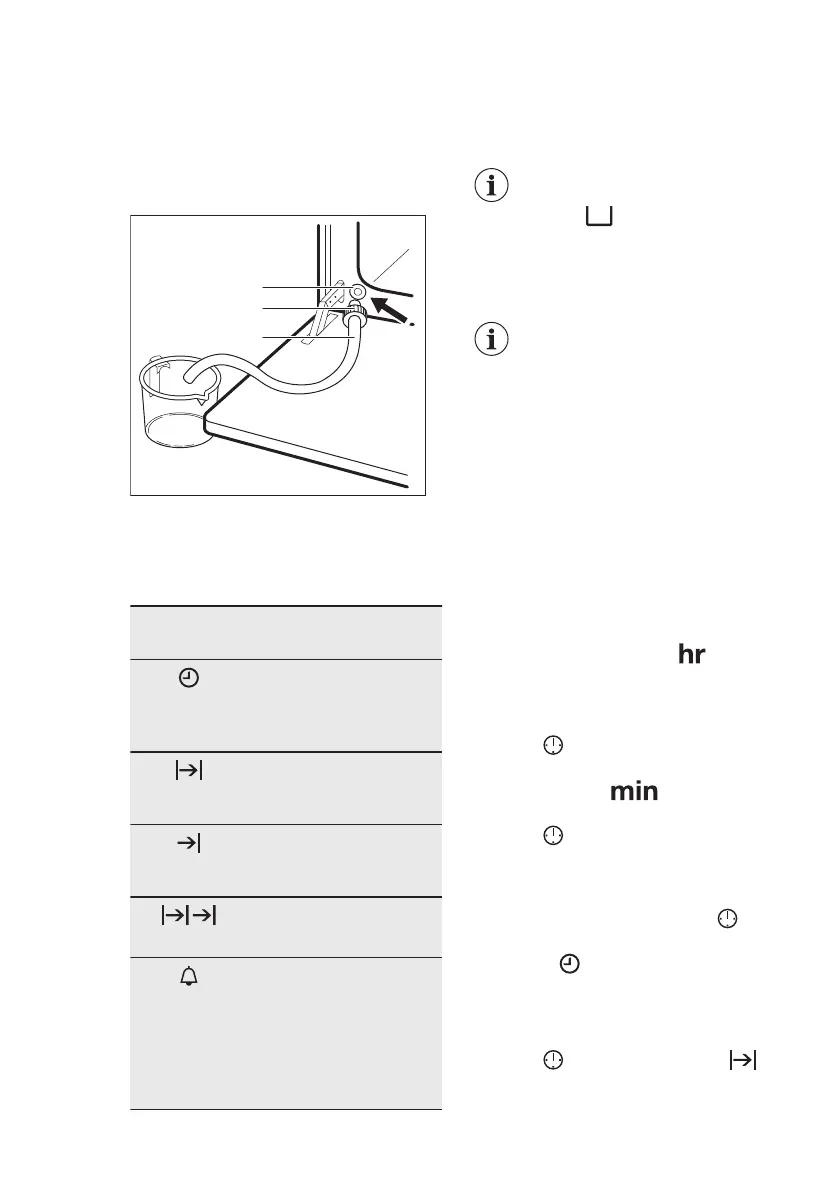
1. Prepare the draining pipe (C),
included in the package with the user
manual. Put the connector (B) onto
one of the ends of the draining pipe.
2. Put the second end of the draining
pipe (C) into a container. Put it at a
lower position than the outlet valve
(A).
3. Open the oven door and put the
connector (B) into the outlet valve
(A).
4. Push the connector again and again
to empty the water tank.
The water may remain
inside after the display
shows: Wait until the
water flow from the
water outlet valve stops.
5. Remove the connector from the valve
when the water stops flowing.
Do not use the drained
water to fill the water tank
again.
7. CLOCK FUNCTIONS
7.1 Clock functions table
Clock func-
tion
Application
TIME OF DAY
To show or change the
time of day. You can
change the time of day
only when the oven is off.
DURATION
To set how long the oven
works. Use only when a
heating function is set.
END
To set when the oven
turns off. Use only when a
heating function is set.
TIME DELAY
Combination of DURA-
TION and END function.
MINUTE
MINDER
Use to set a countdown
time. This function has no
effect on the operation of
the oven. You can set the
MINUTE MINDER at any
time, also if the oven is
off.
7.2 Setting and changing the
time
After the first connection to the mains,
wait until the display shows and
"12:00". "12" flashes.
1. Turn the knob for the temperature
right or left to set the hours.
2. Press
to confirm and switch to set
the minutes.
The display shows and the set
hour. "00" flashes.
3. Press to confirm or the set time of
day will be saved automatically after
5 seconds.
The display shows the new time.
To change the time of day press
again and again until the indicator for the
time of day
flashes in the display.
7.3 Setting the DURATION
1. Set an oven function.
2. Press
again and again until
starts to flash.
ENGLISH
11