INSTALLATION
7
INSTALLATION
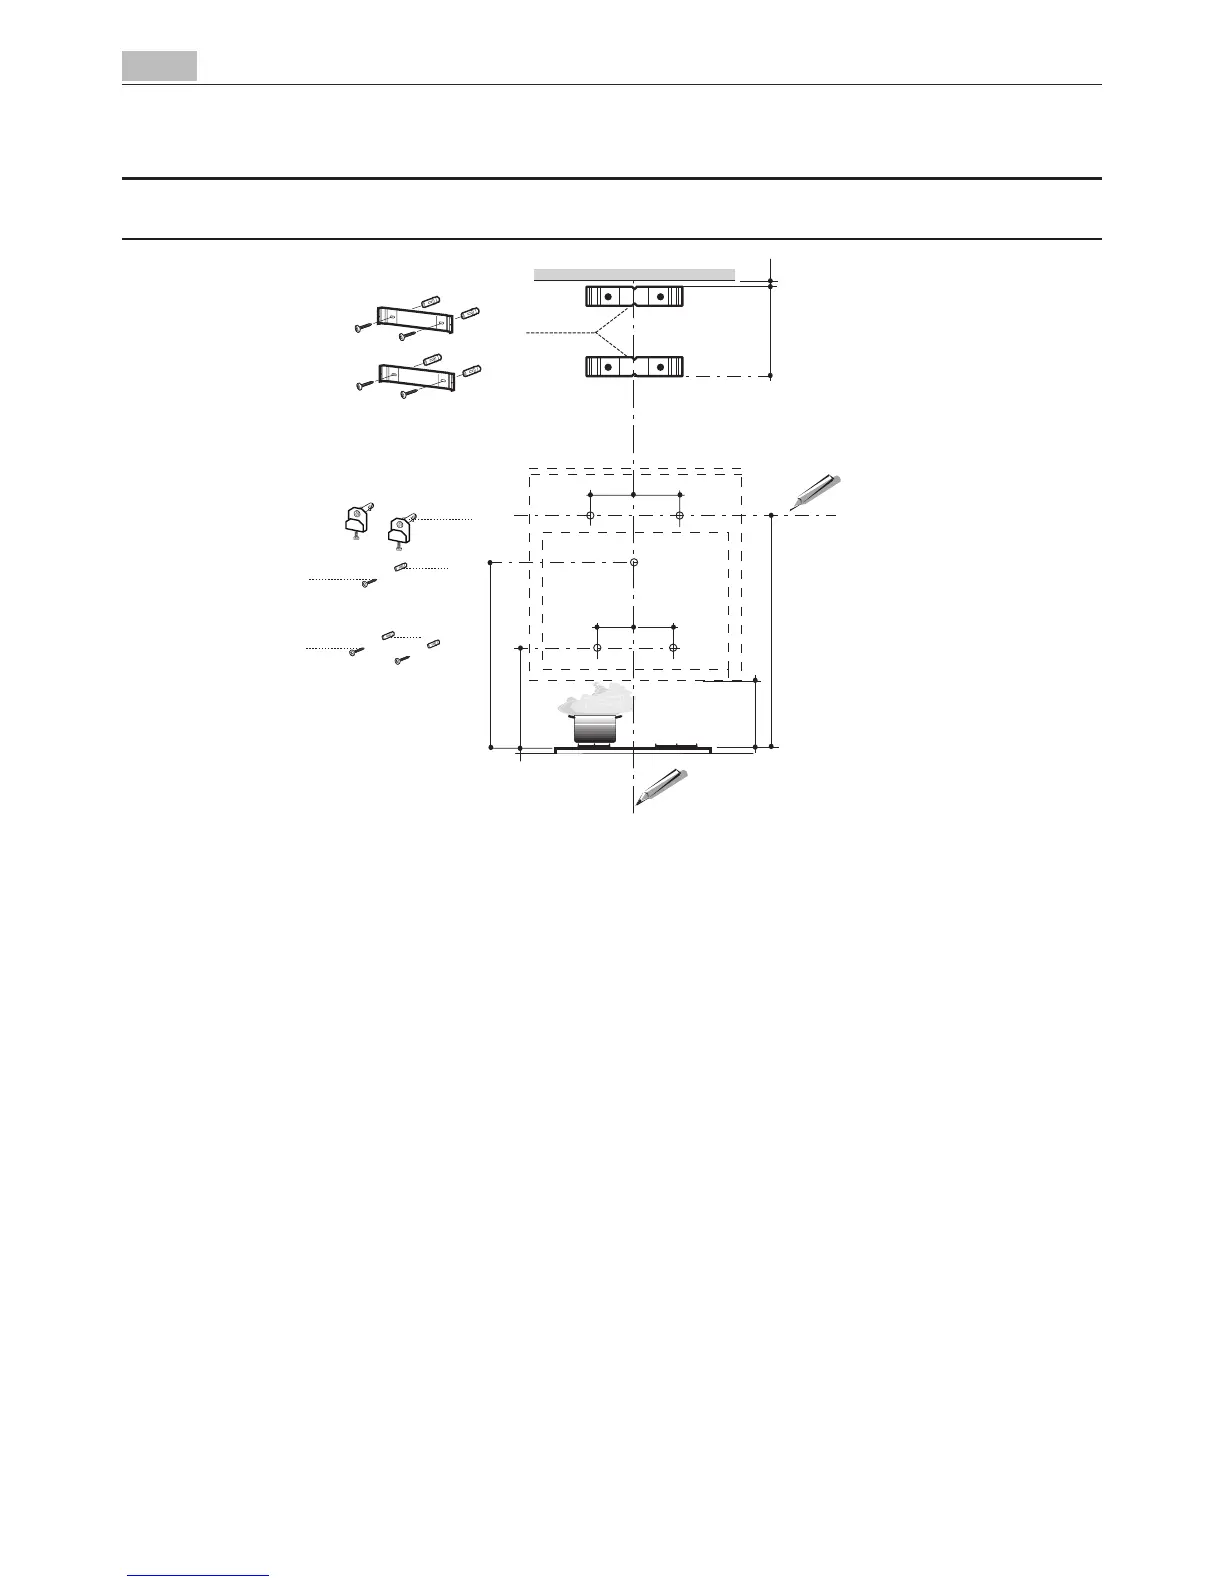
Wall drilling and bracket fixing
As a first step, proceed with the following drawings:
• averticallineuptotheceilingoruptotheupperlimit,atthecentreoftheareainwhichthe
hoodistobefitted;
• ahorizontallineataminimum960mmabovethecookertop.
• Markapoint (1) onthehorizontalline,292mmtotherightoftheverticalreferenceline.
• Repeatthisoperationontheotherside,checkingthatthetwomarksarelevelled.
• Markareferencepoint (2) as indicated at 200 mm from the vertical reference line and 458
mm above the cooker top.
• Repeatthisoperationontheotherside,checkingthatthetwomarksarelevelled.
• Markareferencepoint (3) at 743 mm above the cooker top on the vertical reference line.
• Drillatthemarkedpoints(1),usingaø12mmdrillbit.
• Drillatthemarkedpoints (2) and(3),usingaø8mmdrillbit.
• Insertthebracketplugs 11a into the holes (1) and tighten the screws.
• Insertplug 11 into holes (2) and (3).
• Placebracket 7.2.1 on the wall, about 1-2 mm from the ceiling or from the upper limit,
aligning the centre (notch) with the vertical reference line.
• Markthewallatthecentresofthebracketholes.
• Placethebracket 7.2.1 on the wall at X mm below the first bracket (X = height of the upper
chimney section), aligning the centre (notch) with the vertical line.
• Markthewallatthecentresofthebracketholes.
• Drillø8mmholesatallthemarkedcentrepoints.
• Insertthewallplugs 11 in the holes.
• Fixthebracketsusingthe 12a screws (4,2 x 44,4) supplied with the hood.