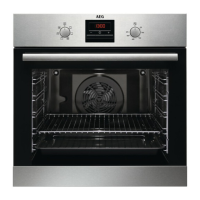
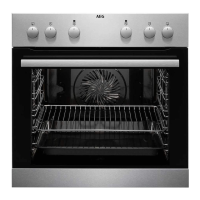
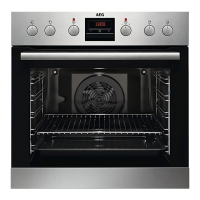
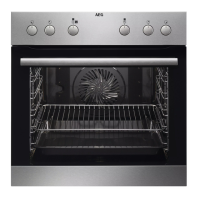
This document is a user manual for the AEG EB30M / BES33101ZM oven.
Function Description
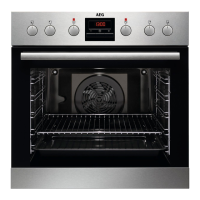
The AEG EB30M / BES33101ZM is a built-in electric oven designed for cooking purposes in single household domestic environments. It features various heating functions, including:
- Conventional Cooking: For baking and roasting food on one shelf position.
- True Fan Cooking: Ideal for baking on up to three shelf positions simultaneously and for drying food. It recommends setting the temperature 20-40 °C lower than for Conventional Cooking.
- Moist Fan Baking: A function designed to save energy during cooking. The temperature in the cavity may differ from the set temperature, and heating power may be reduced. This function complies with energy efficiency and ecodesign requirements (EU 65/2014 and EU 66/2014).
- Fast Grilling: For grilling thin pieces of food in large quantities and toasting bread.
- Pizza Function: For baking pizza, achieving intensive browning and a crispy bottom.
- Defrost: To defrost food such as vegetables and fruit, with defrosting time dependent on the amount and size of the frozen food.
- Grill: For grilling thin pieces of food and toasting bread.
The oven is equipped with a cooling fan that automatically turns on during operation to keep the appliance surfaces cool and continues to operate until the appliance cools down after being turned off. A safety thermostat is included to prevent dangerous overheating by interrupting the power supply and automatically restarting when the temperature drops.
Important Technical Specifications
- Model Identification: EB30M 949496322, BES33101ZM 949496154, 949496316
- Energy Efficiency Index: 95.3
- Energy Efficiency Class: A
- Energy Consumption (Conventional Mode): 0.93 kWh/cycle
- Energy Consumption (Fan-Forced Mode): 0.81 kWh/cycle
- Number of Cavities: 1
- Heat Source: Electricity
- Volume: 72 L
- Type of Oven: Built-In Oven
- Mass: BES33101ZM: 26.7 kg, EB300M: 30.0 kg
- Cabinet Minimum Height: 590 (600) mm
- Cabinet Width: 560 mm
- Cabinet Depth: 550 (550) mm
- Appliance Front Height: 594 mm
- Appliance Back Height: 576 mm
- Appliance Front Width: 595 mm
- Appliance Back Width: 559 mm
- Appliance Depth: 569 mm
- Built-in Depth: 548 mm
- Depth with Open Door: 1022 mm
- Ventilation Opening Minimum Size (Bottom Rear): 560x20 mm
- Mains Supply Cable Length: 1500 mm (cable placed in the right corner of the back side)
- Mounting Screws: 4x25 mm
- Electrical Connection: Requires a qualified electrician for installation and earthing. Compatible with H07 RN-F, H05RN-F, H05 RRF, H05VV-F, H05 V2V2-F (T90), H05 BB-F cable types. The earth cord must be 2 cm longer than phase and neutral cables.
- Internal Lighting: Contains a light source of energy efficiency class G. Uses 300 °C heat-resistant lamps.
Usage Features
The oven features a user-friendly control panel with retractable knobs for heating functions and temperature selection. The display shows clock functions and a timer.
Before First Use:
- Set the clock using the
+ and - buttons.
- Clean the oven: Remove all accessories and shelf supports, then clean the oven and accessories with a microfibre cloth, warm water, and mild detergent.
- Preheat the empty oven: Set to maximum temperature for 1 hour (for a specific function), then 15 minutes (for another specific function), and finally 15 minutes (for a third specific function). Ensure the room is ventilated during preheating as the oven may emit odor and smoke.
Daily Use:
- To set a heating function, turn the knob for heating functions, then turn the control knob to select the temperature.
- The oven has five shelf positions, counted from the bottom.
- Clock Functions:
- Time of Day: To set, change, or check the current time.
- Duration: To set how long the oven works, automatically turning off when the set time ends.
- Minute Minder: To set a countdown timer that does not affect oven operation.
- Accessories: Includes a wire shelf (for cookware, cake tins, roasts) and a combi pan (for cakes, biscuits, baking, roasting, or collecting fat). The accessories have small indentations for increased safety and anti-tip devices. The high rim on the wire shelf prevents cookware from slipping.
- Moist Fan Baking Tips: For best results, use dark and non-reflective tins and containers as they have better heat absorption. Recommended accessories include pizza pans (dark, non-reflective, 28 cm diameter), baking dishes (dark, non-reflective, 26 cm diameter), ramekins (ceramic, 8 cm diameter, 5 cm height), and flan base tins (dark, non-reflective, 28 cm diameter). The oven door should remain closed during cooking with this function to maintain energy efficiency.
- Energy Saving Tips:
- Keep the appliance door closed during operation and avoid opening it too often.
- Ensure the door gasket is clean and properly fixed.
- Use metal cookware.
- Avoid preheating when possible.
- Minimize breaks between baking multiple dishes.
- Use fan-assisted cooking functions.
- Utilize residual heat by reducing temperature 3-10 minutes before the end of cooking for durations longer than 30 minutes, or to keep food warm at the lowest possible temperature.
Maintenance Features
- Cleaning Agents: Clean the appliance front with a microfibre cloth, warm water, and mild detergent. Use a cleaning solution for metal surfaces and a mild detergent for stains.
- Everyday Use Cleaning: Clean the cavity after each use to prevent fat accumulation. Dry the cavity with a microfibre cloth after use.
- Accessories Cleaning: Clean all accessories after each use with a microfibre cloth, warm water, and mild detergent. Do not clean non-stick accessories with abrasive cleaner or sharp-edged objects, and do not put accessories in a dishwasher.
- Removing Shelf Supports:
- Turn off the oven and wait until it is cold.
- Pull the front of the shelf support away from the side wall.
- Pull the rear end of the shelf support away from the side wall and remove it.
- Install in the opposite sequence.
- Removing and Installing the Door:
- Open the door fully and hold both hinges.
- Lift and pull the latches until they click.
- Close the door halfway, then lift and pull to remove it from its seat.
- Place the door on a soft cloth.
- Hold the door trim (B) at the top edge, push inwards to release the clip seal.
- Pull the door trim to the front to remove it.
- Hold the door glass panel by its top edge and carefully pull it out.
- Clean glass panels with water and soap, then dry carefully. Do not clean in a dishwasher.
- Install the glass panel and oven door, ensuring the screen-printing zone faces the inner side of the door and the door trim clicks.
- Replacing the Lamp:
- Turn off the oven and wait until it is cold.
- Disconnect the oven from the mains.
- Place a cloth on the bottom of the cavity.
- Turn the glass cover to remove it.
- Clean the glass cover.
- Replace the lamp with a suitable 300 °C heat-resistant lamp.
- Install the glass cover. Always handle halogen lamps with a cloth to prevent grease residue from burning on the lamp.