CAUTION!
It is important to install the
elbow correctly, with the
shoulder on the end of the
thread, fitted to the hob
connecting pipe.
CAUTION!
Failure to ensure the correct
assembly will cause leakage
of gas.
CAUTION!
Make sure that the gas
supply pressure of the
appliance obeys the
recommended values.
Rigid connection:
Carry out connection by using metal rigid
pipes (copper with mechanical end).
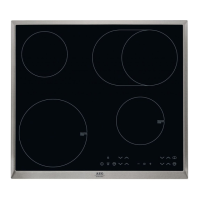
3.5 Injectors replacement
1. Remove the pan supports.
2. Remove the caps and crowns of the
burner.
3. With a socket spanner 7 remove the
injectors and replace them with the
ones which are necessary for the
type of gas you use (see table in
"Technical Data" chapter).
4. Assemble the parts, follow the same
procedure backwards.
5. Attach the label with the new type of
gas supply near the gas supply pipe.
You can find this label in the package
supplied with the appliance.
If the supply gas pressure is changeable
or different from the necessary pressure,
you must fit an applicable pressure
adjuster on the gas supply pipe.
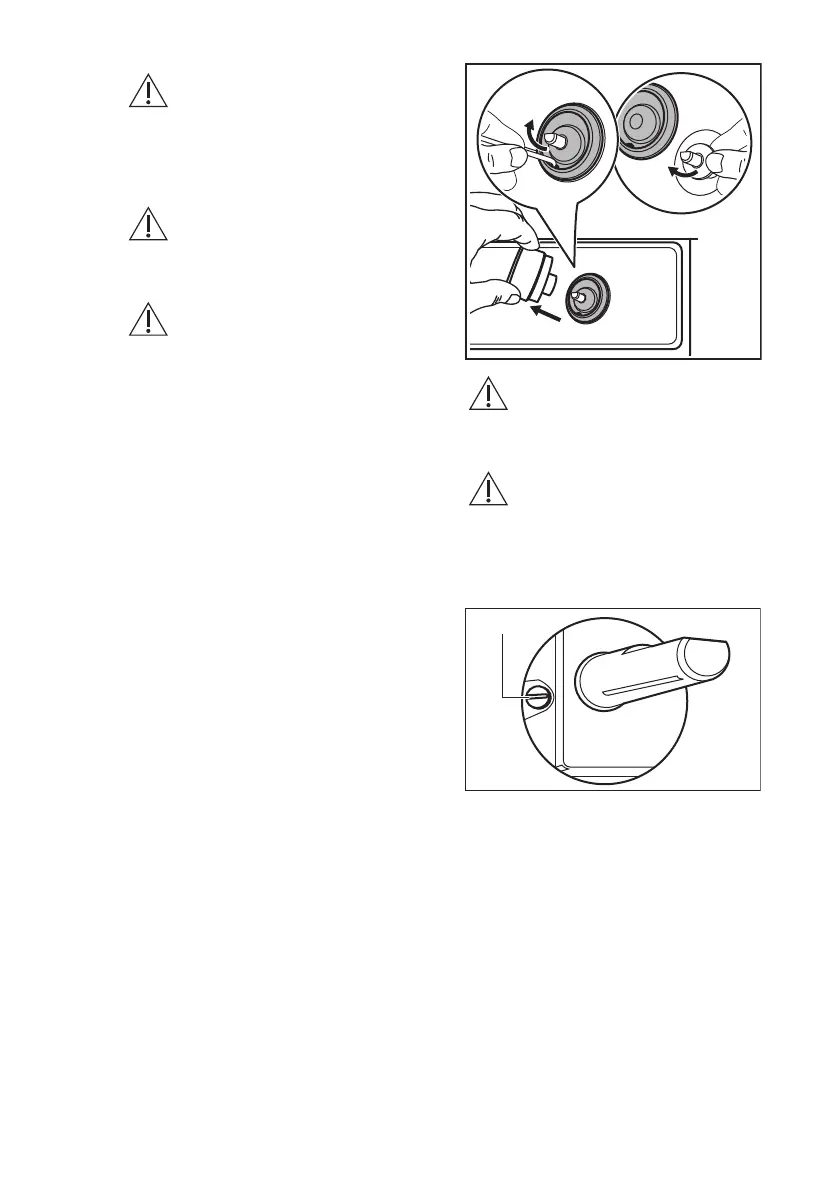
3.6 Adjustment of minimum
level
To adjust the minimum level of the
burners:
1. Light the burner.
2. Turn the knob on the minimum
position.
3. Remove the knob, the gasket and the
washer.
WARNING!
Pay attention not to damage
the gasket. Do not use sharp
tool to remove it.
WARNING!
Do not use the hob surface
to leverage the gasket. This
can cause damage to the
glass.
4. With a thin screwdriver, adjust the
bypass screw position (A).
5. If you change:
• from natural gas G20 20 mbar to
liquid gas, fully tighten the bypass
screw in.
• from liquid gas to natural gas G20
20 mbar, undo the bypass screw
approximately 1/4 of a turn.
6. Reassemble the washer, the gasket
and the knob.
www.aeg.com10
 Loading...