This document is a user manual for an AEG hob, specifically models HKB64540NB and HKB64NB540. It provides comprehensive instructions for installation, safe operation, daily use, maintenance, and troubleshooting, ensuring users can achieve optimal performance and longevity from their appliance.
Function Description
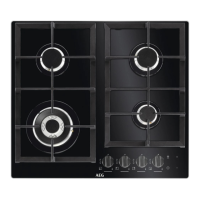
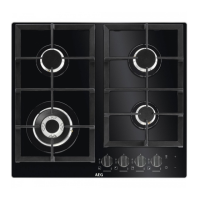
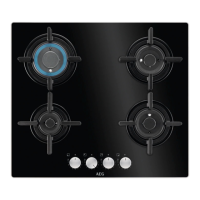
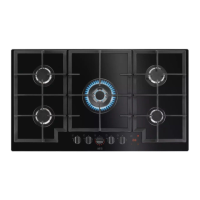
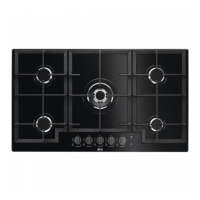
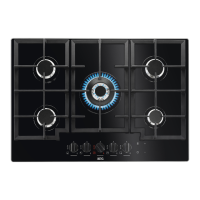
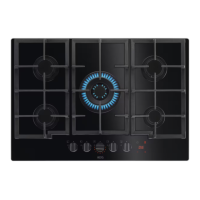
The AEG hob is a cooking appliance designed for household use, featuring multiple gas burners for various cooking needs. It includes a control panel with sensor fields for operating functions like the Minute Minder and Hob²Hood, and control knobs for adjusting gas supply to each burner. The hob is equipped with progressive valves for precise flame regulation and a thermocouple safety device that interrupts gas supply if the flame goes out.
Usage Features
The hob offers several features to enhance the cooking experience:
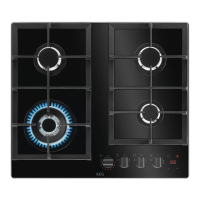
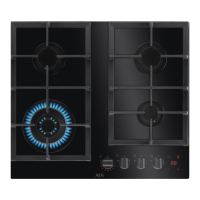
- Burner Operation: To light a burner, push the control knob down and turn it counterclockwise to the maximum gas supply position. Hold the knob for up to 10 seconds to allow the thermocouple to warm up, ensuring the gas supply remains open. Once the flame is regular, adjust it as needed. If the burner doesn't light after a few tries, check the crown and cap positions. If it doesn't light within 15 seconds, release the knob, turn it off, and try again after one minute. In case of a power outage, burners can be ignited manually with a flame. Each control knob has a pilot light that illuminates when turned.
- Flame Regulation: The progressive valves allow for precise control over the flame intensity, from maximum to minimum. Ensure the flame does not go out when quickly turning the knob to the minimum position.
- Cookware Usage: Use stable cookware with a diameter larger than the burner dimensions, centered on the burner for maximum stability and lower gas consumption. Avoid using cast iron, clay, earthenware pots, grills, or toaster plates. Do not place the same pan on two burners or unstable/damaged pots, which could cause spills or injuries. Ensure pot handles are not above the front edge of the cooktop and that pot bottoms do not stand too close to the control knobs, as this can cause the knobs to heat up.
- Minute Minder: This function can be used as a standalone timer, even when the appliance is off. To activate, touch the designated sensor field, then use the +/- fields to set the time (00-99 minutes). The timer counts down, and in the last minute, it decreases in seconds, emitting a sound signal in the final 10 seconds. When the time ends, "00" flashes, and a sound operates. To stop the sound, touch +/-. To stop the timer, touch the timer sensor field longer.
- Hob²Hood Function: This advanced automatic function connects the hob to a special hood via infrared signals, allowing the hob to control the hood's fan and light. The fan can also be operated manually from the hob. For most hoods, the remote system is initially deactivated and needs to be activated according to the hood's user manual. The hob's control panel should not be covered, and the signal between the hob and hood should not be interrupted (e.g., by a hand or cookware handle). The Hob²Hood infrared signal communicator window must be kept clean. After cooking, the hood does not turn off automatically and must be turned off manually. Other remotely controlled appliances may block the signal, so avoid using them simultaneously.
Maintenance Features
Regular care and cleaning are essential for maintaining the hob's appearance and performance:
- General Cleaning: Clean the hob after each use. Always use cookware with a clean base. Scratches or dark stains on the surface do not affect hob operation. Use a special cleaner suitable for the hob's surface. Water or other liquids on the control panel can accidentally activate or deactivate functions. Do not use knives, scrapers, or similar instruments to clean the glass surface, burner rims, or frame. Wash stainless steel parts with water and dry with a soft cloth.
- Burner Cleaning: The enamel coating on pan supports can have rough edges, so handle them carefully when washing by hand. Remove stubborn stains with a paste cleaner. Do not clean burners in the dishwasher.
- Pan Supports: Pan supports are not dishwasher-safe and must be washed by hand. They can be removed for easier cleaning by lifting them horizontally from the metal pins on the rear side of the hob. Be careful not to lift them at an angle to avoid damaging the metal pins. When replacing pan supports, ensure they are correctly positioned and aligned with the center of the burner for proper operation.
- Hob Surface: Immediately remove melted plastic, plastic foil, sugar, and sugary foods when spilled, as they can cause damage. Remove limescale rings, water rings, fat stains, and shiny metallic discoloration when the hob is sufficiently cool. Clean the hob with a moist cloth and a non-abrasive detergent, then wipe dry with a soft cloth.
- Enamelled Parts, Caps, and Crowns: Wash these with warm soapy water and dry them carefully before reassembling.
- Spark Plug: Keep the ceramic ignition candle with its metal electrode clean to prevent difficult lighting. Ensure burner crown holes are not obstructed.
- Periodic Maintenance: Periodically contact an Authorized Service Centre to check the gas supply pipe and pressure adjuster, if fitted.