This document is the user manual for the AEG HKB75540NB hob, a gas cooking appliance. It provides comprehensive information on safety, installation, operation, maintenance, and technical specifications.
Function Description
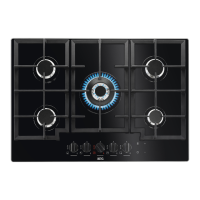
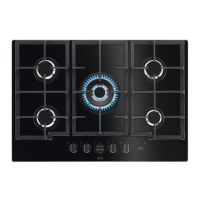
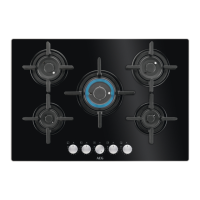
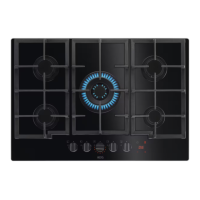
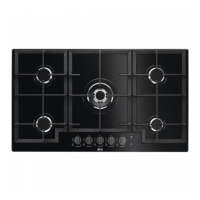
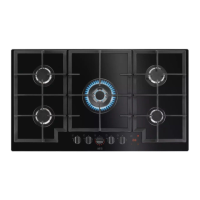
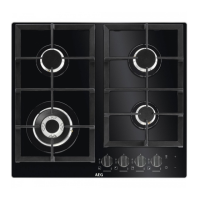
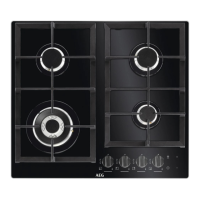
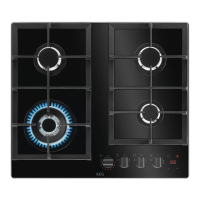
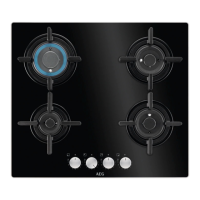
The AEG HKB75540NB is a gas hob designed for domestic cooking. It features multiple burners with varying power levels to accommodate different cooking needs. A key feature is the "Hob²Hood" function, which allows the hob to connect to a special hood via an infrared signal communicator, enabling manual control of the hood's fan speed directly from the hob. The appliance also includes a Minute Minder function for timing cooking processes.
Important Technical Specifications
- Model: HKB75540NB
- Hob Dimensions:
- Width: 740 mm
- Depth: 510 mm
- Burner Types: Multi Crown, Semi-rapid, Auxiliary
- Bypass Diameters (1/100 mm):
- Multi Crown: 57
- Semi-rapid: 35
- Auxiliary: 28
- Gas Burners for NATURAL GAS G20 20 mbar:
- Multi Crown: Normal Power 3.9 kW, Minimum Power 1.4 kW, Injector Mark 146
- Semi-rapid: Normal Power 2.0 kW, Minimum Power 0.6 kW, Injector Mark 96x
- Auxiliary: Normal Power 1.0 kW, Minimum Power 0.33 kW, Injector Mark 70
- Gas Burners for LPG G30/G31 30/30 mbar:
- Multi Crown: Normal Power 3.55 kW, Minimum Power 1.4 kW, Injector Mark 095, Nominal Gas Flow 258 g/h
- Semi-rapid: Normal Power 1.9 kW, Minimum Power 0.6 kW, Injector Mark 71, Nominal Gas Flow 138 g/h
- Auxiliary: Normal Power 1.0 kW, Minimum Power 0.33 kW, Injector Mark 50, Nominal Gas Flow 73 g/h
- Total Power:
- Gas original (G20 2H 20 mbar): 10.9 kW
- Gas replacement (G30/G31 3B/P 30/30 mbar): 745 g/h
- Electric Supply: 220-240 V ~ 50-60 Hz
- Appliance Category: II2H3B/P, II2H3+, I3B/P
- Gas Connection: R 1/2"
- Appliance Class: 3
Usage Features
- Control Panel Layout: The hob features a control panel with sensor fields for the Minute Minder and Hob²Hood functions, along with a timer display and controls for increasing/decreasing time.
- Control Knobs: Each burner has a control knob with positions for no gas supply/off, ignition/maximum gas supply, and minimum gas supply. These progressive valves allow for precise flame regulation.
- Burner Ignition: To ignite a burner, push the control knob down and turn it counterclockwise to the maximum gas supply position. Keep it pushed for up to 10 seconds to allow the thermocouple to warm up. If the burner doesn't light after 15 seconds, release the knob, turn it off, and try again after one minute. In case of electricity absence, burners can be ignited manually with a flame.
- Turning Burner Off: To extinguish the flame, turn the knob to the off position.
- Residual Heat Indicator: The hob includes a residual heat indicator that lights up when a burner is turned off, indicating that the surface is still hot.
- Minute Minder: This function can be activated by touching the timer symbol and setting the desired time (00-99 minutes) using the +/- controls. An audible signal and flashing "00" indicate the end of the set time. The Minute Minder can be used even when the appliance is off and does not affect burner operation.
- Hob²Hood Function: This manual function connects the hob to a compatible hood via infrared. The hob's control panel allows setting the fan speed to Level 1 (H1), Level 2 (H2), or Level 3 (H3). The function can be activated/deactivated manually. Users are advised to refer to the hood's user manual for activation and proper use.
- Cookware Recommendations: Use stable cookware with the correct shape and diameter, larger than the burner dimensions, and centrally positioned. Avoid using cast iron, clay, earthenware, grill, or toaster plates. Do not place unstable or damaged pots on the burner. Ensure pot bottoms do not heat the control knobs. Always use lids to save energy and turn down the flame once liquid boils.
Maintenance Features
- General Cleaning: Clean the hob after each use with a moist soft cloth and neutral detergents. Avoid abrasive products, solvents, metal objects, steam cleaners, or water spray.
- Immediate Cleaning: Immediately remove melted plastic, foil, sugar, or sugary food to prevent damage.
- Cool Cleaning: Once sufficiently cool, remove limescale rings, water rings, fat stains, and shiny metallic discoloration with a moist cloth and non-abrasive detergent.
- Enamelled Parts, Caps, and Crowns: Wash with warm soapy water and dry carefully before reassembling. Do not clean burners in the dishwasher.
- Pan Supports: These are not dishwasher-safe and must be washed by hand. Remove them carefully by lifting horizontally to avoid damaging the metal pins. Ensure they are correctly positioned after cleaning, with arms aligned with the burner center.
- Spark Plug Cleaning: Keep the ceramic ignition candle and metal electrode clean to ensure easy lighting and check that burner crown holes are not obstructed.
- Periodic Maintenance: Periodically contact an Authorised Service Centre to check the gas supply pipe and pressure adjuster.
- Troubleshooting: The manual provides a troubleshooting guide for common issues such as no spark, flame extinguishing after ignition, uneven flame ring, reduced control panel brightness, and issues with Hob²Hood or Minute Minder functions, along with possible causes and remedies.
- Warranty Conditions: The appliance comes with a 36-month warranty for domestic use, covering defective material or faulty manufacture. Installation and service must be carried out by certified electricians or Electrolux authorised service agents using genuine parts. The warranty does not cover damage from electricity fluctuations, faulty installations, improper use, or wear and tear parts after six months.