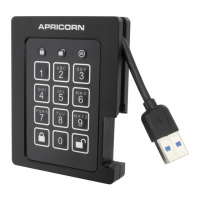
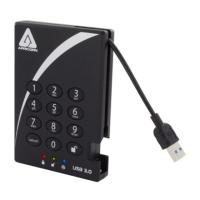
Aegis Padlock SSD
3
1
2
UNLOCK button
LED Indicator lights
LOCK button
When you rst plug in the Aegis Padlock SSD,
the unit will do a self-test to verify all security
components are working properly. The LEDs will
go through 3 test stages: RED, GREEN, and
BLUE. This will be followed by three GREEN
blinks indicating all components are functioning
properly. A test failure will leave the unit in an
inoperable state indicated by a blinking RED LED.
First Time Use
Before the Padlock SSD can be used, the Admin PIN MUST be set. The LEDs will glow
Solid BLUE and Solid GREEN to indicate the Padlock SSD is waiting for an Admin PIN to
be set.
To Set-up the Admin PIN:
1. Press
+ 9 simultaneously. The LEDs will be Constant BLUE / Blinking GREEN.
2. Enter the new Admin PIN and press the
key. If accepted, the BLUE LED will turn
off, the GREEN LED will blink three times, and then will return to Solid BLUE and
Blinking GREEN.
3. Re-enter that Admin PIN and press the
key again. If accepted, the GREEN LED will
glow solidly for three seconds.
4. The BLUE LED will glow solidly indicating the drive is in Admin mode and will remain
that way for 30 seconds or until the
key is pressed, either of which will return the
drive to its standby (locked) state.
5. The Admin PIN is now set and will allow access to the drive or the Admin features.
6. To access the drive’s data using the Admin PIN, press the
button, then enter the
new Admin PIN and press .
Note:
PINs must be a minimum length of 7 maximum 16 digits.
Cannot contain all consecutive numbers (2345678 or 9876543)
Cannot contain all same number (1111111)
The SHIFT key can be used for additional combinations.
SHIFT + 1 are a separate value than just 1.
NOTE: if you are using the Aegis Congurator (sold separately) to set up your
Aegis Padlock SSD, First ensure that the device to be congured has the
“congurable” logo on the belly label. Also, DO NOT perform the following Manual
Admin and USER PIN SETUP steps below; The Aegis Congurator will only recognize
devices in their factory “out of box” state or devices that have been completely reset.
CONFIGURABLE
Quick Start Guide
2
3
1
1 2
ABC
3
DEF
4
GHI
5
JKL
6
MNO
7
PQRS
8
TUV
9
WXYZ
0