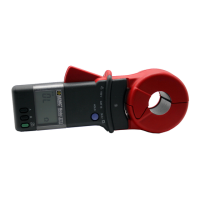
MODEL 3711/3731 SERVICE/CALIBRATION MANUAL Cat. #2117.60/2117.61
v3 – 03/02 - 8 -
Resistance Measurement:
Mode Press the ohm key pad
Check R< 0.1Ω Measure 0.08Ω Display 0.08 ± 1 ct and symbol R< 0.1Ω
Beginning of the scale
Measure 1Ω
Display 1.0 ± 1 ct*
Beginning of the scale
Measure 20Ω
Display 20.0 ± 2 ct
Linearity check
Measure 40Ω
Display 40.0 ±- 6 cts
Linearity check
Measure 80Ω
Display 80.0 ± 15 cts
Gains check
Measure 120Ω
Display 120 ± 4 ct
Note error N1 (# of ct)
Gains check
Measure 150Ω
Display 150 ± 4 ct
Note error N2 (# of ct)
Gains check To verify proper linearity of the two ranges, be sure the
difference between the above error values (N1-N2) is
less than 2 counts. If condition is not met, readjust the
end of the scale to balance the error. Adjust R040 to
read 500 Ω ± 40 cts.
End of scale
Measure 500Ω
Display 500 ± 40 cts
End of scale
Measure 1000Ω
Display 1000 ± 200 cts
Open jaw detection Open the jaw Display the symbol: "jaw open"
*including lead
FIELD CALIBRATION WITH THE CALIBRATION LOOP:
NOTE: If necessary, adjust the Ampere range as shown above.
Cal Loop Accuracy: 0.3% typical (± 0.5% max.) This loop does not allow calibration above 198Ω.
Test description Conditions Operation / Result
ON / OFF Press the ON/OFF key pad
Beginning of scale
adjustment
Insert the probe around 22Ω
loop Adjust R019 to display 22.0Ω ± 0.2 cts
End of scale adjustment
Insert the probe around 198Ω
loop Adjust R040 to display 198Ω ± 7 cts or
198 - 4Ω
Readjust 2 or 3 times until both readings are within specification
CALIBRATION VERIFICATION WITH THE CALIBRATION LOOP
Test description Conditions Operation / result
ON / OFF Press the ON/OFF key pad
Insert the probe to the 7.9Ω loop
Display 7.9 ± 0.3
Insert the probe to the 12.5Ω loop
Display 12.5 ± 0.4
Beginning of scale
Insert the probe to the 22Ω loop
Display 22.0 ± 0.2
Insert the probe to the 49.5Ω loop
Display 49.5 (+ 1.5 / -1.1)
End of scale
Insert the probe to the 198Ω loop
Display 198 (+ 7 / -4)

 Loading...