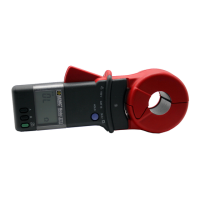
MODEL 3711/3731 SERVICE/CALIBRATION MANUAL Cat. #2117.60/2117.61
v3 – 03/02 - 7 -
CALIBRATION PROCEDURE
Note: The ground tester can be calibrated for resistance measurement values only if necessary.
However, if the current calibration is required, it is imperative to readjust the ohms range.
LAB CALIBRATION:
Test Description Conditions Operation / Result
ON / OFF Press the ON/OFF key pad
Current Measurement:
Select Ampere Press the A key pad
Zero check No current through the jaws Check the probe display 0A + 2 cts.
Adjustment Supply 1.40A, 60Hz
Wait until the reading stabilizes and adjust R073
to read 1.400A on the display ± 3 ct
Resistance Measurement:
Select the ohm range
Press the Ω key pad
Beginning of scale
adjustment
Measure 20Ω Adjust R019 to read 20.0Ω / -1 ct on the display
End of scale adjustment
Measure 500Ω Adjust R040 to read 500Ω ± 20 ct on the display
Readjust the preceding steps 2 to 3 times or until both readings are within specification
Middle of scale check
Measure 120Ω
Check the display is 120 ± 4 cts.
Note the error value N1 (# of cts)
Middle of scale check
Measure 150Ω
Check the display is 150 ± 4 cts.
Note the error value N2 (# of cts)
Control Gain Accuracy
To verify proper linearity of the two ranges, be
sure the difference between the above error
values (N1-N2) is less than 2 cts. If this condition
is not met, readjust the end of scale to balance
the error. Adjust R040 to read 500Ω ± 40 cts.
CALIBRATION VERIFICATION
After calibration adjustment procedure is complete, verify the following conditions:
Test Description Conditions Operation / Results
ON / OFF Press the ON/OFF key pad
Current Measurement:
Ampere range Press the A key pad
Zero check No current Display 0A + 2 cts / - 0 cts
End of scale 3 - 30A Measure 25A Display 25.00A ± 60 cts
Beginning of scale 3 -30A Measure 5A Display 5.00A ± 12 cts
Range 300mA - 3A Measure 1.4A Display 1.400A ± 35 cts
Range 0 - 300mA Measure 200mA Display 200mA ± 5 cts

 Loading...