HE-110 1B+ II Water Wizard Water Heaters
OMM-0063_0D Installation, Operation & Maintenance Manual
Page 12 of 50 11/28/2018
AERCO International, Inc. • 100 Oritani Dr. • Blauvelt, New York 10913
•
CHAPTER 3. INSTALLATION
3.1. INSTALLING THE WATER WIZARD
To install the Water Wizard SW1B+II water Heater, follow the steps below:
Installing the Water Wizard Heater Instructions
1) Dimensions for three versions of AERCO Model SW1B+II are shown in Figures 1a, 1b, and
1c.
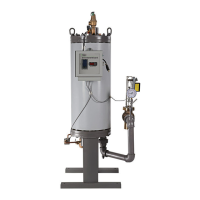
2) Uncrate the Heater carefully. Set the Heater upright by using a block and tackle or hoist
attached to the lifting lug on the top of the Heater (the eye-bolts shown in Figure 15). Always
use the lifting lugs to lift and/or move the Heater.
3) If possible, for easy in-place maintenance, locate the Heater where there is at least 2 feet
clearance all around the Heater and where the head room clearance from the top of
dimension B in Figure 1 is at least equal to dimension A for the Heater Model, less 24
inches.
4) It is suggested that the Heater stand assembly be secured to the floor, however, any other
means for securing the Heater may be used. If piping is used to secure the Heater, the
piping must include ample provision for expansion.
5) Make all piping connections as instructed in Step 6 below and per the appropriate Figures
shown:
a) Single Heater – Figure 3
b) Parallel Heaters – Figure 4
c) Single Heater used with an Accumulator – Figure 5
d) Single Heater used with a Stratified Storage Tank – Figure 6
or with any specific piping diagram which may have been furnished by AERCO for this
installation.
6) For the best Heater performance, OBSERVE THE FOLLOWING VERY CAREFULLY in
making the piping installation:
a) Do not use cement or red lead in making up pipe joints
b) For Heater connection types, sizes, and exact locations, see Figure 1.
c) All piping to the Heater top head should be provide with unions or flanges which are
LOCATED BEYOND THE OUTSIDE DIAMETER OF THE HEATER HEAD to permit
removal of the head and shell for in-place maintenance.
d) Include all of the stop valves, check valves, steam traps, and other elements in the
piping as shown in Figure 3, 4, 5, or 6, or as separately specified by AERCO. Note
that the check valve shown at the Heater in the Condensate return line is furnished in
the piping package assembly by AERCO.
e) The Condensate return piping MUST be arranged to permit Condensate to drain
freely by gravity from the Heater Bottom Head. Failure to do so may result in
improper Heater operation and/or in damage to the Heater Steam/Condensate
system.
(Continued)