Hardware Reference Guide 13
MOUNTING AN AP110 OR AP120
Ceiling Mount
To mount an AP to a track in a dropped ceiling, use the appropriate track clip for the width of the ceiling
track. Two clips ship with the AP: one for 1" (2.54 cm) tracks and one for 1/2" (1.27 cm) tracks.
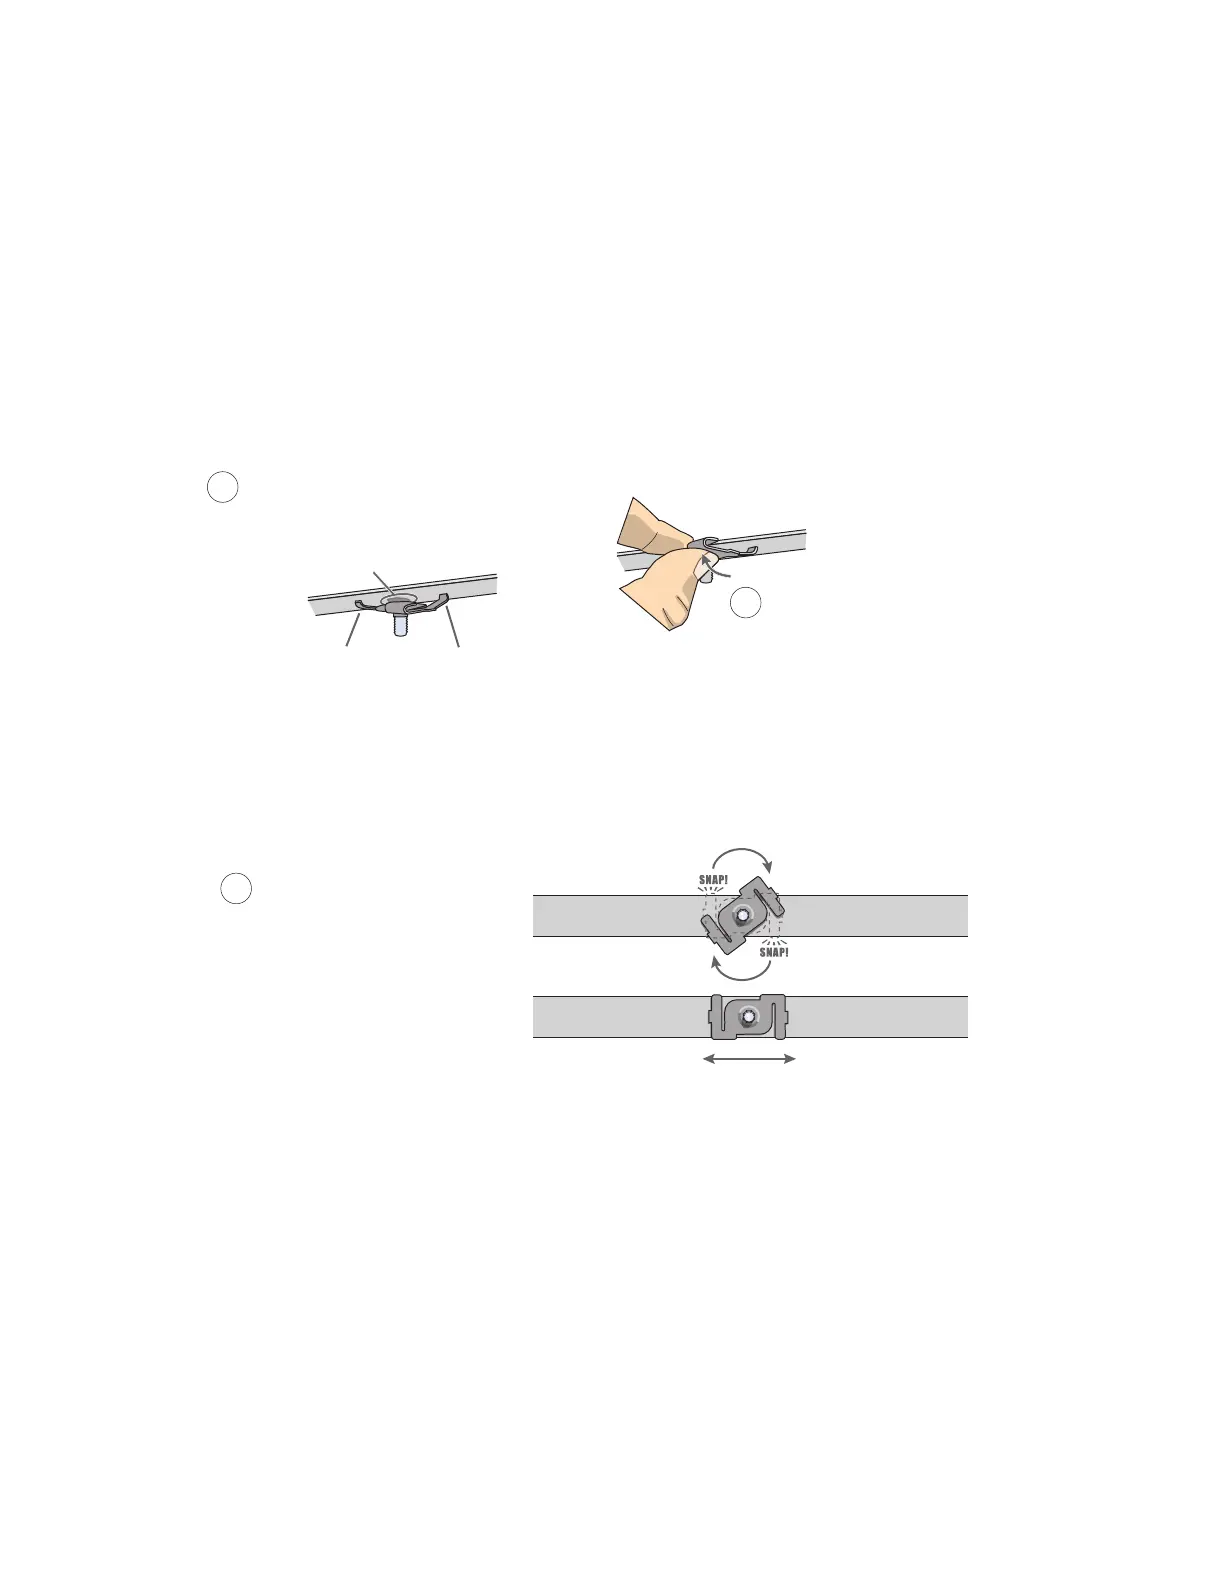
1. Nudge the ceiling tiles slightly away from the track to clear some space, and slide one tab of the track
clip over the edge of the track.
2. With the tips of the track clip prongs positioned against the middle of the track, press upward on the
other tab until it clears the track edge, as shown in Figure 4. Keeping the prongs away from the track
edges until both tabs grip the track ensures that the clip does not snap into place prematurely with only
one tab in position.
Figure 4 Attaching the track clip to the ceiling track
3. Twist the track clip until it snaps onto the ceiling track, as shown in Figure 5. You can then slide the clip
along the track to reposition it if necessary.
Figure 5 Securing the clip to the track and repositioning it if necessary
1
Position the clip so one tab is over
the edge of the ceiling track. (The
ceiling track is shown as transparent
to expose the tab above the track.)
The two prongs press upward against
the middle of the ceiling track.
2
Press the other tab upward,
flexing the prongs against
the track until the tab
clears the edge of the track.
Twist the clip until the prongs
snap into place and grip the
edges of the track.
If necessary, slide the clip
along the track to position it
exactly where you want it to be.
(Worm’s eye view with ceiling tiles removed for clarity)
3
 Loading...