Hardware Reference Guide 59
MOUNTING THE AP340
Suspended Mount
You can suspend the AP340 from a horizontal beam, post, strut, or girder. As well as the mounting plate, you
need a quad-toggle, a 1.5 mm (0.059 inch) wire rope with hook, and a locking device. ERICO
®
supplies
these items in its CADDY
®
SPEED LINK product line. The part number for the quad-toggle is SLD15QT250 and
that for the set that includes the wire rope, hook, and locking device is SLD15L2S. These items are available
through various suppliers.
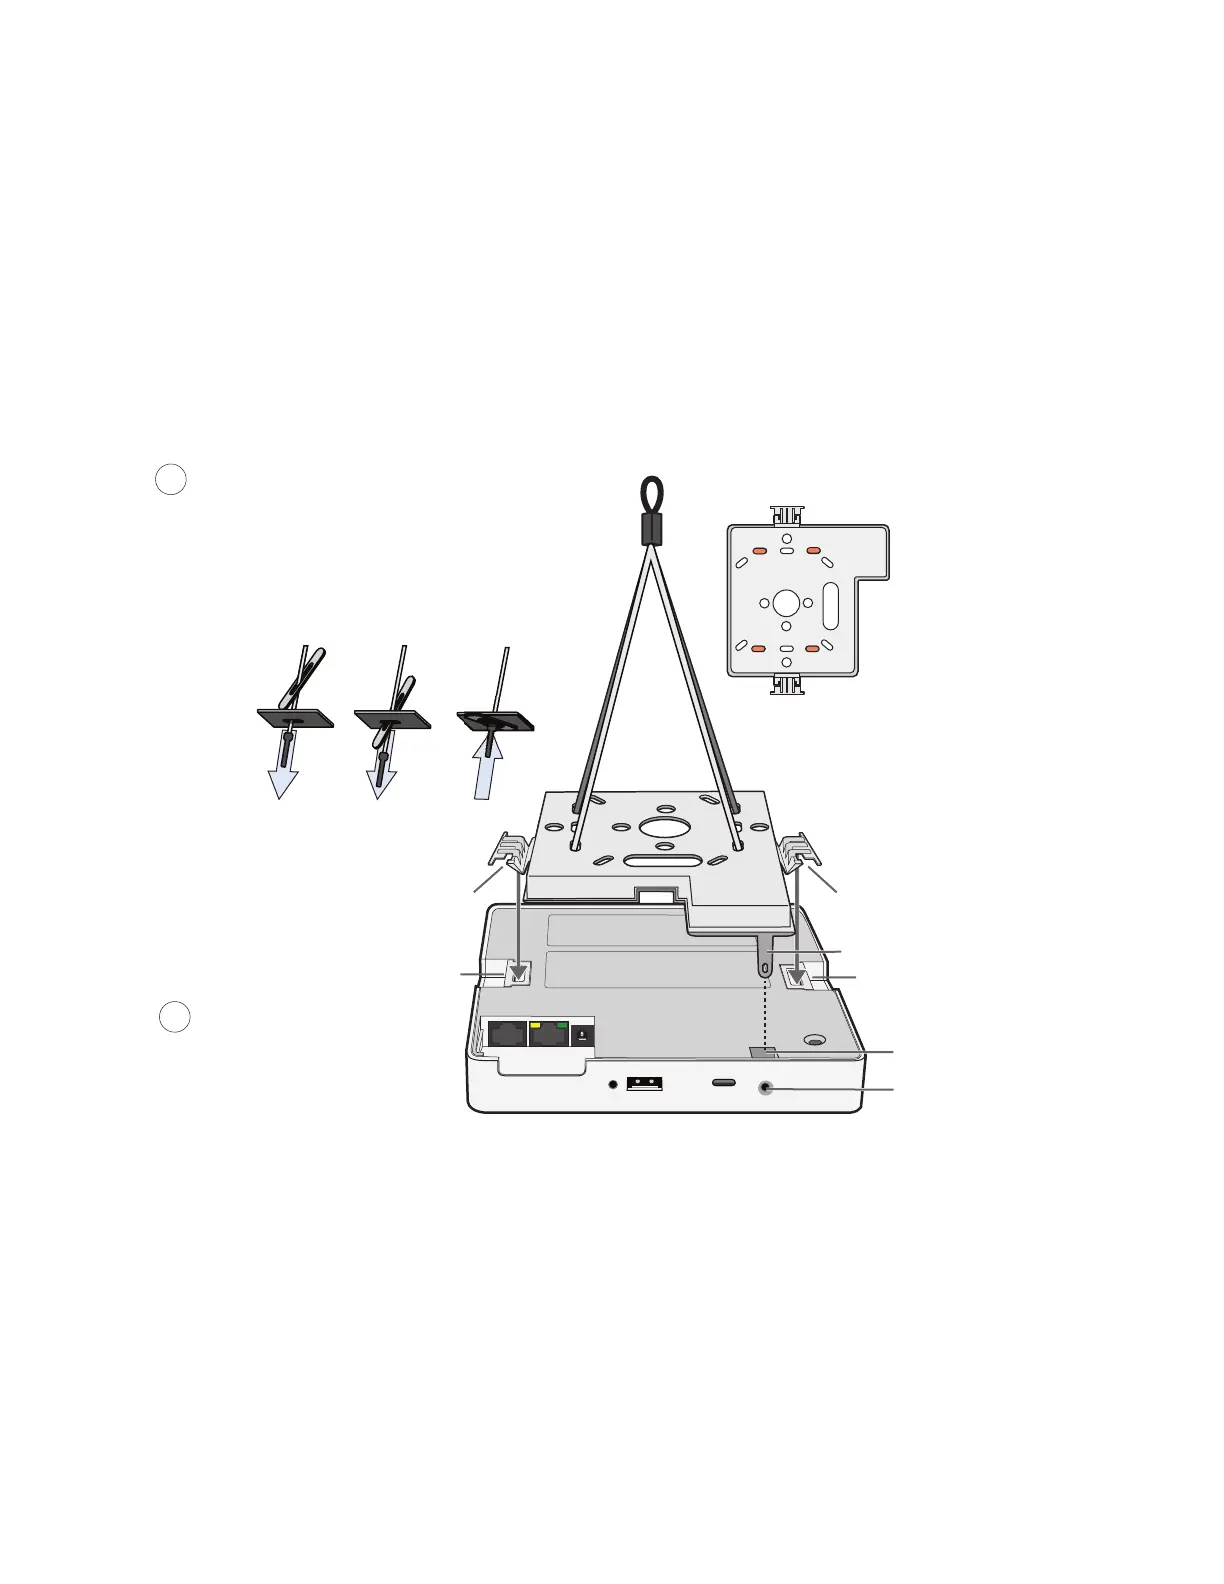
1. With the recessed side of the mounting plate facing downward, insert the four ends of the quad-toggle
through holes in the mounting plate.
2. Turn the AP340 face down and attach it to the mounting plate (see Figure 11).
Figure 11 Connecting the quad-toggle and AP340 to the mounting plate
3. Draw the wire rope over a support beam, fasten the hook around the wire, and pull the wire until the
hook is snug against the underside of the beam.
4. Push the end of the wire rope without the hook through the side hole in the locking device in the
direction indicated by the arrow on its side, and then pass it through the loop at the end of the
quad-toggle.
5. Insert the wire rope back through the center hole in the locking device, and pull it through the locking
device until the AP340 is suspended at the height you want (see Figure 12 on page 60).
The center tube that runs through the locking device is designed to allow you to pull the rope wire up
through it while preventing the rope from slipping back down. If you pull too much rope through and
need to pull it back down, use a tool such as a screwdriver to press against the inner tube in the locking
device to release the rope. Then you can pull it back out (see "Height Correction").
Tab slot
V-shaped tab
V-shaped tab
Tab slot
To secure the four strands to the mounting plate:
1. Insert the metal cleat at the end of a strand
through a hole in the plate.
2. Slide the oblong washer along the strand and
pass it through the hole.
3. Pull the strand upward to lock the cleat and
washer against the underside of the plate.
1
2
Mounting plate
The recommended holes
for the four strands
are shaded
Align the V-shaped tabs on
the mounting plate with the
tab slots on the bottom of
the device and push on the
tabs until they click into
place.
Security tab
Security tab cavity
Security screw hole
 Loading...