6
FILTER CHANGE INSTRUCTIONS continued...
2. Pre-filter Replacement At Least Every 12 Months
a. Slide the pre-filter out of the filter slot.
b. Slide the new pre-filter into the filter slot. Make sure it is pushed in fully.
c. Close the access panel by swinging it back up and pushing the sides over the unit walls. The access panel should
have a snug fit onto the unit. Re-install the screw and the thumbscrew knobs to secure the hinged panel back in place.
Thumbscrew knobs should be a snug and hand-tight fit, do not over tighten.
d. Turn power switch to the on ‘ I ‘ position.
e. Place old pre-filter in a plastic bag for disposal.
3. HEPA Filter Maintenance Each time you replace the Pre-Filter
a. When changing the pre-filter, the two (2) HEPA filters below should be vacuumed off.
b. Slide both filters out of the bottom filter slot and vacuum the front (carbon side) surface of the filters. Doing this
prolongs the lives of the filters.
c. After vacuuming both filters, slide them back inside their lower filter slot. Make sure they are fully inserted.
4. Replacing the HEPA Filters At Least Every 24 Months
a. Slide both HEPA filters out of the bottom filter slot.
b. Slide new filters into the filter slot, carbon side up. Make sure they are pushed in fully.
c. Close the access panel and re-install the screw and thumbscrew knobs to secure the panel back into place.
Thumbscrew knobs should be a snug and hand-tight fit, do not over tighten.
d. Turn power switch to the on ‘ I ‘ position.
e. Place old filters in a plastic bag for disposal.
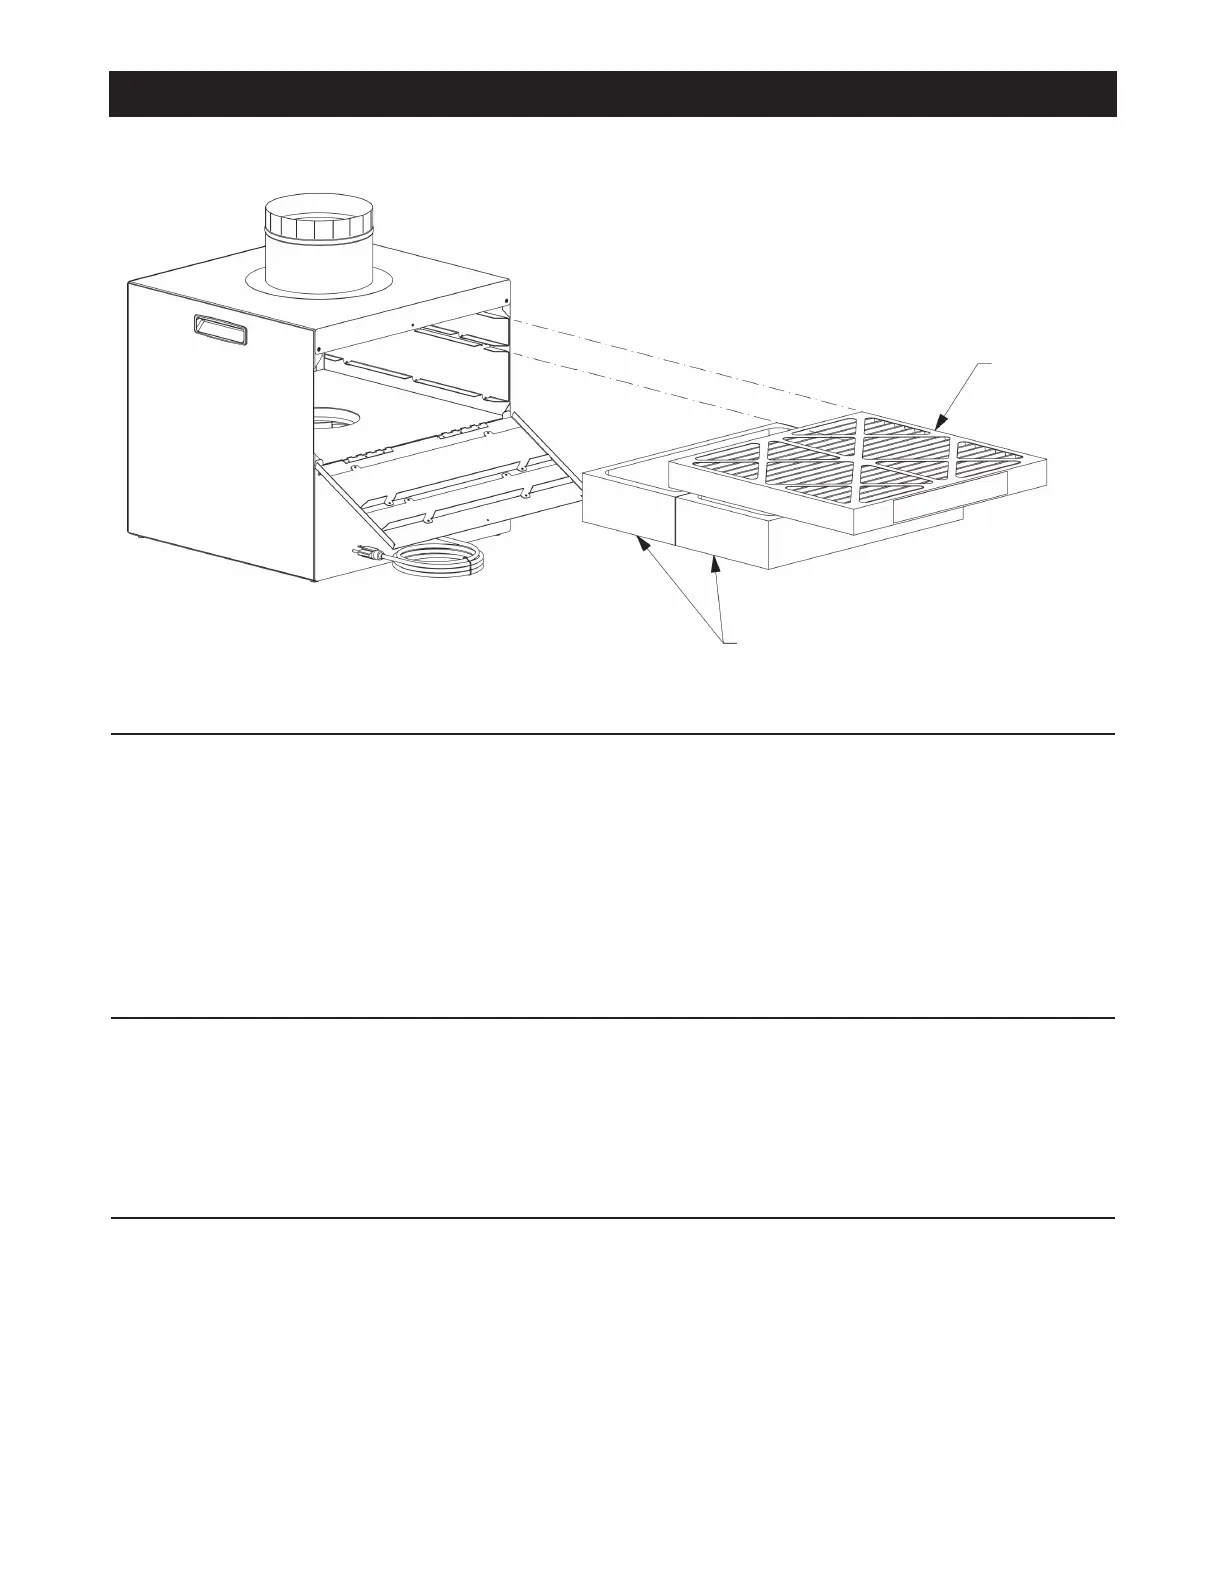
Slide Out Pre-filter
Slide Out 2 HEPA Filters
IMPORTANT NOTE: Our filters are sealed in protective
poly bags to ensure they are fresh and new when ready for
use. Be sure to open each filter bag and discard the plastic
coverings prior to installation. Do not operate the G4 without
removing the filters from their poly bags.