3.'Assembly'9'ConXnued'
P7
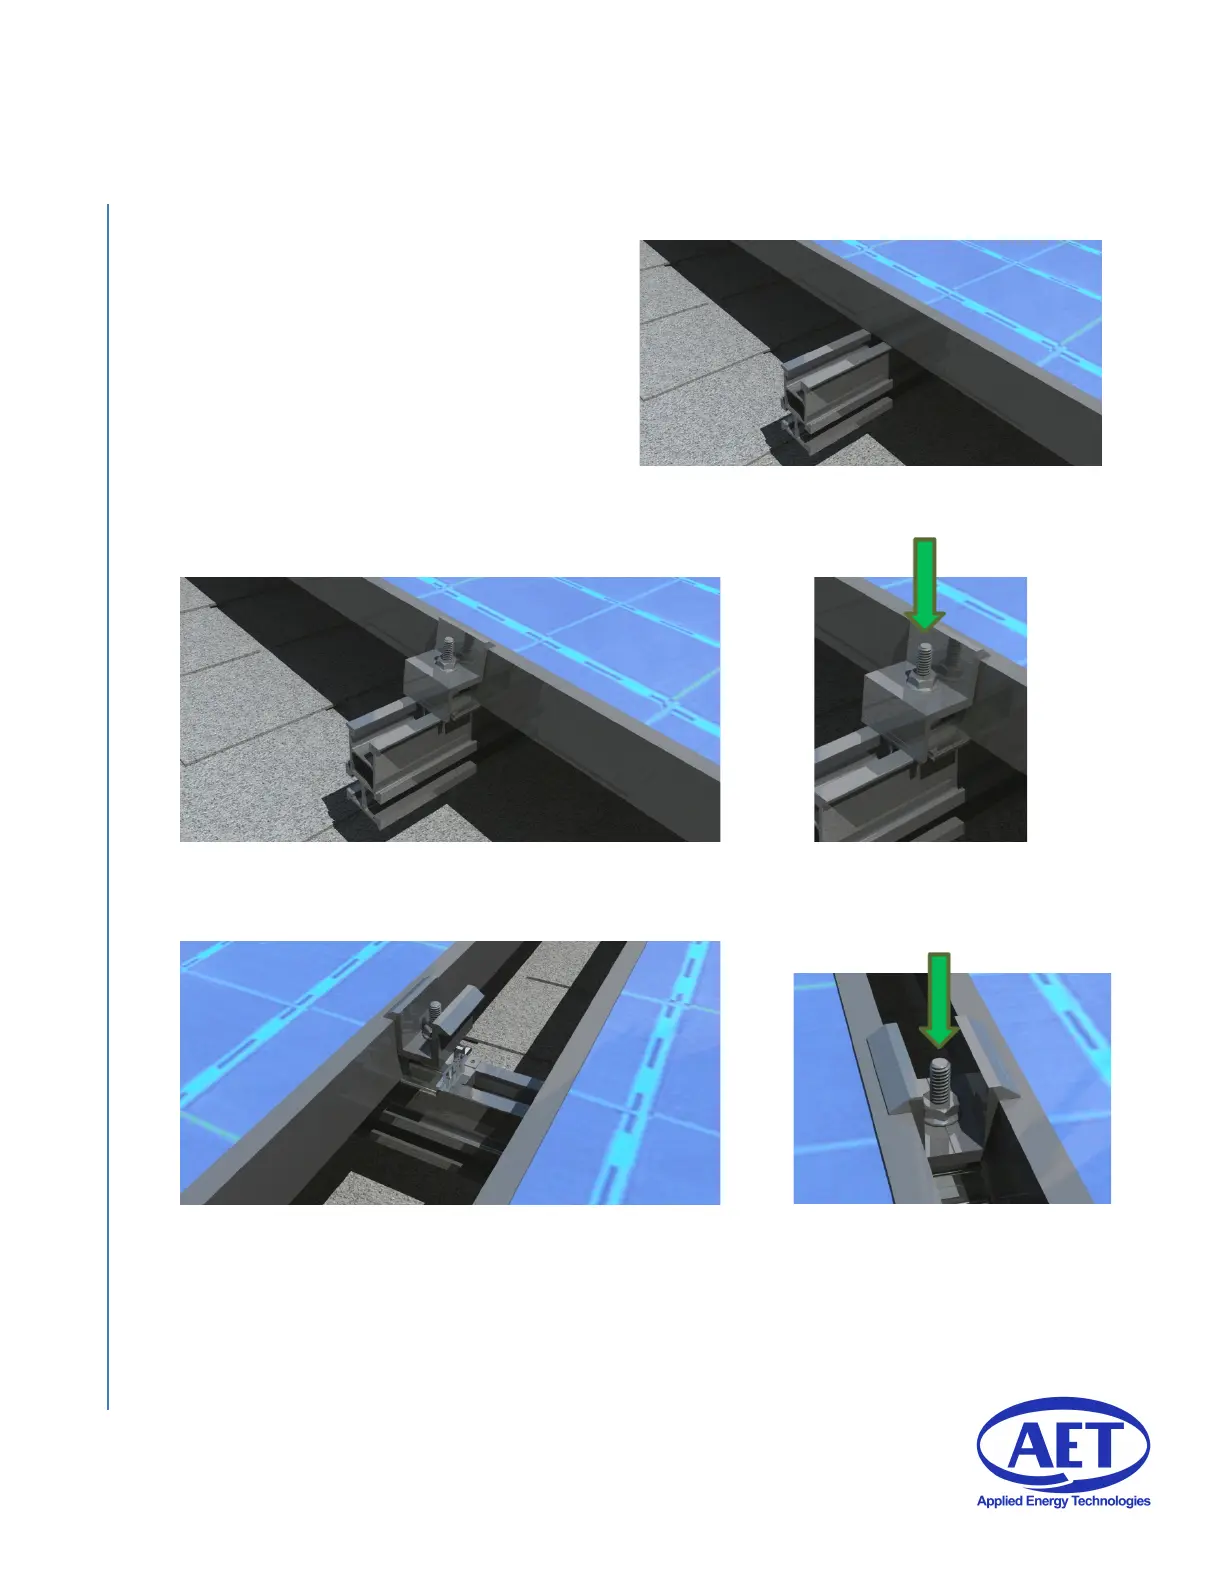
5)'Install'Solar'Panels.'
A) Place'last'panel'of'row'rails''(reference'AET'job'
specific'layout).'
B) Push'End'Clamp'Assemblies'into'top'rail'channel.'
C) Once'the'panels'and'End'Clamp'Assemblies'are'
located'properly,'use'a'7/16”'socket'with'ratchet'
or'driver'to'to rque'the'1/4'“nut'at'the'top'of'the'
End'Clamp'Assembly'to'10'in/lb'.'
D) Push'Mid'Clamp'Assemblies'into'top'rail'channel.'
E) Once'the'panels'and'Mid'Clamp'Assemblies'are'
located'properly,'use'a'7/16”'socket'with'ratchet'
or'driver'to'to rque'the''1/4”'nut'at'the'top'of'the'
Mid'Clamp'Assembly'to'10'in/lb'.'
A)'Place'last'panel'of'row'rails''(reference'AET'job'
specific'layout).'
B)'Push'End'Clamp'Assemblies'into'top'rail'channel.' C)'use'a'7/16”'socket'with'ratchet'
or'driver'to'to rque'the''1/4”'nut'at'
the'top'of'the'End'Clamp'Assembly'
to'10'in/lb'.'
D)'Push'Mid'Clamp'Assemblies'into'top'rail'channel'
between'panels.'
E)'use'a'7/16”'socket'with'ratchet'
or'driver'to'to rque'the''1/4”'nut'at'
the'top'of'the'Mid'Clamp'Assembly'
to'10'in/lb'.'