SMART-SHIFT INSTALLATION
GM SILVERADO / SIERRA 2019 1500 only2020
After calibration (see Section 3), verify that the
vehicle is in Park. Secure the shift cable to the Nose
Cone using the OEM preassembled hardware and a
small amount of Blue Loctite®.
2020
SILVERADO /
SIERRA
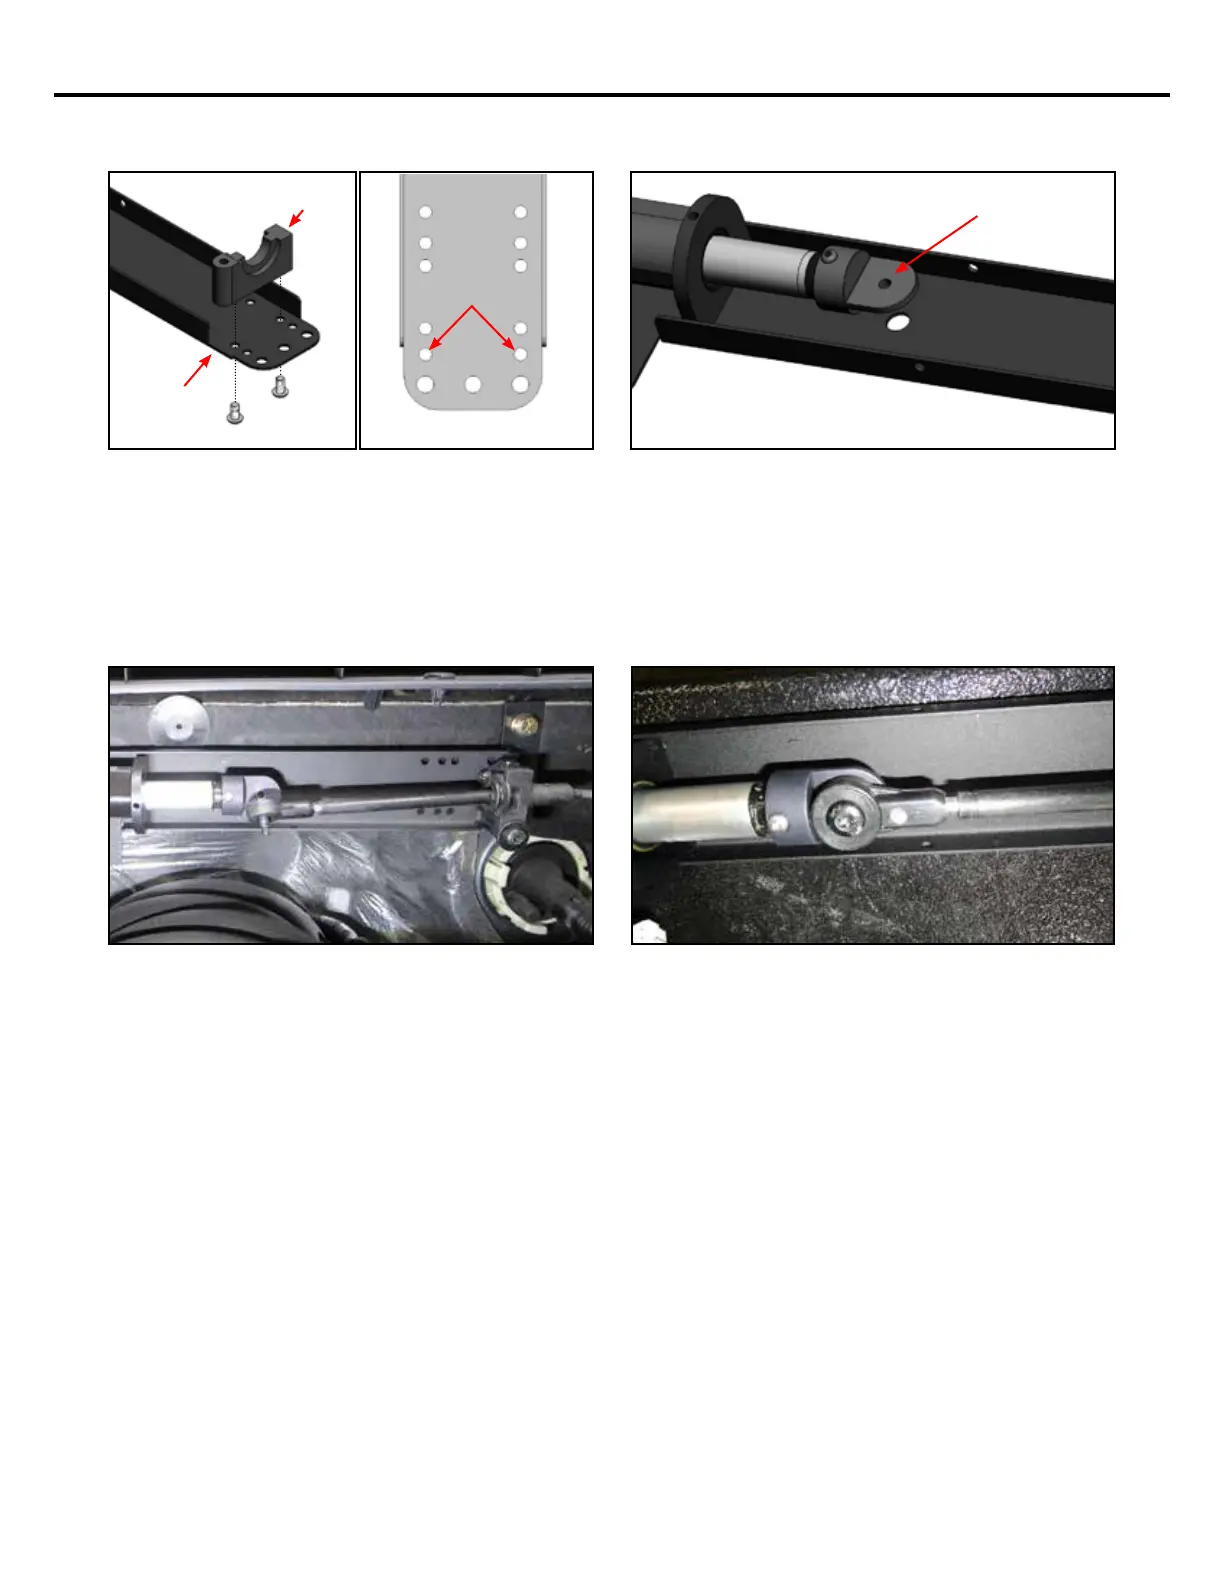
Attach the Cable Bracket (included in KIT-SS-ASSY-
19S) to the end of the Smart Shift bracket in the loca-
tion shown in the gures above. Notch the side of
the Smart Shift bracket. Secure this bracket using the
(2) provided #10-32 x 3/8” button head screws and a
small amount of Blue Loctite®.
CABLE
BRACKET
NOTCH
SMART-SHIFT
BRACKET
The OEM shift cable has an M6 screw preassembled
to it. This means the Smart Shift Nose Cone must be
drilled and tapped to M6 to accept it.
DRILL & TAP
FOR M6 SCREW
Slide the OEM shift cable over the Smart Shift cable
bracket. Secure the OEM shift cable to the Smart
Shift Cable Bracket with the preassembled OEM
hardware and a small amount of Blue Loctite®.
9