SMART-SHIFT INSTALLATION
GM SILVERADO / SIERRA 20152018 & 2019 2500 only
After calibration (see Section 3), verify that the ve-
hicle is in Park. Press the shift cable over the pin on
the Nose Cone.
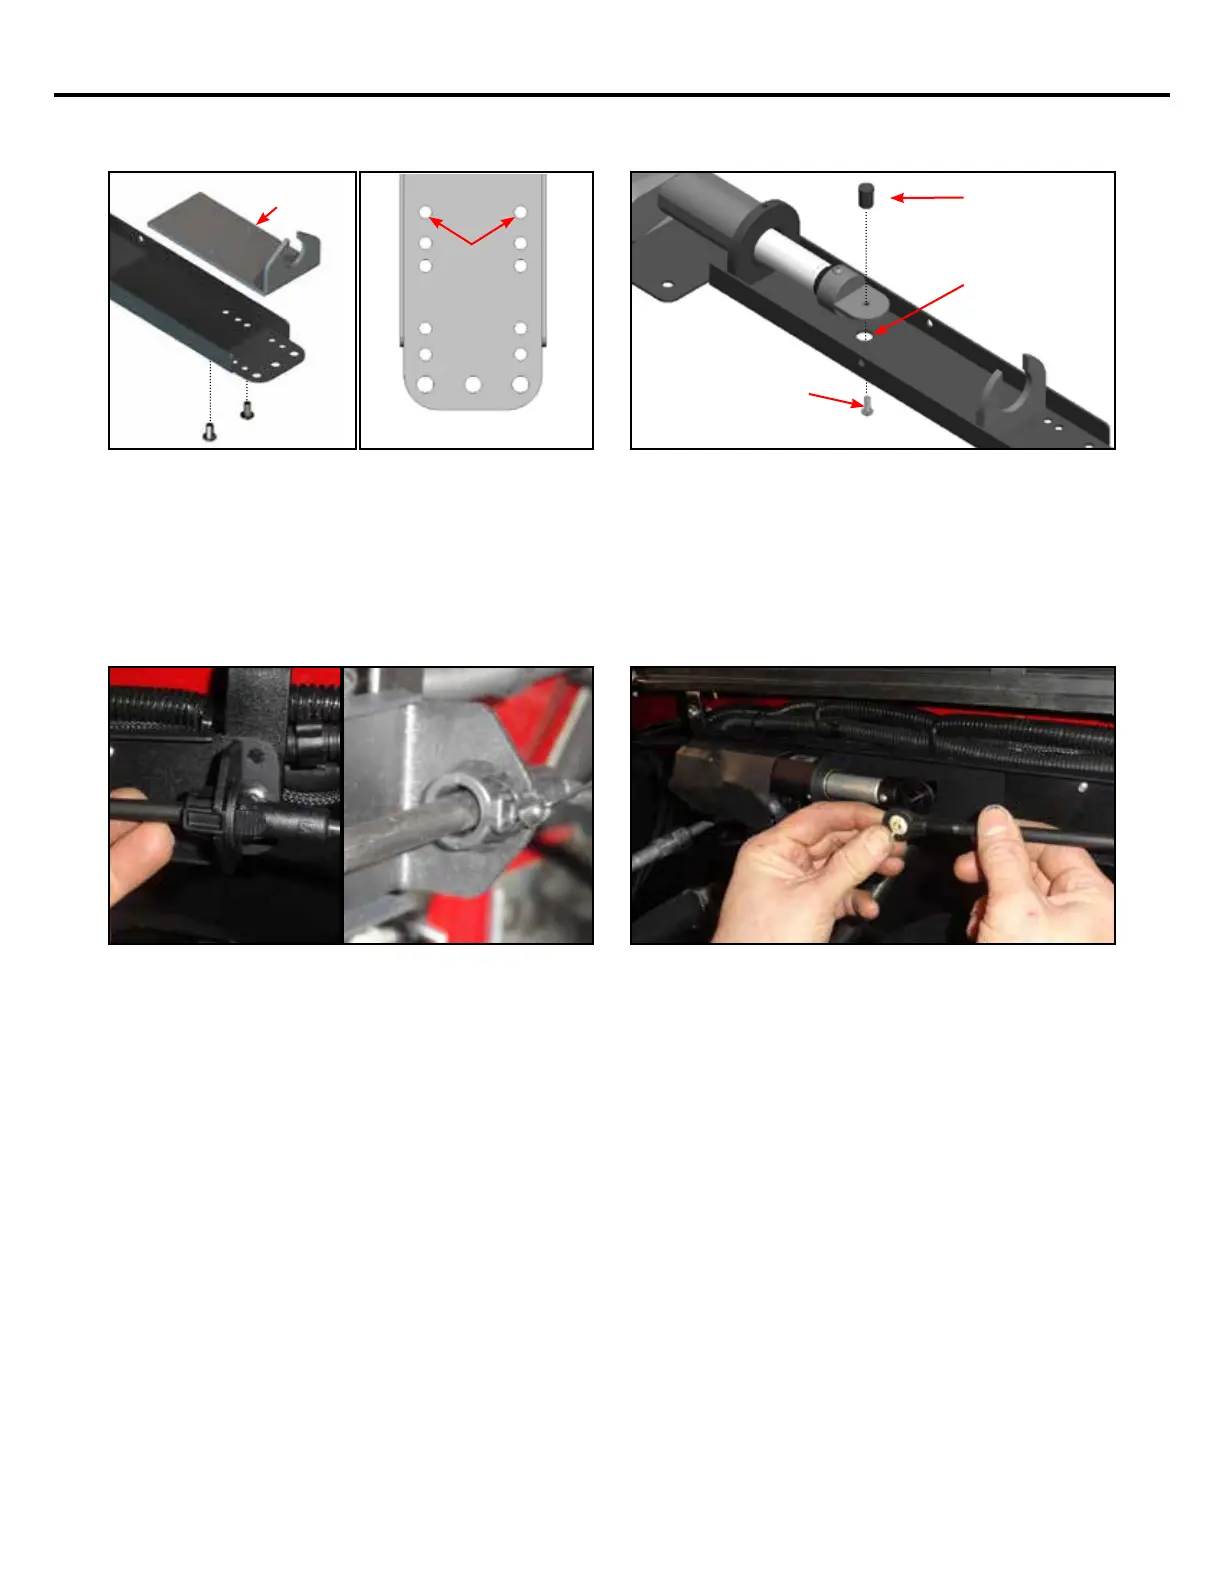
Attach the Cable Bracket (included in KIT-SS-ASSY-
05M) to the end of the Smart Shift bracket in the
location shown in the gures above. Secure this
bracket using the (2) provided #10-32 x 3/8” button
head screws and a small amount of Blue Loctite®.
2015-2019
SILVERADO /
SIERRA
CABLE
BRACKET
Attach the Smart-Shift pin (included in KIT-SS-ASSY-
05M) to the nose cone using the supplied #6-32 x
3/8” button head screw and Blue Loctite®. Hint: Use
the 3/8” hole directly beneath the Nose Cone to gain
access to the underside of the Nose Cone in order to
insert and tighten the screw as shown.
SMART SHIFT
PIN
USE THE 3/8” HOLE
IN THE BRACKET TO
GAIN ACCESS TO THE
UNDERSIDE OF THE
NOSE CONE.
#6-32 x 3/8” BUTTON
HEAD SCREW
Slide the OEM shift cable through the Smart Shift
cable bracket. It will snap in place. Secure the OEM
shift cable to the Smart Shift Cable Bracket by sliding
a zip tie around the clip, underneath the tabs, so
they cannot be compressed or slid out of the Cable
Bracket.
8