SMART-SHIFT INSTALLATION
Mounting the actuator to the vehicle’s shift cable and than to the vehicle are the most important parts of the
entire installation process. The actuator can position itself accurately to within 1/32” of travel. If the shift cable
is not positioned mechanically correct relative to the actuator, the shift positions will vary with each applica-
tion due to freeplay in your mechanical installation. For this reason, EMC supplies the Smart-Shift mounting
bracket preassembled to the actuator. Determine the method for attaching the shift cable rst, followed by
securing the actuator mounting the bracket to the vehicle.
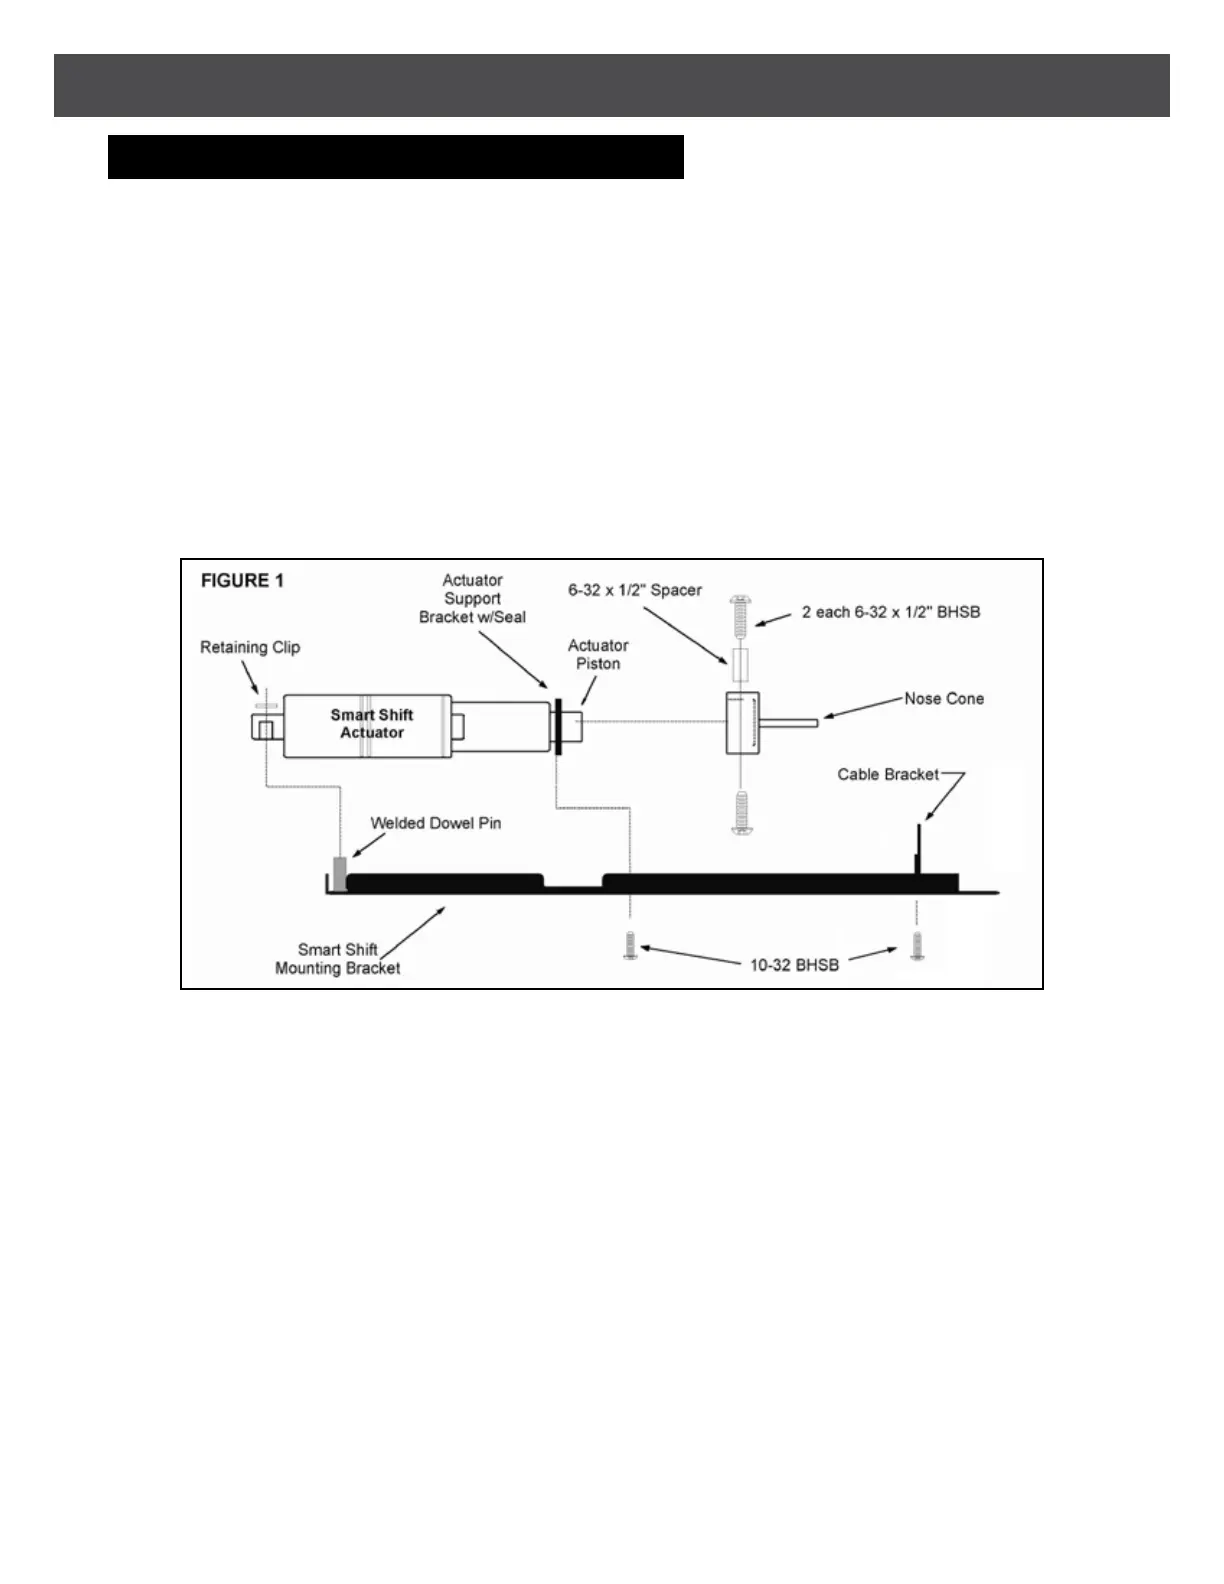
THE ACTUATOR MOUNTED TO THE SMARTSHIFT ACTUATOR BRACKET
Refer to FIGURE 1 below to understand how the actuator is attached to the actuator mounting bracket. This
method is the same for all vehicles. The only changes that occur from one vehicle to another is the design of
the Cable Bracket and the hardware for attaching the shift cable to the Nose Cone. Refer to the remainder of
this section for the Nose Cone and Cable Brackets instructions for some common EMC vehicles.
M11
2. INSTALLATION
2
2.1 SHIFT CABLE INSTALLATION