EasyManua.ls Logo

AFG 2.0 AR - Page 6

AFG 2.0 AR
17 pages
Print Icon
To Next Page IconTo Next Page
To Previous Page IconTo Previous Page
Loading...
BEFORE
YOU BEGIN
10
INTRODUCTION
IMPORTANT
PRECAUTIONS
ASSEMBLY
BEFORE
YOU BEGIN
BIKE
OPERATION
LIMITED
WARRANTY
TROUBLESHOOTING
& MAINTENANCE
CONDITIONING
GUIDELINES
BEFORE
YOU BEGIN
ASSEMBLY
11
INTRODUCTION
IMPORTANT
PRECAUTIONS
BIKE
OPERATION
CONDITIONING
GUIDELINES
TROUBLESHOOTING
& MAINTENANCE
LIMITED
WARRANTY
ASSEMBLY ST EP 4 ASSEMBLY ST EP 5
CONSOLE WIRES
CONSOLE MAST WIRES
CONSOLE
CONSOLE
PRE-ATTACHED SCREWS
BOLT (E)
10 mm
Qty: 8
HARDWARE BAG FOR STEP 4 CONTENTS :
Open HARDWARE BAG FOR STEP 4.
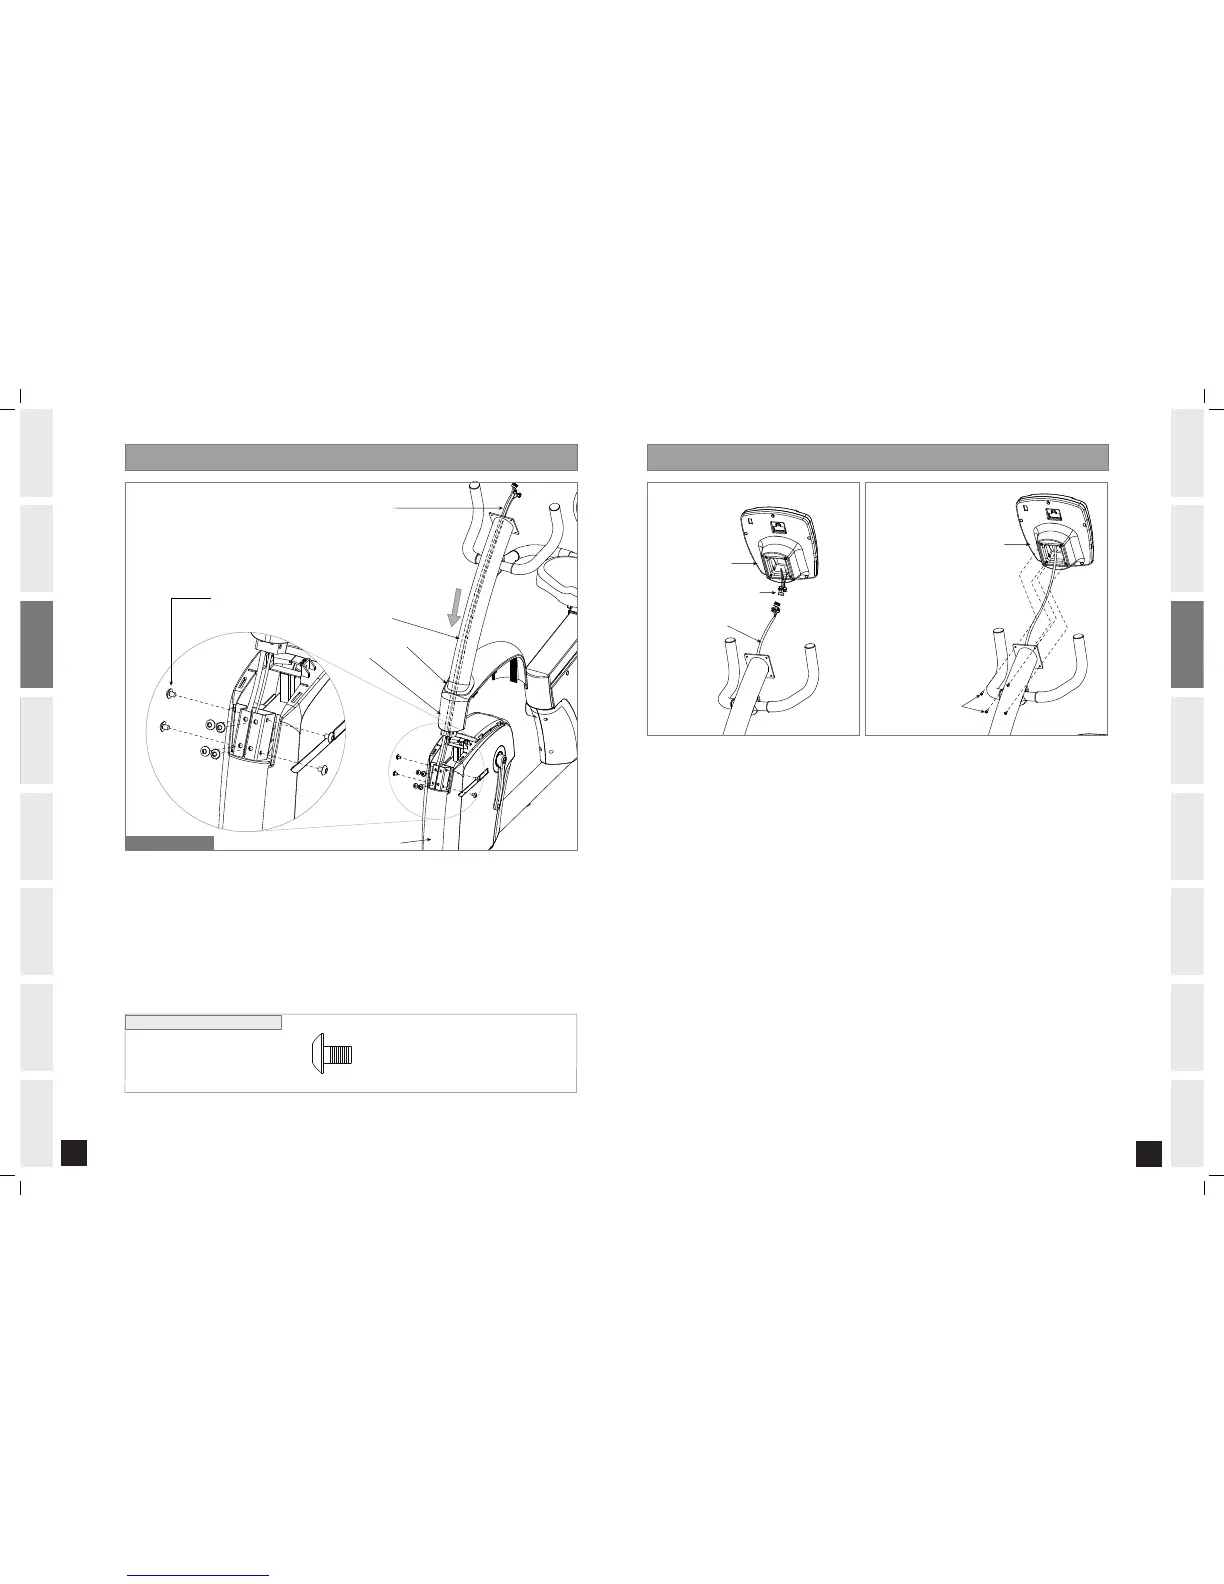
Slide TOP CAP GROMMET and TOP CAP onto the bottom of the CONSOLE MAST.
Carefully pull the CONSOLE WIRE through the CONSOLE MAST using the twist tie located inside the
CONSOLE MAST.
Attach the CONSOLE MAST to the MAIN FRAME using 8 BOLTS (E).
Slide TOP CAP GROMMET and TOP CAP down CONSOLE MAST and carefully snap TOP CAP into the
MAIN FRAME.
A.
B.
C.
D.
E.
Note: There is no hardware bag for this step. All hardware is pre-attached.
Attach the CONSOLE MAST WIRES to the CONSOLE WIRES.
Carefully tuck the CONSOLE MAST WIRES into the CONSOLE MAST before attaching CONSOLE.
Attach the CONSOLE to the CONSOLE MAST using the 4 PRE-ATTACHED SCREWS (screws will have to be
removed from the console first).
NOTE: Be Careful Not to Pinch Wires!
A.
B.
C.
BOLTS (E)
TOP CAP
TOP CAP GROMMET
CONSOLE MAST
CONSOLE WIRE
MAIN FRAME
CONSOLE WIRES
CONSOLE MAST WIRES
CONSOLE
CONSOLE
PRE-ATTACHED SCREWS
3.0AR SHOWN
2.0_3.0_AR_Rev.2.3.indd 10-11 8/1/07 11:42:02 AM

Related product manuals