iI_ ii_i i
; i i i I
W
il__iiii_ii!I_ii_ii_!!_i_
i ii
i / _ii
2.0 AS rev 1.2.indd 16-17
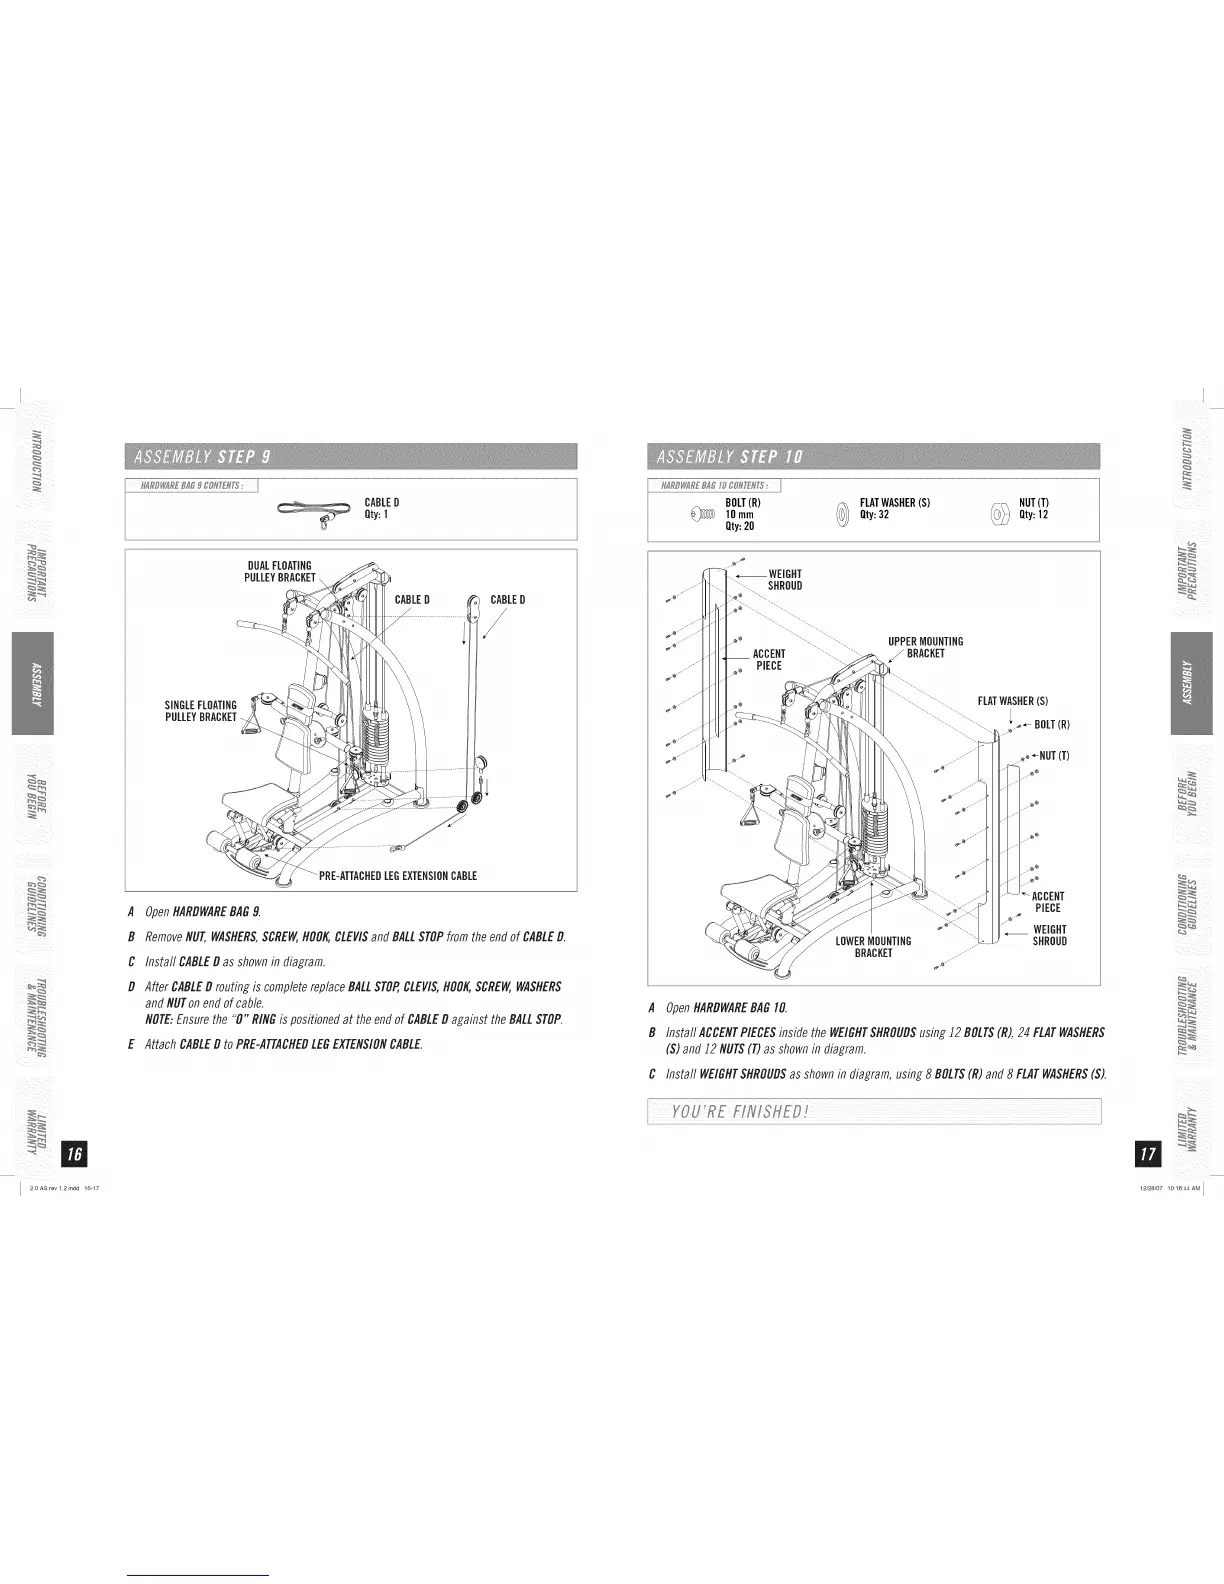
CABLED
Qty:1
SINGLEFLOATING
PULLEYBRACKET
DUALFLOATING
PULLEYBRACKET
CABLED
1
CABLED
/
PRE-ATTACHEDLEGEXTENSIONCABLE
A OpenHARDWAREBAG9.
B RemoveNUT,WASHERS,SCREW,HOOKCLEVISand BALLSTOPfrom the end of CABLED.
C Instafl CABLED as shown in diagram.
D After CABLED routing is complete replace BALLSTOP,CLEVIS,HOOK,SCREW,WASHERS
and NUTon end of cable.
NOTE:Ensure the "0" RINGis positioned at the end of CABLED against the BALLSTOP.
E Attach CABLED to PRE-ATTACHEDLEGEXTENSIONCABLE.
BOLT(R)
@_ lOmm
Qty:20
(_ FLATWASHER(S)
Qty:32
NUT(T)
Qty:12
.....-'""
....'"
--'
.,.-"
_-_'" ........-
A OpenHARDWAREBAG Ill.
B Instafl ACCENTPIECESinside the WEIGHTSHROUDSusing !2 BOLTS(R), 24 FLATWASHERS
(S) and 12 NUTS(T) as shown in diagram.
C Instafl WEIGHTSHROUDSas shown in diagram, using 8 BOLTS(R) and 8 FLATWASHERS(S).
/