iI_ ii_i i
: i i i I
W
il__iii_i_i_i!I_ii_ii_!!_i_
i ii
i / _ii
2.0 AS rev 1.2.indd 14-15
A
B
C
D
CABLEB
Qty:1
CLEVIS
WASHER
NUT
HOOK
HANDLE
BALLSTOP
RING
WASHER
SCREW
SINGLEFLOATING
PULLEYBRACKET
CABLEB
/
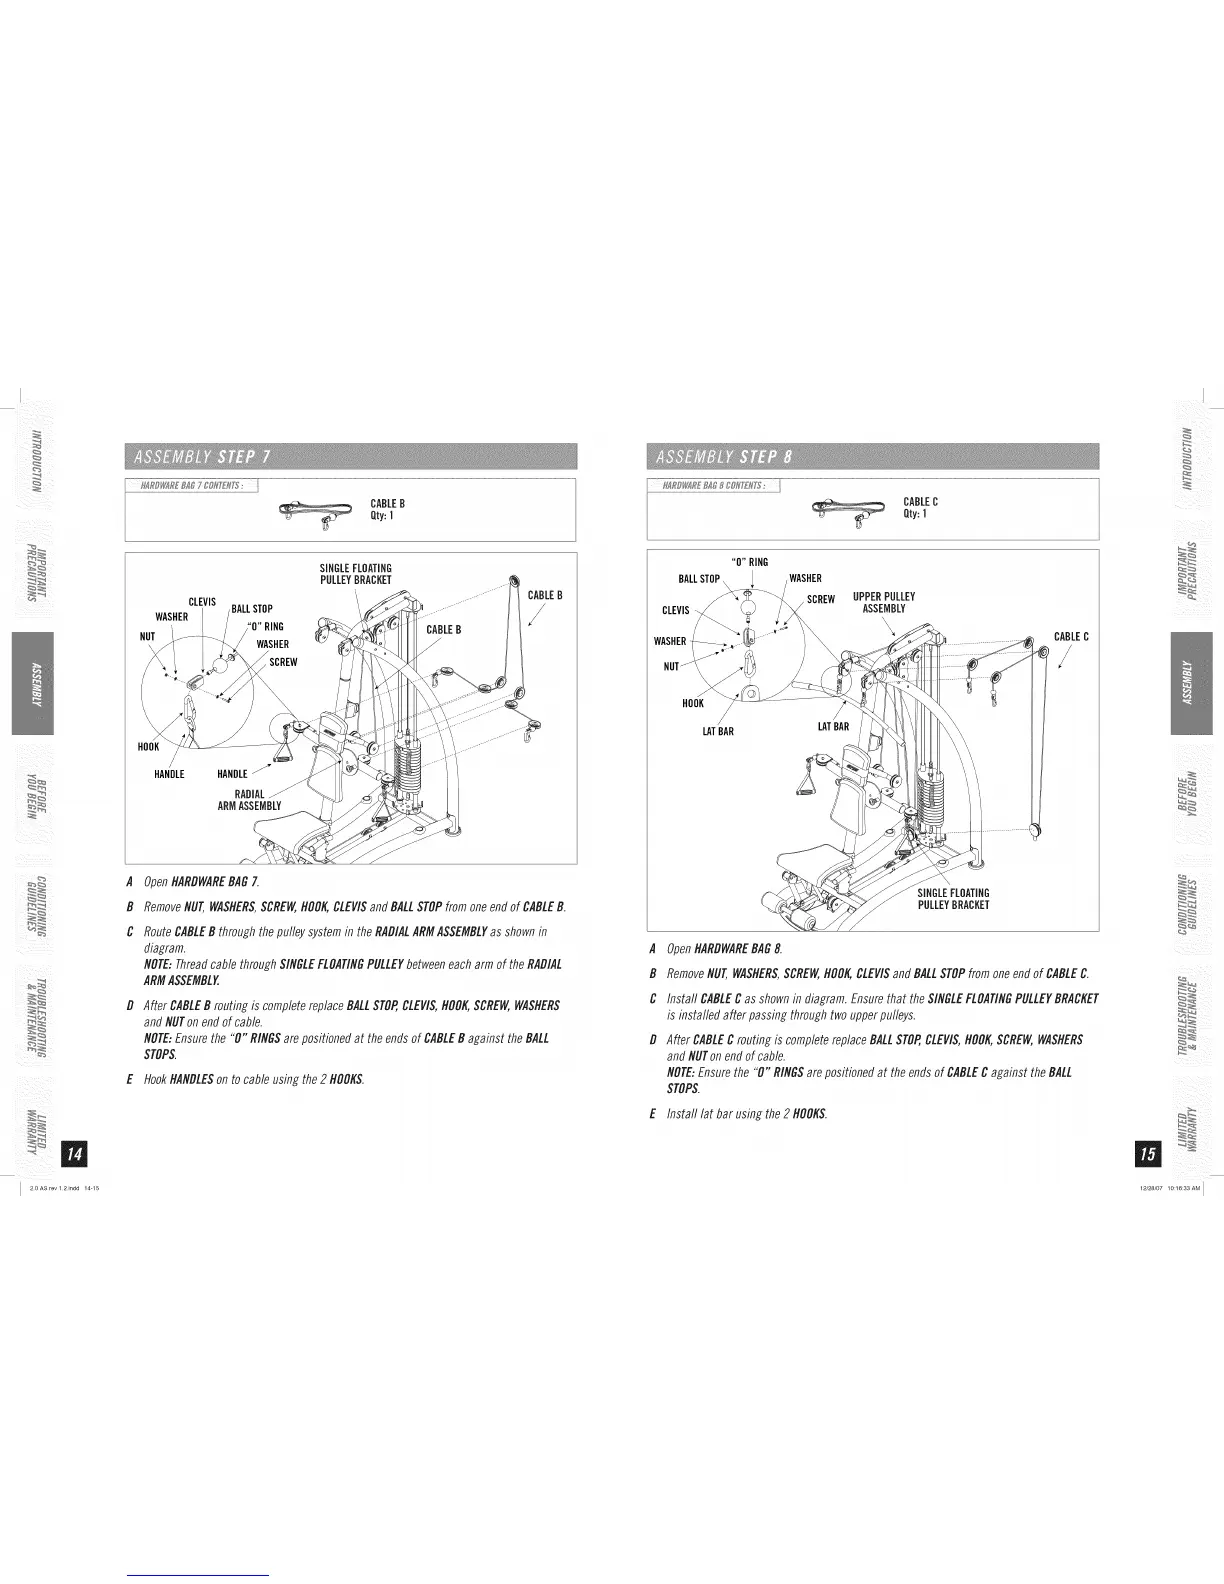
OpenHARDWAREBAGZ
RemoveNUT,WASHERS,SCREW,HOOKCLEVISand BALLSTOPfrom one end of CABLEB.
RouteCABLEB through the pulley system in the RADIALARMASSEMBLYas shown in
diagram.
NOTE:Threadcable through SINGLEFLOATINGPULLEYbetween each arm of the RADIAL
ARMASSEMBLY.
After CABLEB routingis completereplaceBALLSTOP,CLEVIS,HOOKSCREW,WASHERS
andNUTonendofcable.
NOTE:Ensurethe "0" RINGSarepositionedat theendsof CABLEB against theBALL
STOPS.
E HookHANDLESon to cable using the 2 HOOKS.
CABLEC
Qty:1
BALLSTOP
CLEVIS
WASHER
HOOK
LATBAR
WASHER
SCREW
LATBAR
UPPERPULLEY
ASSEMBLY
\
CABLEC
SINGLEFLOATING
PULLEYBRACKET
A
B
C
D
OpenHARDWAREBAG8.
RemoveNUT,WASHERS,SCREW,HOOK,CLEVISand BALLSTOPfrom oneendof CABLEC.
Install CABLEC as shown in diagram. Ensure that the SINGLEFLOATINGPULLEYBRACKET
is installed after passing through two upper pulleys.
After CABLEC routing is complete replace BALLSTOP,CLEVIS,HOOKSCREW,WASHERS
and NUTon end of cable.
NOTE:Ensure the "0" RINGSare positioned at the ends of CABLEC against the BALL
STOPS.
E Install lat bar using the2 HOOKS.
/
iii _ i i
ii _ _ii ii
12/28/07 10:16:33 AM