EN9
www.afx-light.com
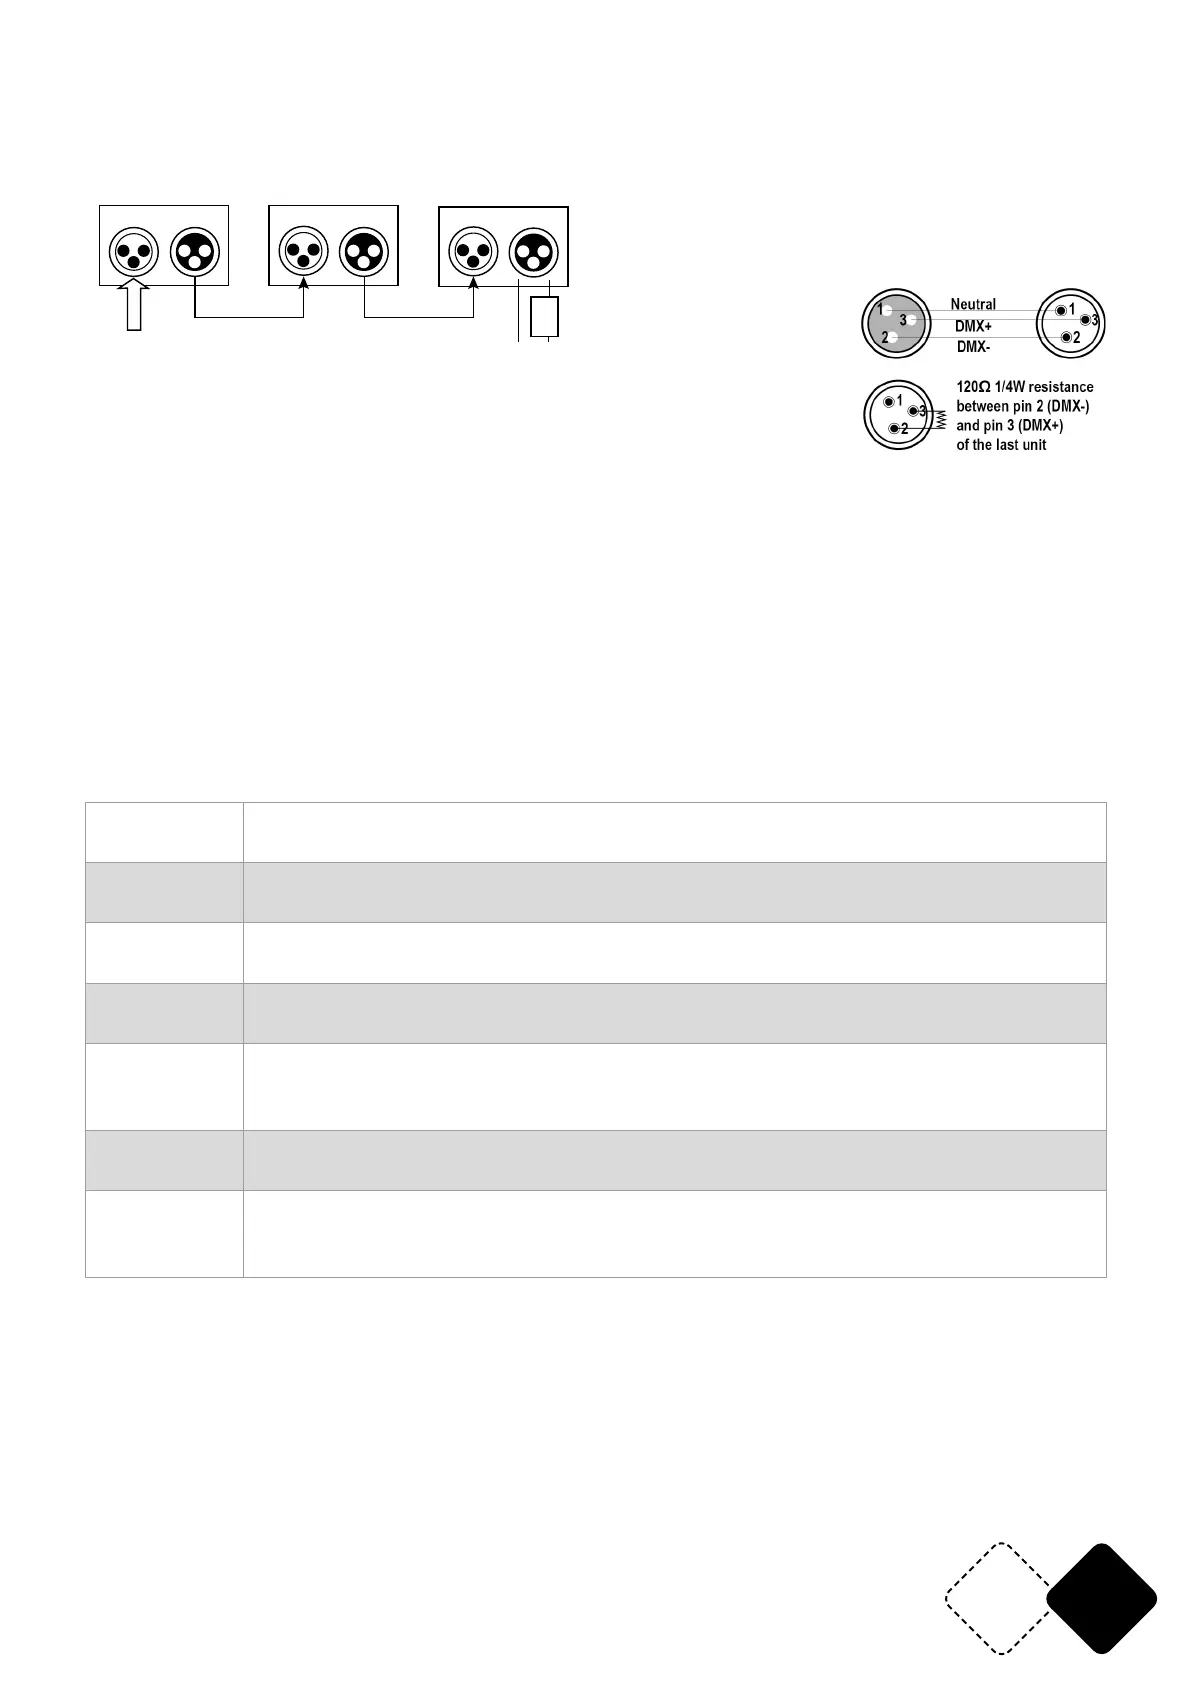
CONNECTION OF SIGNAL CABLE
Use a 3-pin XLR cable to connect the output socket of the master and the input socket of the slave
light. Connect the OUT socket of the master and the IN socket of the slave light, then, connect the
OUT socket to the IN socket of the next light. Ordinal to connect all the lights as below:
IN OUT OUTIN OUTIN
DMX IN
Resistor
3
rd
Light
2
nd
Light
1
st
Light
120Ω 1W
2 3
DMX signal terminator is recommended on the last unit of the chain. DMX
terminator is a XLR connector with a 120Ω resistor between the pin 2 and
pin 3 of the XLR connector
MASTER SLAVE MODE
Connect two or more HYPER-STROBE-RGB+W via a 3-pin DMX connector and set all units to any
DMX address between A001 ~ A512. All units must be set to the SAME address!
The rst device is the master and all other ones are slaves. The display of the slave units will not
ash. All slaves will operate exactly the same as the master unit.
Please note: Only one Master can be set for a group of devices.
The Master-Slave mode will only work when the DMX512 console is turned off.
FACTORY SETTINGS
Press the menu key for 5 seconds to enter the factory setting. Factory settings mainly include the
lamp output power, fan setting mode, setting temperature protection point and sending parame-
ters. The factory sets any mode and exits by pressing the menu key for 5 seconds.
TABLE OF FACTORY SETTINGS
R255-R032 Change the red LED current (r032-r255) with UP/DOWN and click OK to save. The
default value is R200.
G255-G032 Change the green LED current (g032-g255) with UP/DOWN and click OK to save.
The default value is G200.
B255-B032 Change the blue LED current (b032-b255) with UP/DOWN and click OK to save.
The default value is B200.
W032-W255 Change the white LED current (w032-w255) with UP/DOWN and click OK to save.
The default value is W240.
FAN0-FAN1 Fan setting: FAN0 means that the fan starts working when the xture is switched
on. FAN1 means that the fan will start working only when the xture has reached
the set temperature protection point.
T040-T070 Set the temperature protection point, modify the parameters (40° ~ 70°) with UP/
DOWN and click OK to save. The default value is 65.
Send Send the factory setting parameters of the machine via the UP/DOWN buttons
to all other lamps connected in parallel with three core signal wires. Conrm the
sending parameters and press the menu key for 5 seconds
SPECIFICATIONS
Power supply ...................................................................................................110-240V~ 50/60Hz
Consumption .............................................................................................................................500W
Light sources ........................................................................864 pcs. 3-in-1 RGB LEDs type 5050
........................................................................................................96 pcs. white LEDs type 5730
Strobe ....................................................................................................................................1 – 25Hz
Dimensions ....................................................................................................... 415 x 220 x 100mm
Weight ........................................................................................................................................ 4.5kg