8
!
CAUTION
NOTE
INSTALLING THE ANTI TIP DEVICE
FOR FREESTANDING INSTALLATIONS
Step by step instructions for locating the po-
sition of the bracket:
1) Decide where you want to place the refrigerator / freezer.
Slide it into place, being careful not to damage the oor,
leaving 1" (2.5 cm) of clearance from the rear wall to allow
room for the anti-tip bracket.
2) Raise the rear leveling legs approximately
1
⁄4" (6 mm) to
allow engagement with the anti-tip bracket. Level the unit
by adjusting all the leveling legs as required. Turning the
leveling leg counterclockwise will raise the unit and clock-
wise will lower the unit.
3) Make sure the refrigerator / freezer is in the desired
location, then mark on the oor the rear and side corner
of the cabinet where the anti-tip bracket will be installed. If
the installation does not allow marking the rear corner of
the cabinet, then make temporary lines on the oor mark-
ing the front corner of the cabinet, excluding the door. Slide
the refrigerator / freezer out of the way. From the temporary
line extend the sidewall line back 21
1
⁄2" (54.6 cm) as shown
in Figure 10.
4) Align the anti-tip bracket to the marks on the oor so
the side of the bracket lines up with the side of the cabinet
mark, and the "V" notches on the anti-tip bracket line up
with the end of the 21
1
⁄2" (54.6 cm) line (Rear of cabinet
line).
5) Fasten the anti-tip bracket to the oor using the supplied
screw. (See Figure 10).
6) Slide the cabinet back into position, making sure the rear
cabinet leveling leg slides under the anti-tip bracket engag-
ing the slot.
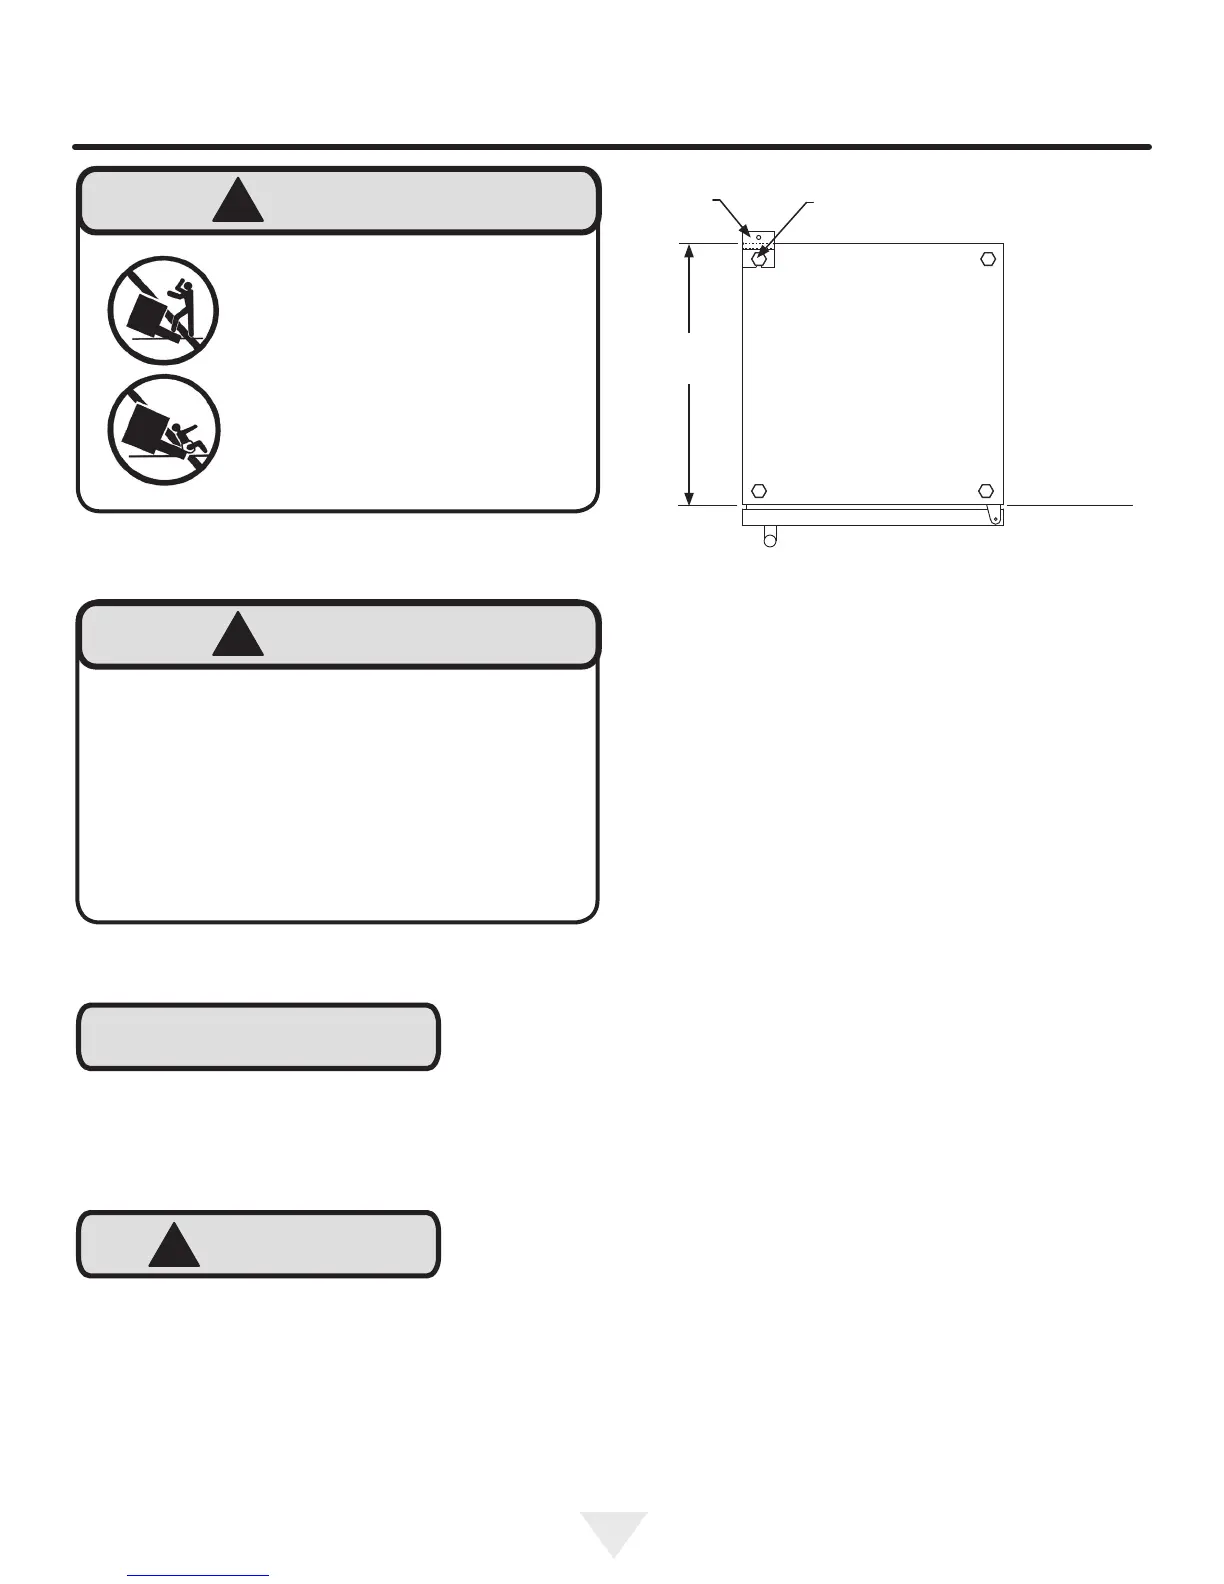
Front of cabinet
Figure 9
21
1
⁄2"
(54.6 cm)
Anti-Tip
Bracket
Leveling Leg
Bottom View of
Refrigerator /
freezer
!
WARNING
If your refrigerator / freezer is not located under a
counter top (free standing), you must use an anti-tip
device installed as per these instructions. If the refrig-
erator / freezer is removed from its location for any
reason, make sure that the device is properly engaged
with the anti-tip bracket when you push the refrigerator
/ freezer back into the original location. If the device is
not properly engaged, there is a risk of the refrigerator
/ freezer tipping over, with the potential for property
damage or personal injury.
Floor Mount Installation
The anti-tip bracket is to be located on the oor in the left
or right rear corner of the refrigerator / freezer as shown in
Figure 9.
!
WARNING
• ALL APPLIANCES CAN TIP
RESULTING IN INJURY.
• INSTALL THE ANTI-TIP
BRACKET PACKED WITH
THE APPLIANCE.
• FOLLOW THE INSTRUC-
TIONS BELOW
Anti-Tip Device
If installing on a concrete oor, concrete fasteners are
required, (not included with the anti-tip kit).
Any nished ooring should be protected with appropriate
material to avoid damage when moving the unit.