Getting started with DR 100e - Performing an exposure
0363A EN 20161128
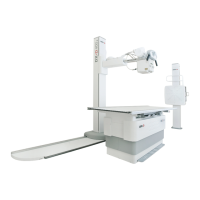
1 Moving the unit
Do not use the unit on floors with an
Inclination higher than 5 degrees. Do not
drive the unit on ramps with an inclination
higher than 10 degrees.
The equipment must be moved only after
bring it to transport position
Make sure the device is
switched off.
Move the rotating
column in central position.
Lower the arm (A) to
locked position.
Put the X-ray tube (A) in
vertical position on both
rotation axes (B and C).
Turn the X-ray tube rotation handle (F) clockwise. The
device is now in transport position.
Release the brake.
On a system with rotating column, release the brake by
pulling the lever on the handlebar.
On a system with fixed column, release the brake pedal.
Move the unit holding the handlebar.
To overcome obstacles or
small drops, press with the
foot on the pedal for the
tilting and, at the same time,
pull the handlebar.
2 Starting the device
Unroll the mains cable from the cable reel and extend
it completely.
Plug the cable into a mains power socket.
Press the power button.
Power on button
3 Positioning
Monitor the patient position (hands, feet,
fingers, etc.) with special care to avoid injury
to the patient caused by unit movements.
Patient hands must be kept away from mobile
components of the unit. Intravenous tubing,
catheters and other patient connected lines
should be routed away from moving
equipment.
Pull and rotate the knob
(A) with the arrow towards
the green dot to unlock the
arm.
Lift the arm.
Position the X-ray tube relative to the region of
interest by moving the device or rotating the column.
Point the X-ray tube towards the region of interest.
The X-ray tube can be
tilted in all directions.
The collimator can be
rotated on its vertical axis.