Chapter 12 619
RF Section
A14 Frequency Control Assembly
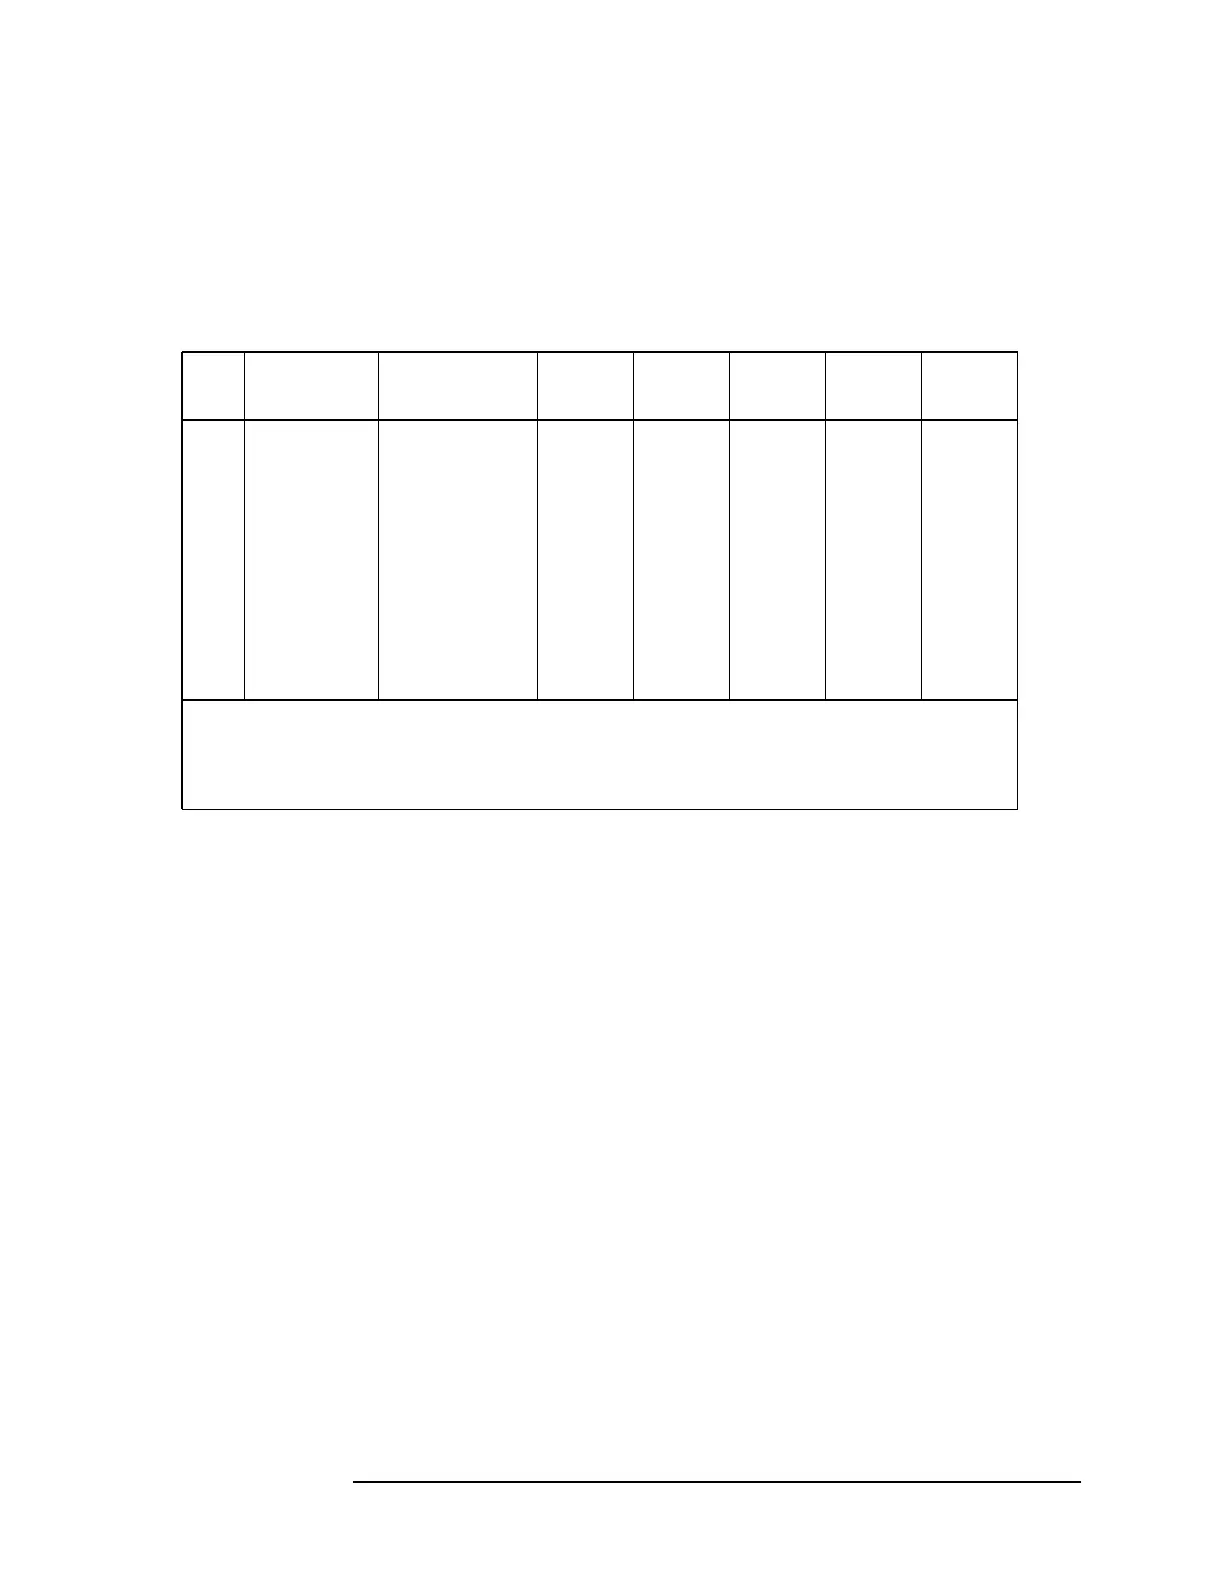
9. Check the voltage at A14J15 pin 3 with the spectrum analyzer
center frequency set to the frequencies listed in Table 12-5. The
following table lists the voltage that should be measured at A14J15
pin 3, the settings for the four switches (U416 in function block Q),
and the gain through the Sweep + Tune Multiplier.
10.Move the WR PROT/WR ENA jumper on the A2 Controller assembly
to the WR ENA position.
11.Set the spectrum analyzer to the following settings:
Center frequency........................................................ 5GHz
Span .............................................................................. 0Hz
12.On the spectrum analyzer, press
CAL, MORE 1 OF 2, SERVICE CAL
DATA, PRESEL ADJ, and PRESEL OFFSET.
13.Connect a DVM to A14J16 pin 13.
14.Set the DAC to values from 0 to 255 to yield DVM readings from 0 V
to −10 V respectively.
15.Set the spectrum analyzer center frequency to 40 GHz and measure
the voltage at A14U414 pin 1: V
16.Connect the DVM to A14J16 pin 1.
17.Press
PRESEL SLOPE.
18.Set the DAC to values from 0 to 255 to yield DVM readings from 0 V
to the voltage measured in step 15.
19.On the spectrum analyzer, press
CAL and REALIGN LO & IF.
Table 12-5 Sweep + Tune Multiplier Values
N* Center
Frequency
A14J15 Pin 3
(Vdc)
U416A U416B U416C U416D
Gain
†
1 5 GHz −1.33 Open Closed Closed Closed −0.208
2 10 GHz −2.58 Open Closed Open Closed −0.417
4 15 GHz −3.83 Open Closed Open Open −0.833
4 20 GHz −5.08 Open Closed Open Open −0.833
4 30 GHz −6.52 Open Closed Open Open −0.833
8 40 GHz −10.98 Open Open Open Open −1.666
8 50 GHz −13.48 Open Open Open Open −1.666
* N is the harmonic mixing mode.
†
Gain is the ratio of the change in the voltage at A14J15 pin 3 to the change in the
voltage at A14J15 pin 1, within a given band.
 Loading...


