in the circuit or small clip that can be hooked onto a wire in the circuit.!
!
The other method for making connections is to use a BNC to banana-plug adapter on the
oscilloscope input and then use the superstrip leads that we regularly use for the multimeter
and power supply connections.!
!
The scope probes are the preferred approach for making connections. They are robust and
provide good contact with minimal loss and stray capacitance – important when making
measurements on high-frequency signals. They also provide some protection to the
oscilloscope input circuitry, which can be damaged if large voltages are applied. They can be
broken if mishandled and are expensive to replace. On the other hand, the breadboard leads
are easy to use, cheap to replace. For our relatively simple EE 201 measurements, the simple
leads may be adequate, but in general, you should avoid using them, because they tend to act
like antennas and pick up all sorts of extraneous signals.!
!
Whenever you connect a probe, you must check and set the probe scaling factor. Most of the
scope probes have a 10x attenuator meaning that the incoming voltage is reduced by a factor
of 10 on its path to the input circuitry of the oscilloscope. This is how the scope probes
provide protection. (Some probes in lab have 100x attenuation.) You must “tell” the
oscilloscope that the signal is being attenuated so that it can compensate and provide accurate
readings. If you do not set this properly, all of your voltage readings for a given channel will
be off by some factor, usually 10. !
!
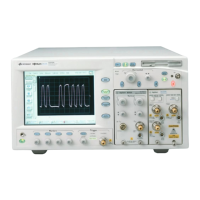
To check and set the probe scale factor for a particular channel, start by pushing the channel
button (section 4 in Fig. 1.) Press the Probe softkey that appears – pressing it once causes a
pop-up menu to appear. Continue to press the Probe softkey until the Ratio menu item is
selected. Use the Entry knob to adjust the ratio until it matches the channel’s probe. For the
scope probes, the attenuation ratio is printed on the probe case – most in our lab are 10:1. Of
course, the breadboard leads have no attenuation, so the ratio is 1:1.!
!
The connections for the four channels are not completely independent. The negative terminals
of all four are in common. There are really only five available connections: positive for Ch1,
positive for Ch2, positive for Ch3, positive for Ch4, and the one negative that serves all four
channels. The common negative connection has two consequences. First, you only need one
negative connection from the oscilloscope to your circuit. (This is good since it cuts down on
wires.) Secondly, you can only have one negative connection in your circuit – all four
channels must reference the same negative connections. (This is bad because it somewhat
limits what you can measure.) If you try to connect the two negative leads from two channels
to different points in the circuit, you will mess up your measurement. Connecting negative
leads to different points in the circuit effectively shorts out the part of the circuit between the
two the leads! Be careful.!
!
3. Autoscale!
Once the connections are made, you can press the Autoscale button to initiate measurements.
The oscilloscope will measure the waveforms at each channel. If a repetitive waveform with a
measurable amplitude is present, the channel is turned on, and the waveform trace will be
drawn on the display. The display time scale is automatically adjusted to show a two (or a
 Loading...