few) period of the waveform. The voltage scaling for each channel is automatically adjusted
to that the amplitude of the trace is an appreciable fraction of the total display.!
!
You can use Autoscale at the beginning of any measurement. It is also helpful once you have
manually messed up all of the settings and can no longer see any traces. Just hit Autoscale
again, the oscilloscope will take you back to where you began.!
!
4. Making manual adjustments!
Autoscaling is nice, but usually it does not provide the trace in exactly the form that you
would like. You can manually fine-tune the traces on the oscilloscope to get exactly the view
that you want.!
!
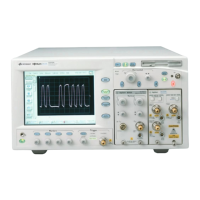
You can adjust the time scale by turning the Horizontal control knob (item 4 in Fig. 1.)
Turning this knob adjusts the time / division of the graph on the display, expanding or
contracting the trace in the horizontal direction. The current time / division setting is listed at
the top left corner of the graph.!
!
The vertical scaling and position for each channel trace are adjusted using the vertical controls
(section 3 in Fig. 1). Each channel has its own vertical scaling, and is adjusted using the
vertical scale knob (larger knob above the channel buttons). The scaling (V/division) for each
channel is given along the top edge of the graph. In addition, the traces can be moved up and
down on the graph using the vertical position knobs (smaller knobs below the channel
buttons). The zero point for each trace is indicated along the left side of the graph by a small
“ground” symbol. You can move two or more traces so that they have the same zero point in
order to make direct comparisons. Or you can move traces away from each for clearer
viewing.!
!
5. Measurements & Cursors!
There are various kinds of measurements that can be made on the waveforms. The values for
each type of measurement can be displayed for each channel waveform in the area just to the
right of the graph. The default measurements are peak-to-peak amplitude and frequency for
each active channel. To add more measurements, press the Meas key to display the
measurements menu in the softkey area. Use the Source softkey to choose which channel
trace you would like to do the measurement on. Use the Type softkey and the Entry knob to
choose the type of measurement. Then use the Add Measurement softkey to add the
measurement to the displayed list.!
!
Cursors are extremely useful for comparing different points on one trace or points on different
traces. You can use cursors to find time delays and voltage changes in waveforms. There are
two x-cursors (time cursors), each of which can be moved to any point along the time axis.
There are two y-cursors (voltage cursors), each of which can be moved to any point along the
voltage axis. The value of the trace at the cursor point is listed, along with the difference
between the two cursors.!
!
6. Saving traces!
Lastly, you will probably want to save a copy of your measured traces to include in a report.
Plug a flash drive into the USB port and press the Save/Recall key to enter the Save/Recall
 Loading...