Installation Guide 7
E444xAU IF Output Options E444xAU Options H20, H25 and H70
Installation Procedure
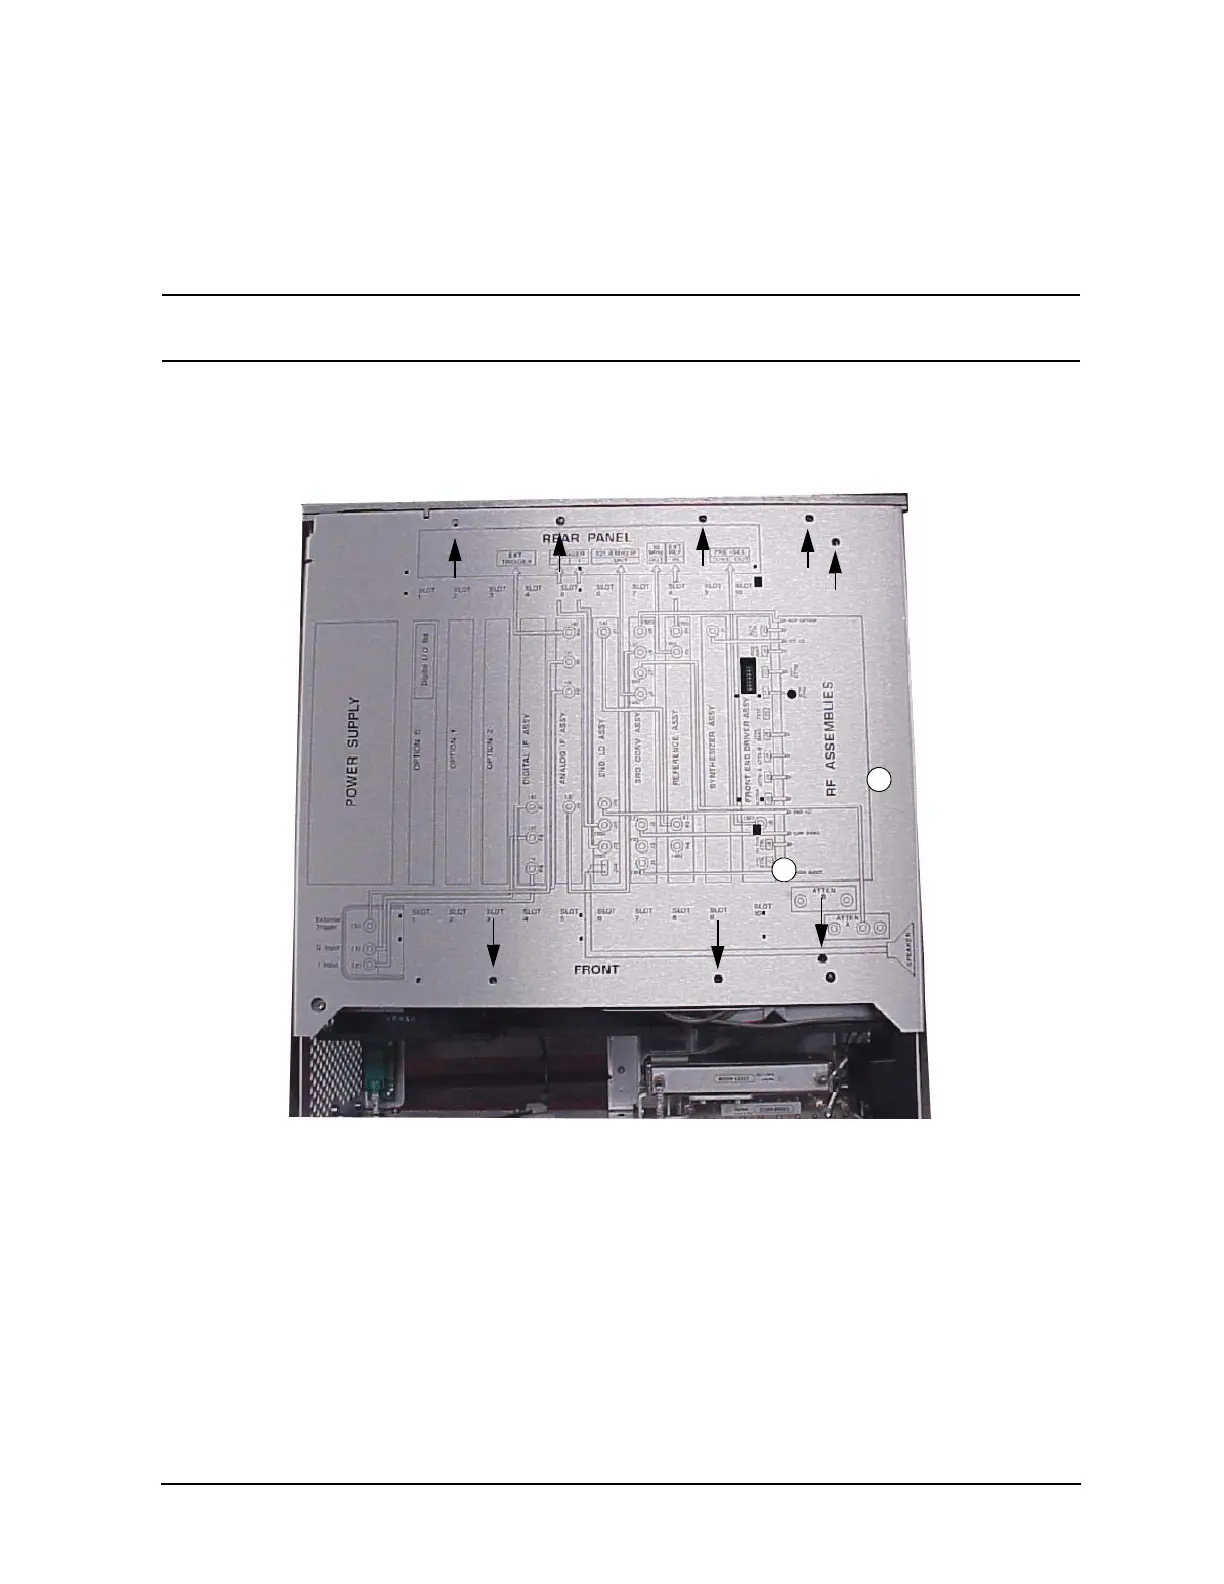
5. Remove the chassis cover, using a #10 Torx driver. Refer to Figure 4 for location of top
screws. There are ten screws to remove from the “speaker” side of the chassis cover and
two screws from the “power supply” side of the chassis cover. Place all hardware in a
safe location for re-installation.
NOTE The E4446A and E4468A have two additional screws in the chassis cover. The
white circles indicate the approximate position.
Figure 4 Chassis Cover Screw Location
 Loading...