12 Installation Guide
E444xAU Options H20, H25 and H70 E444xAU IF Output Options
Installation Procedure
4. Carefully route the cables along the top of the rear frame and between the board
extractors to insure that they will not be damaged when installing the chassis cover.
Refer to Figure 12 and Figure 13 on page 14. Connect the cables as follows:
• Connect the 321.4 MHz IF Input cable (E4440-60412) (W52) on the rear panel to the
321.4 MHz IF Input connector (J1) on the Option IF board. Refer to Figure 11 on
page 13.
• Connect the Option IF Output cable (E4440-60413, W41) on the rear panel to the
Option IF Output connector (J2) on the Option IF board.
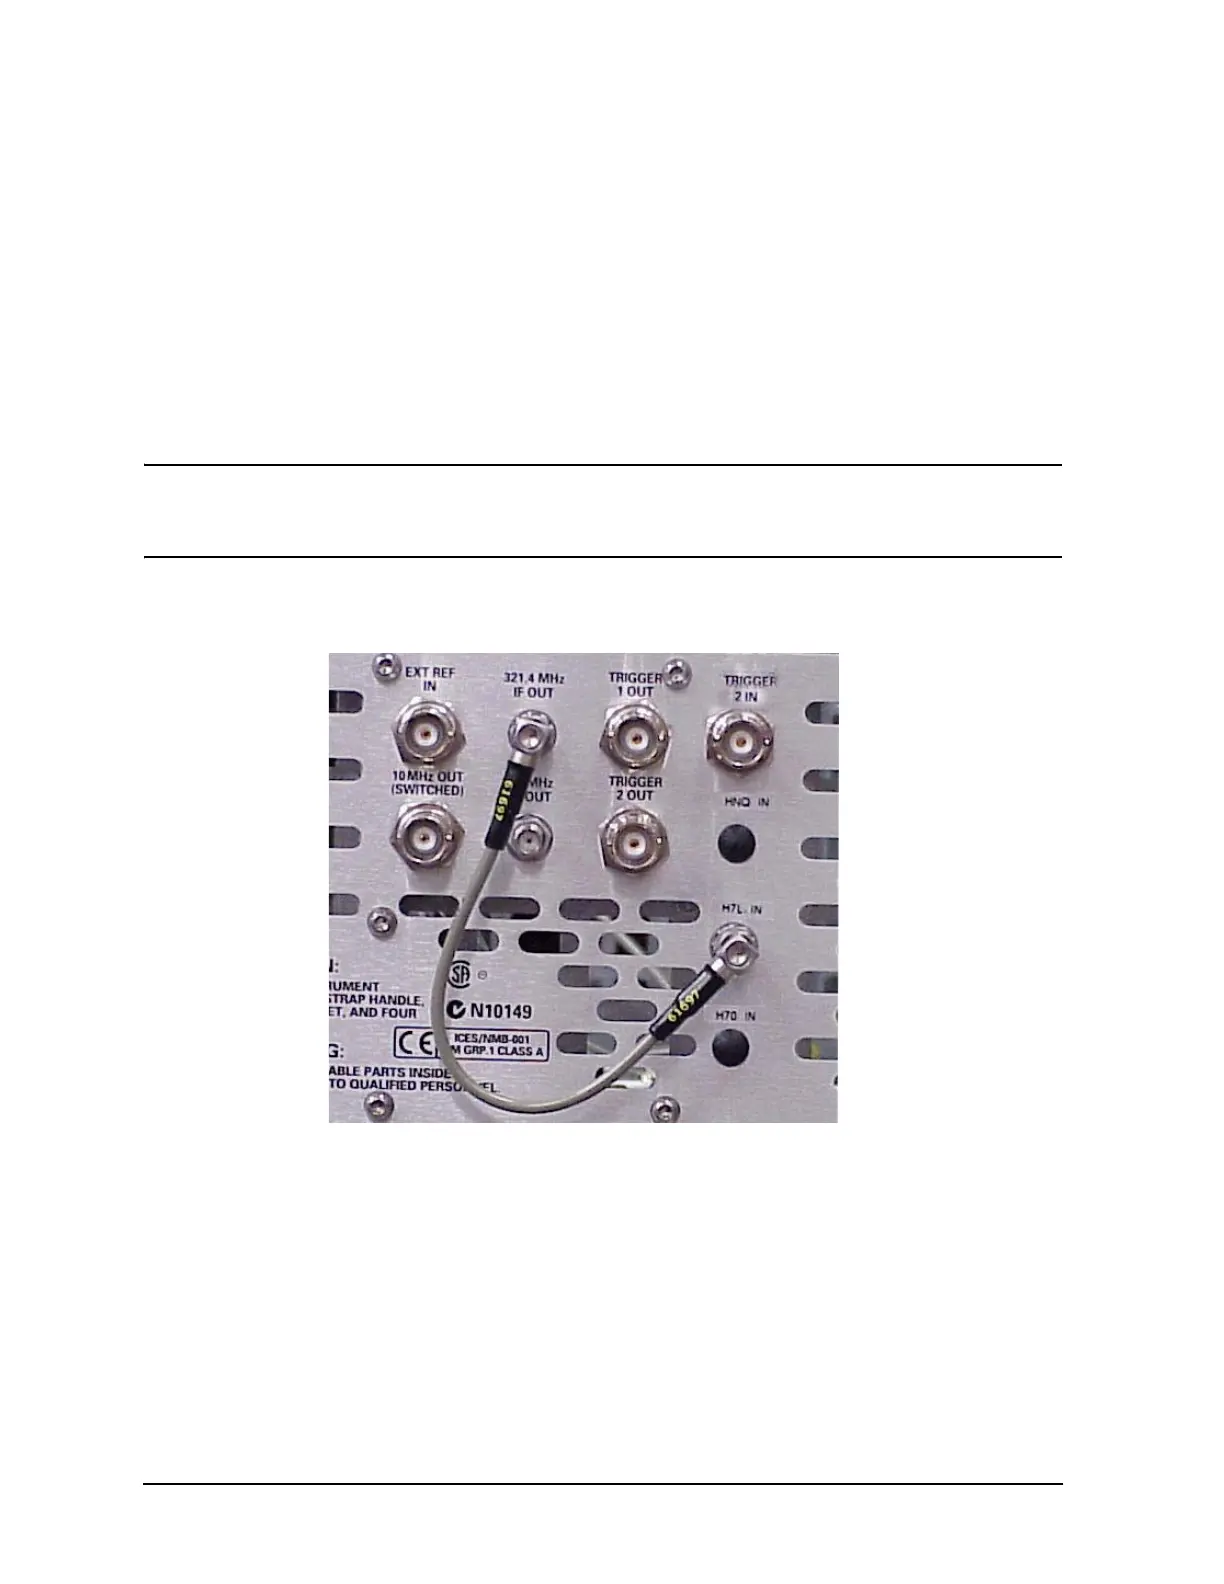
• Connect the jumper cable (8120-5066). See Figure 10.
NOTE Jumper cable (8120-5066) is included on instruments with Option H7L or
HNQ. Move the cable from the Option H7L IN or HNQ IN to the Option IF IN
connector (H20 IN, H25 IN or H70 IN) for the option to function properly.
Figure 10 Jumper Cable (Option H7L)
5. Completely insert the Option IF Output board into Slot 2.
6. Attach the appropriate option label (H20, H25 or H70) to the rear panel next to the
existing list of options on the serial number label.
7. Install the chassis cover, instrument cover, side handles, bottom and rear feet in reverse
order of the removal process described in the beginning of the procedure.
8. Install licence key to enable Option H20, H25 or H70. Refer to Option Upgrade
Entitlement Certificate for option license procedure.
 Loading...