14
13
14
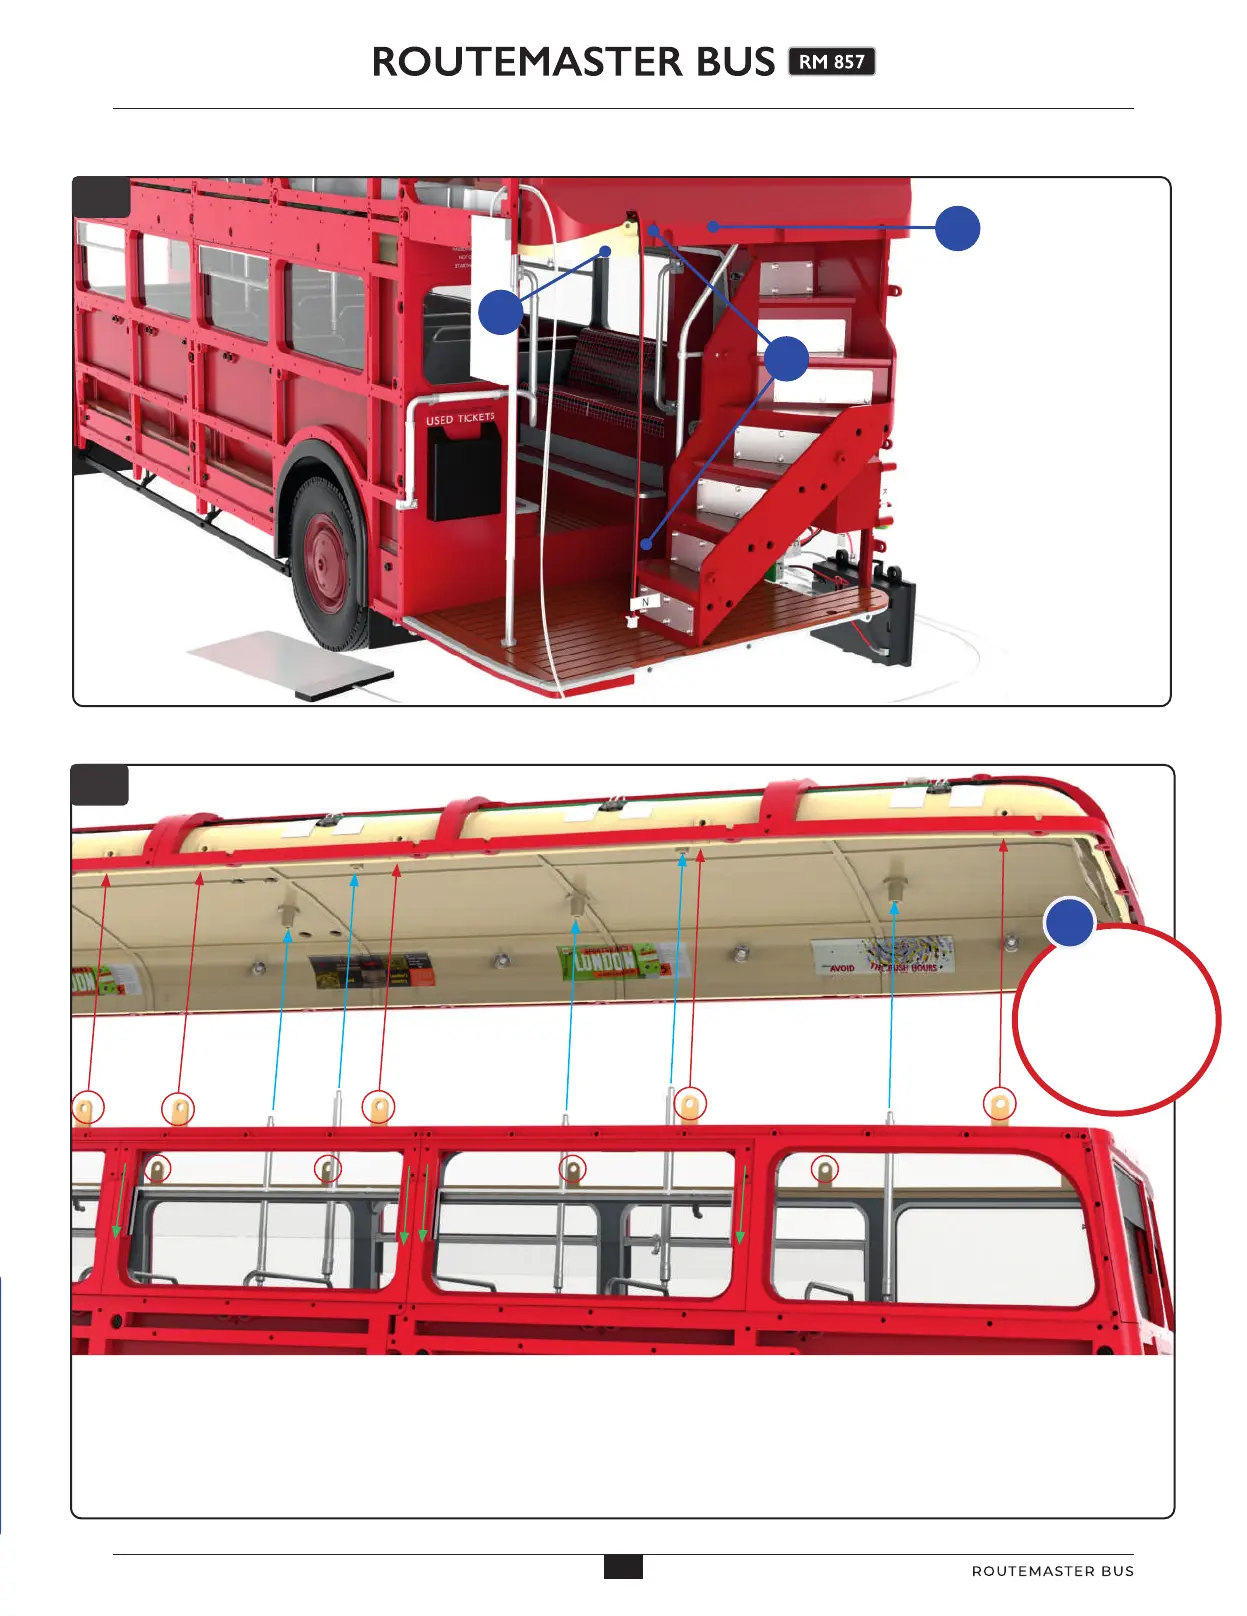
The next step is to fit the roof of the upper deck (see
also step 15). Open the windows (green arrows) and
align the roof assembly with the framework of the upper deck.
As you do so, on both sides of the bus, ensure that the grab
poles fit into the ceiling sockets (blue arrows): it is advisable to
use tweezers (through the windows) to guide them into place.
The tabs on both sides (red circles) fit into slots between the
ceiling and the frame and align with the holes in the ceiling.
13
This shows
the rear
platform with the
rear wall panel 81A
replaced. The cable
72A (labelled N),
comes through the
notch between the
rear wall 81A and the
ceiling 54A. The cable
reaches almost to the
platform.
72A
54A
81A
You may find
this easier if you
turn the model on
its side and insert the
tabs partially while
you fit the grab
poles.
4
31
31
AGORAMODELS ROUTEMASTER BUS