Operation
10-7
STEP 3
Place Moisture Tester in the Bucket of Hay
• Center the sensor tip in the bucket and push straight down toward the bottom of the bucket,
so it penetrates the hay (see Figure F).
• Apply about 40 pounds of downward pressure to the tester. This will compact your hay so it is
ready to test. Don’t touch the sensor while testing (see Figure G).
• Ensure the sensor dish, with 40 pounds of pressure applied, does not go below the mark in
your bucket (see Figure I). If the tester goes below the mark (see Figure I), more hay must
be added to the bucket (see STEP 2).
STEP 4
Take Test
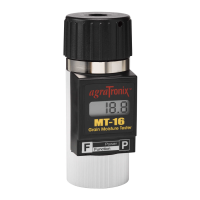
• While maintaining downward pressure (about 40 pounds) press and release the “P” button
(see Figure H).
• The tester will slowly display “
run
”, one letter at a time (see Figure J). During this time main-
tain constant downward pressure on the tester.
• Once the test is complete, and the tester displays the moisture reading (see Figure K), you
can then remove the downward pressure, and take the tester out of the bucket.
• When you have nished your moisture measurement, empty the bucket and repeat STEPS
2 thru 4 with another hay sample. For best results, test 3 different hay samples, measure the
moisture of each, and take the average of the 3 moisture measurements as your final result.