2 3
1: INSTALLING SIDE RAILS
NOTE: Some installs require special instructions. If required, follow special instructions
for side rail attachment along with these standard instructions.
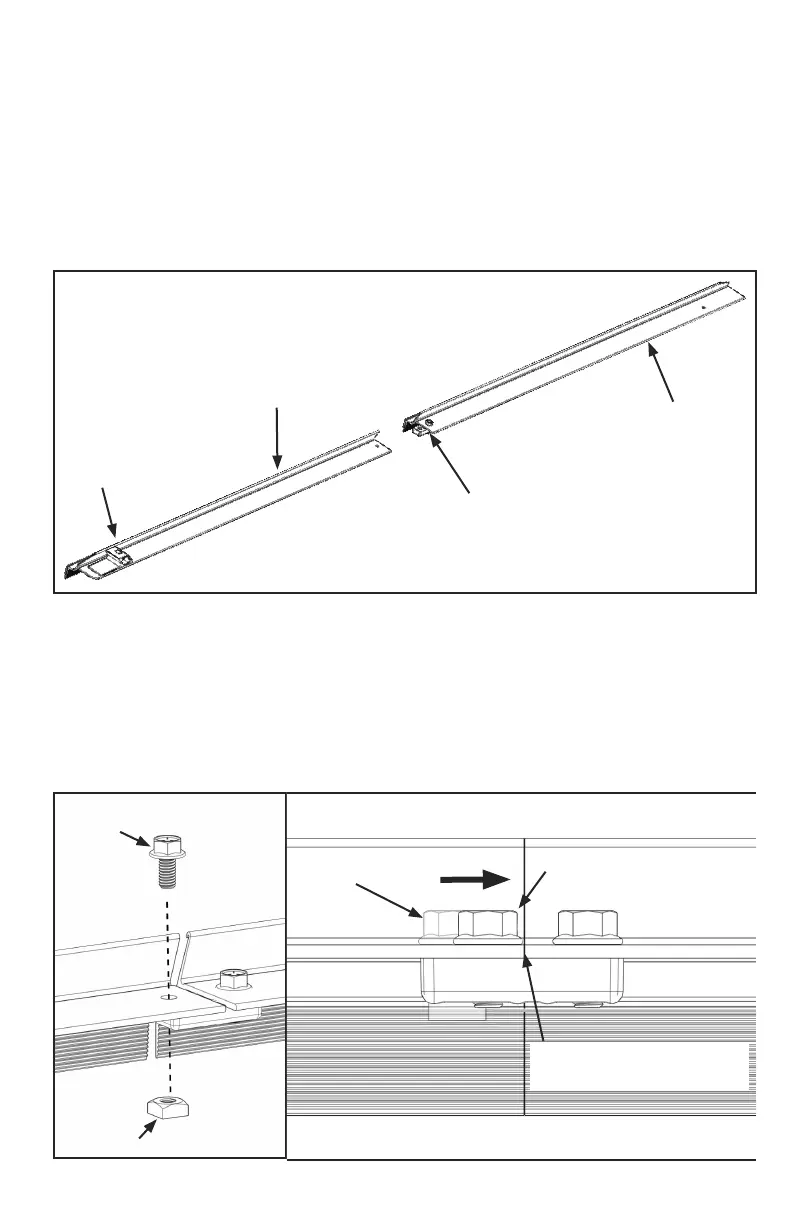
A. Locate two side rail sections with matching proles displayed in image below.
B. Unroll hook and loop and slide into front side rail channel.
C. Slide rear side rail with strike onto pre-installed assembly bracket on front side rail
without strike.
Front side rail
(without strike)
Rear side rail (with strike)
Pre-installed
assembly bracket
D. Attach rear side rail with strike to assembly bracket with anged hex bolt and square
nut, tighten with 1/2" wrench.
IMPORTANT: Bolt with square nut starts at outside of slotted bracket hole and
moves toward center when tightening to pull side rails together. Do not alter side
rails or bracket.
NOTE: Do not use impact tools to tighten hardware to assembly bracket.
Square nut
Flanged
hex bolt
Strike
Bolt in loose
position
Bolt in tightened
position
Side rails should have little to
no gap at assembly bracket


 To Next Page