- 6 -
3-1
3
MOUNTING
MOUNTING
MOUNTING
MOUNTING
MOUNTING
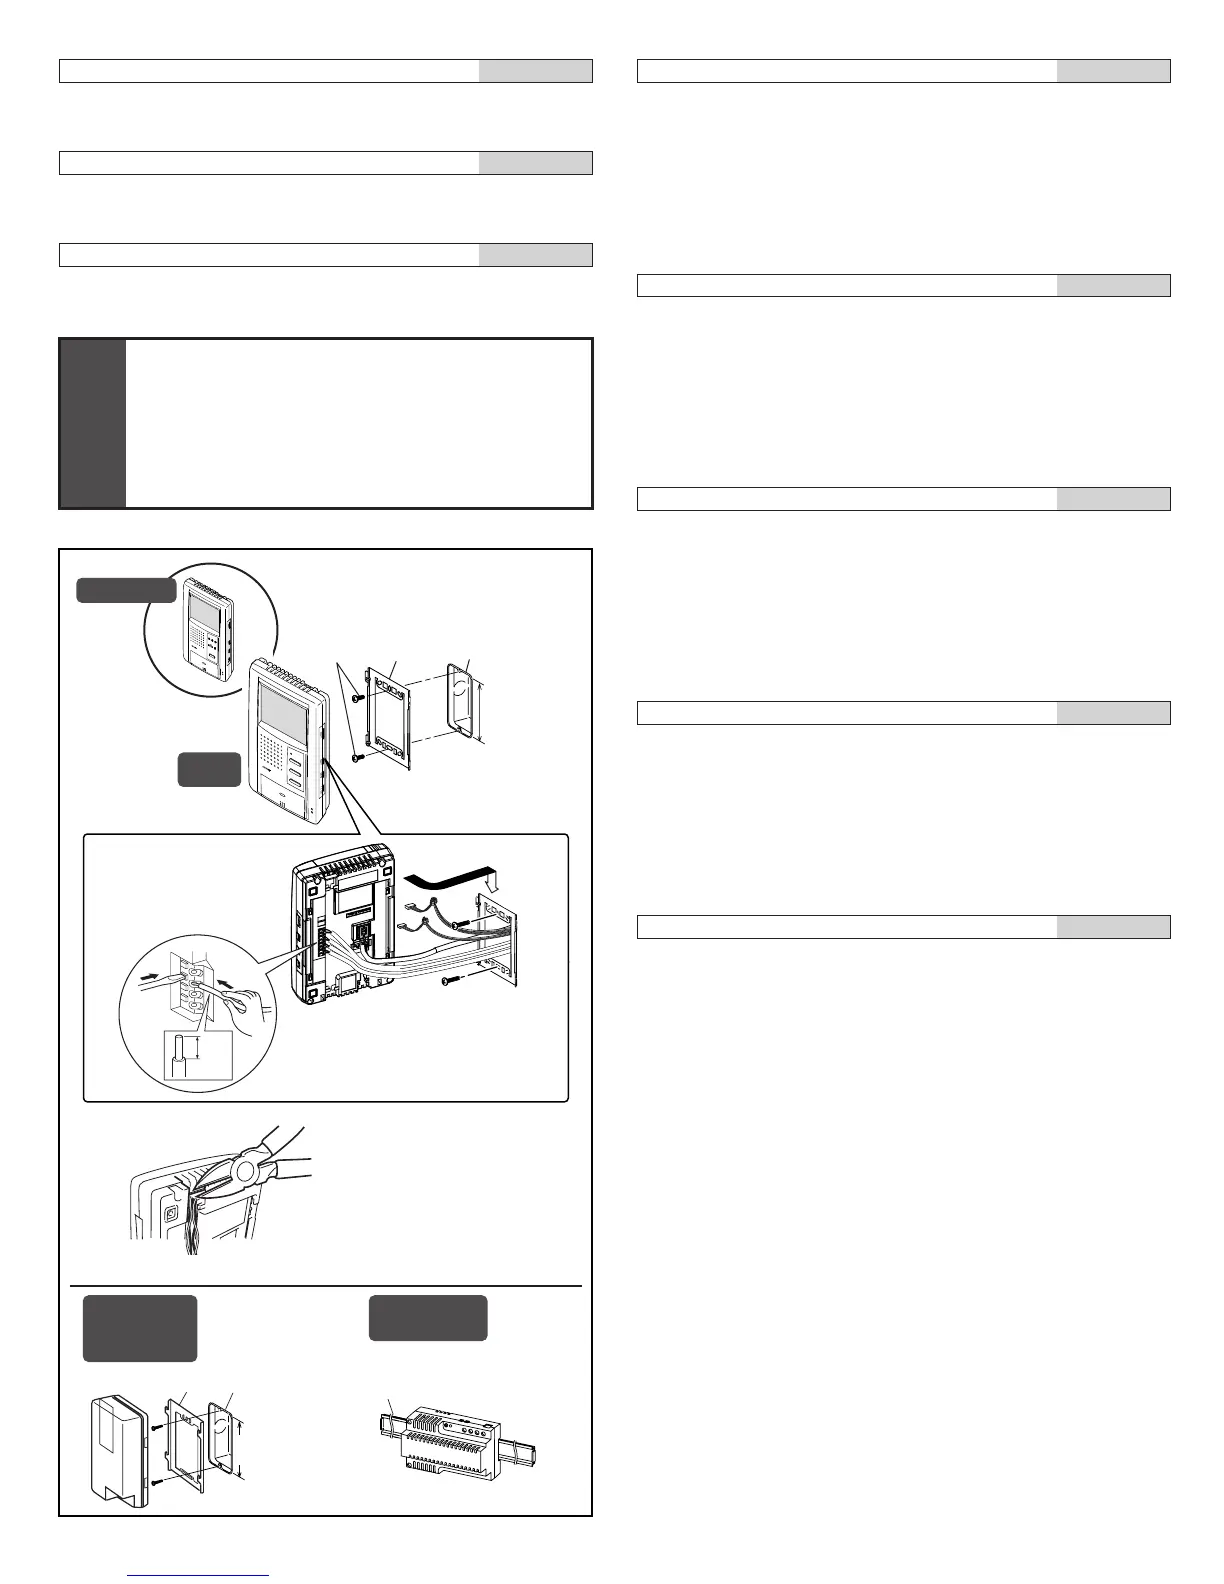
Mounting
[1] Screws (x2)
[2] Mounting bracket
[3] 1-gang box
[4] Din rail
1. Press the RELEASE button (to insert or remove the wire).
2. Insert the cable into the terminal.
NOTES: When a 1-gang box is not installed, the cable can be surface-
run to the top or bottom of the unit. Cut the cable inlet to
allow passage of the wiring into the unit.
English
Español
Nederlands
Deutsch
Français
Wiring distance
NOTE:A Power Supply: PS-1810DIN covers 1(or 2) Door station
with One Monitor unit only. If additional Monitor(s) are to
be used, please add another PS-1810DIN.
Wiring distance
NOTE:A Power Supply: PS-1810DIN covers 1(or 2) Door station
with One Monitor unit only. If additional Monitor(s) are to
be used, please add another PS-1810DIN.
Wiring distance
NOTE:A Power Supply: PS-1810DIN covers 1(or 2) Door station
with One Monitor unit only. If additional Monitor(s) are to
be used, please add another PS-1810DIN.
Español
Nederlands
Deutsch
83,5 mm
(3-5/16")
[3][2]
[1]
[4]
83,5 mm
(3-5/16")
[3]
[2]
PS-1820DIN
PS-1810DIN
1
2
9mm
(3/8")
J
B
-
2
M
D
T
A
L
K
JB-2M
ED
T
A
L
K
C
A
L
L
M
O
N
IT
O
R
R
E
C
P
L
A
Y
S
E
T
JB-2MED
JB-2MD
JB-2HD
PS-1820
PS-1820S
PS-1820UL