-9-
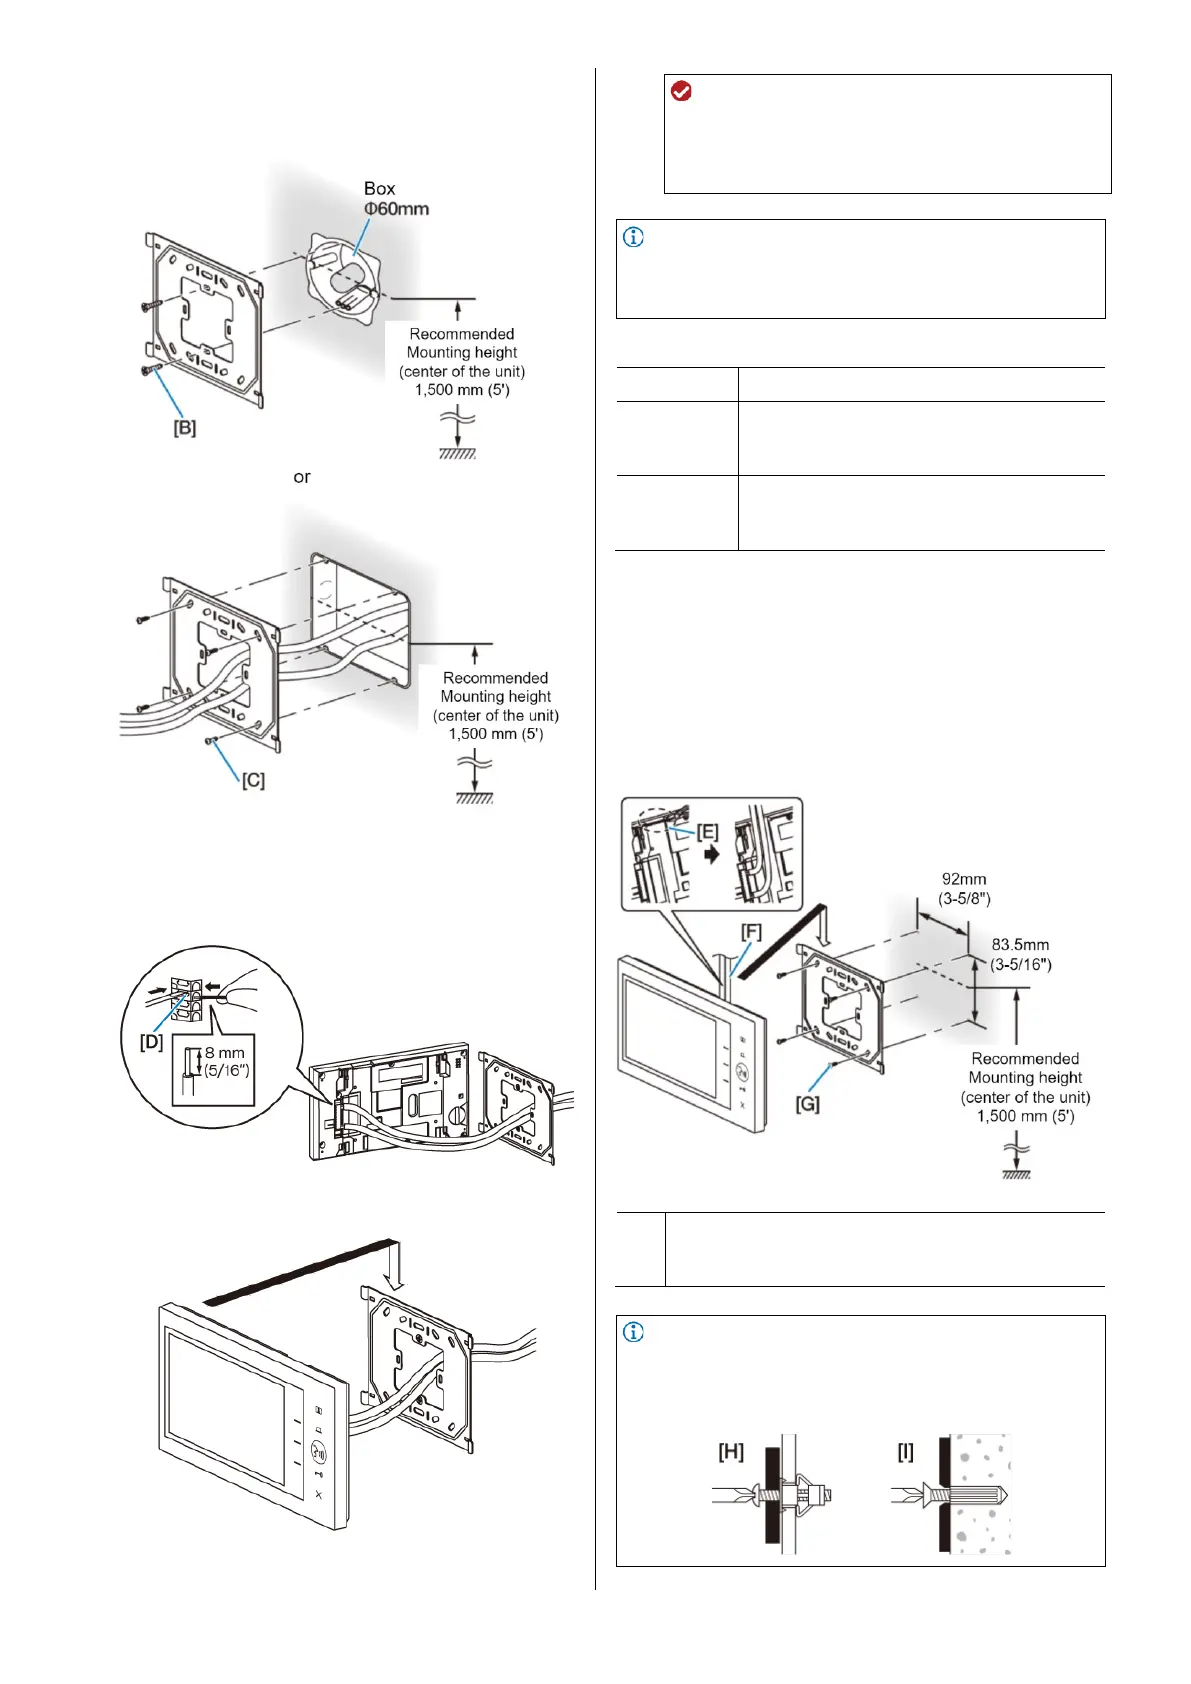
2 Fasten the mounting bracket to the wall with
the screws [B] (×2).
When using a 3-gang box, use screws [C] (×4).
3 Connect wires.
Strip 8 mm (5/16") of the wire jacket and insert it
into the terminal. If it is difficult to insert, press and
hold the release button [D] while inserting.
4 Mount the station on the mounting bracket [A].
ATTENTION
Be careful not to trap cables between the station
and the mounting bracket.
Be careful not to damage the cable sheath with the
mounting bracket.
NOTE
When using wood mounting screws (×4) for wall
mounting, drill a 50 mm (1-15/16″) diameter hole at the
position of the station's center on the wall.
Should be compatible with a gang box.
Screw shaft: Φ4.1 mm or less
Slotted head: Φ8.2 mm or less, 3.0 mm or
less in height
Screw shaft: Φ4.1 mm or less
Slotted head: Φ8.2 mm or less, 3.0 mm or
less in height
Surface wiring
The wires can be routed to the top or bottom of the station.
If wiring is to be routed from the top of the station, cut the
cable inlet [E].
If there is a large amount of wiring [F], strip away the jacket
of the wire up to the cable inlet.
Fasten the mounting bracket to the wall with wood mounting
screws [G] (×4).
Available screws
Screw shaft: Φ4.1 mm or less
Slotted head: Φ8.2 mm or less, 3.0 mm or less in
height
NOTE
When wood mounting screws cannot be used for
plasterboard walls, concrete walls, and the like, use
commercially-available board anchors [H] or concrete
plugs [I].