19/04/2019 V2.0 Page 6 of 24
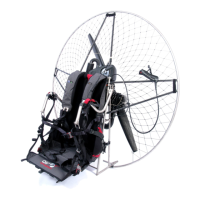
2.2.2 Propeller cage mounting
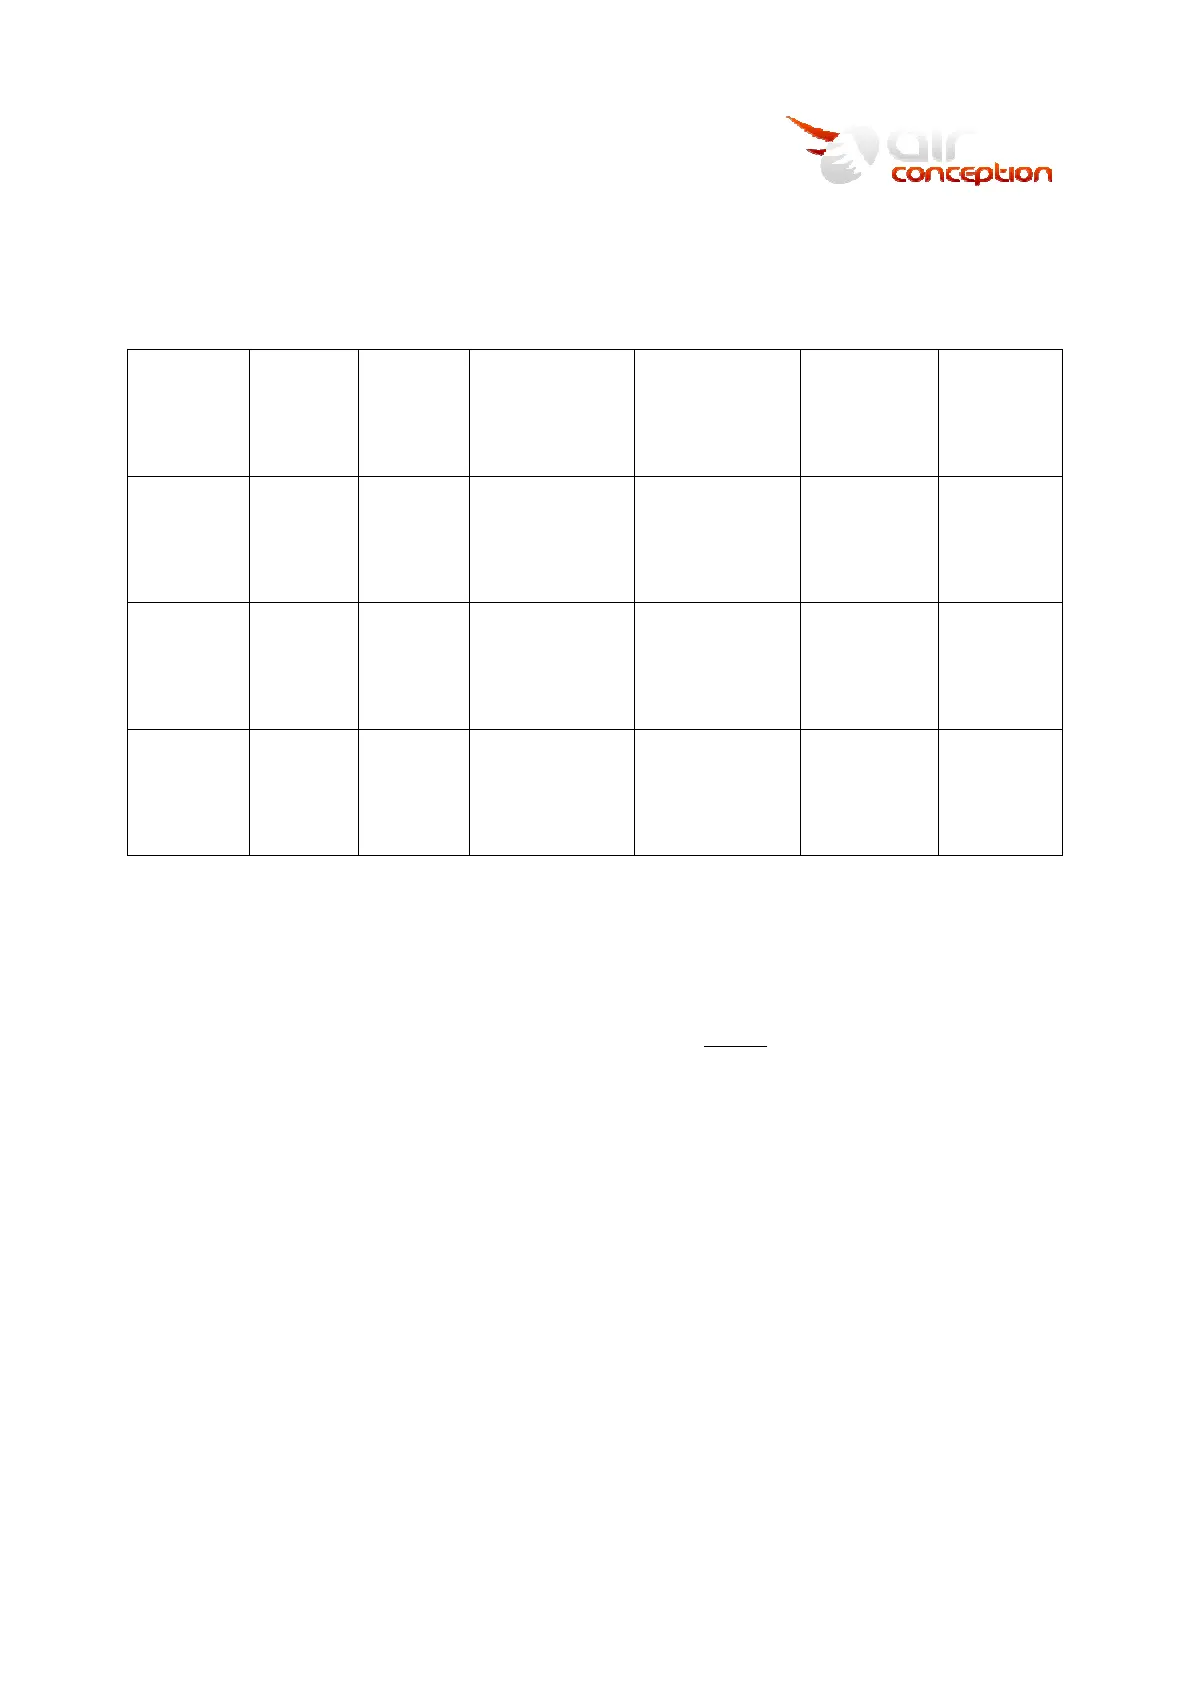
Begin mounting the propeller cage by inserting 6 carbon tubes into the frame. Care must be
taken as they are 3 different lengths. Please check the following table to know the position
of each carbon tube on your frame.
Next, after stretching out the cage’s frame with the net, insert all 4 parts of the cage into
the carbon tubes. The next step is inserting the black C-clips that connect the cage directly
with the lower part of the frame. When all the elements of the cage are connected you
should tighten the netting by pulling the rope in the lower part of the security net. This is
designed to pass though the spring and pull back on itself. The last, but very important step,
is mounting three security Velcro bands, which prevent the cage from accidentally
unfastening. The velcro is there just to hold it closed you do not have to pull it very strongly.
After mounting the propeller cage you should once again check if it is correctly mounted
and protected.
It is recommendable to memorize the exact sequence of all activities.
Delta
140 cm
frame
150 cm
frame
Delta
165 cm
XL Al. frame
Delta
165 cm
XL Ti. frame
Race/Split
v1/v2
140 cm
Ti. frame
Race v2
150 cm
Ti. frame
2x upper
carbon
tubes
length
52 cm 55 cm 61 cm 62 cm 61 cm 66 cm
2x middle
carbon
tubes
length
51 cm 55 cm 63 cm 62,5 cm 51 cm 56 cm
2x lower
carbon
tubes
length
52 cm 59 cm 64 cm 64 cm 56 cm 61 cm