Do you have a question about the Airxcel 9430 Series and is the answer not in the manual?
Displays operational temperature ranges for cooling and heating modes.
Crucial safety warning to disconnect power before installation.
Guidance on selecting an optimal location for thermostat installation.
Step-by-step instructions for physically mounting the thermostat.
Initial steps to connect the thermostat to the RV Climate app.
Instructions for connecting more thermostats to the app.
How to operate the thermostat using the mobile application.
Procedure to disconnect a thermostat from the RV Climate app.
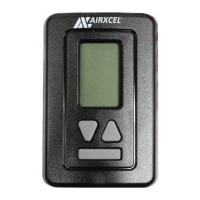
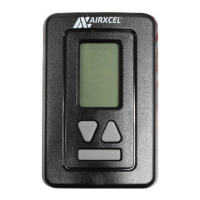
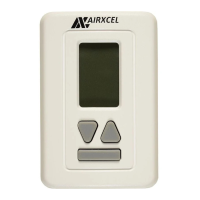
Describes the function of each physical button on the thermostat.
This document describes the installation, operation, and application of a thermostat, specifically the 9430354, 9430355, 9430357, and 9430358 models, which are designed for RV use. The thermostat is a sensitive instrument intended for accurate temperature control and comfort within an RV environment. It supports both cool-only and heat/cool functionalities, with specific models designated for each.
The thermostat's primary function is to regulate the temperature within an RV by controlling the air conditioning and heating systems. It displays the current mode (e.g., cooling, heating, fan) and the room temperature. Users can adjust the set temperature and switch between different operating modes. The device incorporates a three-minute anti-short cycle for cooling, which protects the compressor by preventing it from re-energizing too quickly after being de-energized. This safety feature can be bypassed by changing the mode to OFF. The thermostat is designed to operate with a 12 VDC control circuit, not exceeding 1 amp. It includes a replaceable 2 amp fuse to protect against mis-wiring or system shorts.
The thermostat features a digital display that shows the current mode and room temperature. To activate the thermostat, users press the mode button once, which also illuminates the backlight if equipped. Subsequent presses of the mode button cycle through available modes. The up or down arrow buttons are used to wake the thermostat, display the set temperature (which will flash), and then adjust the set temperature. After five seconds of inactivity, the thermostat returns to sleep mode.
The thermostat can be controlled directly via its physical buttons or remotely through the RV Climate app, available on Google Play and Apple App stores. To pair the thermostat with a mobile device, users download the app, select "ADD NEW THERMOSTAT," and then simultaneously hold the Up and Down buttons on the thermostat to enter pairing mode. The app will prompt for a 6-digit ID from the thermostat to complete the pairing process. Once connected, the thermostat reverts to the main screen, and users can slide the screen left to access additional settings. Within the app, users can assign a custom name or description to the thermostat (up to 7 characters), select "SET" to save changes, and control the thermostat's temperature and mode settings. The app also allows for pairing additional thermostats, with a maximum of three units per individual phone, and managing previously paired thermostats, including the option to remove them. Each thermostat can be connected to a maximum of four individual phones; subsequent connections will automatically delete the oldest ones.
The thermostat also supports a Fahrenheit/Celsius toggle. Holding the mode button down for five seconds will switch the temperature unit. The backlight automatically turns off after five seconds of inactivity.
Installation of the thermostat should be performed by trained technicians, adhering to all local and national codes and ordinances. Before any installation, removal, or cleaning, it is crucial to disconnect power at the main service panel by removing the fuse or switching the circuit breaker to the Off position to prevent electrical shock.
For accurate temperature control, the thermostat should be located on an inside wall, approximately five feet above the floor, in a dry area with good air circulation. It should not be installed near direct sunlight, heat-producing appliances (like televisions, radios, or wall lamps), or near furnace/air conditioner supply registers, as these can create unusual heating conditions that affect temperature readings.
The thermostat wiring is factory installed by the OEM, and RV Products recommends using a minimum of 18 gauge wiring. If the fuse blows, it is essential to identify and correct the cause of the failure before replacing the fuse. Operating the cooling system when the outdoor temperature is below 50°F can cause damage to the cooling equipment, so this should be avoided.
The device complies with part 15 of the FCC Rules, ensuring that it does not cause harmful interference and accepts any interference received. The equipment has been tested and found to comply with Class A digital device limits, providing reasonable protection against harmful interference in a commercial environment. While designed for commercial use, operation in a residential area may require the user to correct any interference at their own expense.
| Model | 9430 Series |
|---|---|
| Display | LCD |
| Backlight | Yes |
| Hold Function | Yes |
| Fan Control | Auto/On |
| Type | Digital Thermostat |
| Stages | Single Stage |