EasyManua.ls Logo

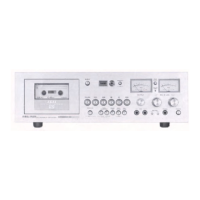
Akai GXC-760D

Akai GXC-760D
8 pages
To Previous Page IconTo Previous Page
Loading...
banaan
INTRODUCTION
—————
Your
new
GXC-760D
Cassette
Tape
Deck
is
made
of
the
very
finest
materials
and
incorporates
the
very
latest
in
recording
and
playback
techniques.
In
addition
to
the
features
outlined
in
this
manual,
AKAI's
superior
A.D.R
(automatic
distortion
reduc-
tion)
System
which
changes
the
recording
equalizer
characteristics
according
to
the
signal
level
of
a
certain
frequency
band
to
achieve
low
distortion
over
an
extended
frequency
range
is
also
incorpo-
rated
in
this
model.
This
together
with
many
other
outstanding
features
including
a
3-motor,
3-head
system
and
AKAI’s
wear-free
GX-Heads
combine
to
bring
you
the
finest
in
cassette
recording
and
play-
back.
We,
therefore,
urge
you
to
READ
THIS
MANUAL
THOROUGHLY
BEFORE
ATTEMPTING
OPERATION.
CASSETTE
TRACK
SYSTEM
É
HEAD
SIDE
B
TRACK
4
|(L)
SIDE
B
TRACK
3
|(R)
SIDE
A
os
TRACK
2
|(R)
SIDE
A
[tee
|
TRACK
1
|(L)
This
model
employs
a
4-track
recording/playback
system.
The
first
half
of
the
stereophonic
recording
or
playback
take
places
on
tracks
1
and
2.
The
second
half
takes
places
on
tracks
3
and
4
after
the
cassette
has
been
inverted.
Recording
and
playback
depends
upon
the
length
of
the
tape
(C-30,
30
minutes;
C-60,
60
minutes,
etc.).
Monaural
and
stereo
record-
ed
tapes
can
be
played
back
on
either
stereo
or
monaural
cassette
recorders
without
any
loss
in
quality.
Because
the
total
track
width
of
the
left
and
right
channels
is
equal
to
that
of
the
monaural
track,
the
playback
head
will
scan
both
left
and
right
channels
together.
This
results
in
automatic
mixing
of
left
and
right
channels
from
the
stereo
tape
for
monaural
reproduction.
TAPE
SELECTION
This
machine
is
equipped
with
Tape
Selector
Switches
which
set
the
machine
to
proper
bias
and
equalization
according
to
the
tape
being
used.
De-
press
the
LOW
NOISE
Switch
when
using
low
noise
tape,
and
depress
the
CHROME
Switch
when
using
chromium
dioxide
tape.
Depress
both
switches
simultaneously
when
using
Ferri-Chrome
tape.
*
Low
noise
tape
is
standard
for
this
machine.
The
use
of
ordinary
tape
will
result
in
inferior
performance.
DIRECT
FUNCTION
CHANGE
CONTROL————
This
model
features
feather-touch
Full
Direct
Func-
tion
Change
Control.
The
necessity
of
depressing
the
Stop
ll
Button
prior
to
changing
modes
is
elimi-
nated.
The
inclusion
of
direct
function
change
to
recording
mode
facilitates
easy
add-on
recording.
AUTOMATIC
STOP
This
machine
employs
full
release
automatic
stop
wherein
at
the
end
of
the
tape,
the
head
block
completely
separates
from
the
tape
and
capstan.
Protects
tape
and
prevents
pinch
wheel
wear.
PEAK
CHECK
The
GXC-760D
is
equipped
with
a
Peak
Check
Switch.
When
this
switch
is
depressed,
the
VU
Meters
are
set
to
—8
dB
(marked
with
red
marker
on
VU
Meters)
in
relation
to
a
continuous
O
VU
sinewave
signal.
Therefore,
adjustment
of
the
peaking
level
of
re-
cording
input
signals
can
be
accomplished
as
follows:
1.
Adjust
Recording
Level
Controls
and
set
to
position
at
which
the
normal
recording
level
is
"0"
VU.
2.
Depress
the
Peak
Check
Switch
and
re-adjust
so
that
only
the
heaviest
peak
parts
reach,
but
de-
finitely
do
not
exceed,
“0”
on
the
VU
Meter
scales.
*
This
feature
is
especially
convenient
for
fine
adjustment
of
pulsive
input
signal
peaks
(such
as
when
recording
from
percussion
instruments,
etc.)
so
that
the
full
dynamic
range
of
the
tape
can
be
utilized
without
incurring
distortion
caused
by
over-recording.
SOUND
MONITORING
For
precise
recording
level
adjustment,
set
Monitor
Switch
to
SOURCE
position
and
monitor
signals
through
headphones
while
adjusting
input
level
controls.
Dual
monitoring
can
also
be
accomplished
with
this
.machine
by
switching
the
Monitor
Switch
to
and
from
TAPE
and
SOURCE
to
compare
the
signals
being
recorded
with
the
input
source.
Separate
recording
and
playback
Dolby
circuits
extend
this
Dual
Monitoring
feature
to
cover
Dolby
recording
as
well.
For
private
headphone
listening,
connect
stereo
headphones
and
set
Monitor
Switch
to
TAPE
position.
*
Set
Monitor
Switch
to
TAPE
position
for
play-
back
through
a
speaker
system.
*
For
monitoring
during
recording,
the
use
of
headphones
is
recommended.
SOUND
MIXING
Independent
line
and
microphone
recording
level
controls
and
input
jacks
enable
signals
from
micro-
phones
and
from
line
sources
to
be
blended
and
recorded
simultaneously
on
the
tape.
Connect
microphones
to
Microphone
Jacks
and
connect
desired
source
to
the
Line
Input
Jacks.
Follow
recording
procedure,
adjusting
both
Line
and
Microphone
Input
Level
Controls.
TIMER:
RECORDING
——
————
——
——
By
using
an
external
timer
together
with
Akai
Re-
mote
Control
Unit
RC-17
or
RC-18,
absentee
re-
cording
can
be
accomplished
with
this
machine.
Connect
Remote
Control
Unit
to
Remote
Control
Jack
and
properly
load
a
tape.
Plug
in
AC
Cord
through
the
external
timer.
Adjust
input
level
follow-
ing
recording
procedure
and
with
the
Power
Switch
turned
ON
and
the
Remote
Control
Unit
REC
and
FWD
Play
Keys
locked
into
recording
mode
posi-
tions,
set
timer,
following
manufacturers
instructions.
If
timer
is
set
to
coincide
with
source
timing,
the
GXC-760D
will
automatically
begin
recording
ac-
cording
to
setting.
*
This
machine
features
Automatic
Stop
which
will
be
effected
at
the
end
of
the
tape.
HEAD
CLEANING
HH
It
is
important
for
the
heads
and
the
head
block
area
to
be
kept
clean
at
all
times
as
dust
adhering
to
these
parts
deteriorates
sound
quality.
1.
Turn
off
Power
Switch.
2.
Remove
cassette
from
receptacle.
3.
Lift
off
cassette
lid
(with
tape
view
window)
by
lifting
upward.
4.
Clean
recording/playback
and
erase
heads
with
a
cotton
swab
stick
dipped
in
Akai
Cleaning
Fluid

Related product manuals